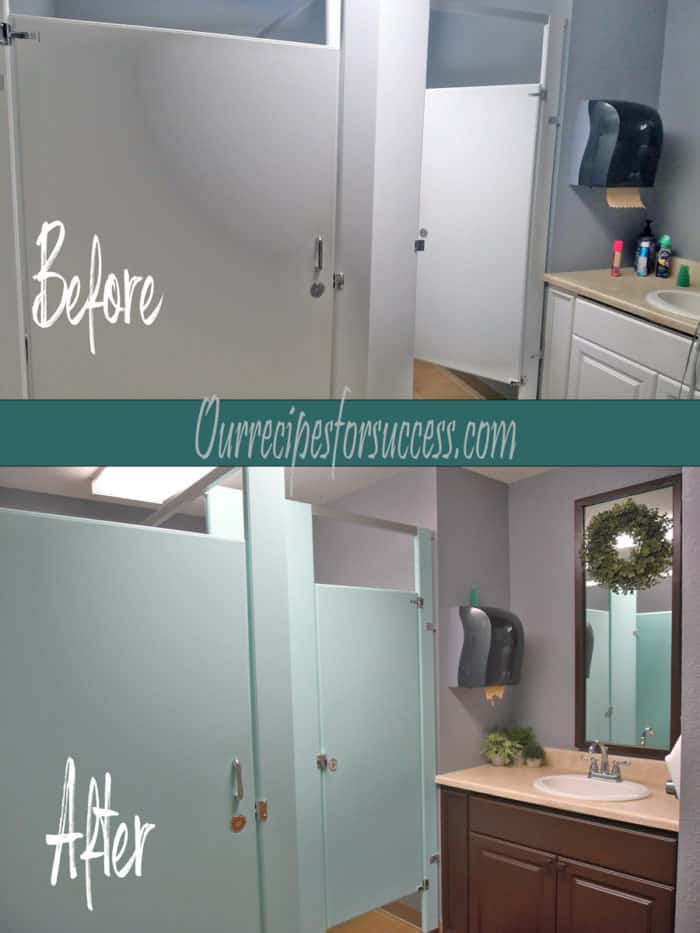
During a meeting at our local golf course (Eagle Glen Golf Course, Farwell, MI) it was mentioned that the women’s bathroom could use a makeover. It hadn’t been updated in several years and was in need of a little “TLC”, so I volunteered my time and ideas to spruce it up. These small bathroom update ideas began with a brainstorming session, with my sister Donna. We’d like to share our thought process and what we came up with.
In this article, we will be providing you with a few links to some products for pricing and informational purposes. We are required to let you know some of these links are “affiliate links”. This means if you click on a link and make a purchase, we could make a small commission, at no extra cost to you. This helps offset the cost of maintaining our website. Now, let’s get started.
Our Makeover Thought Process
Table of Contents
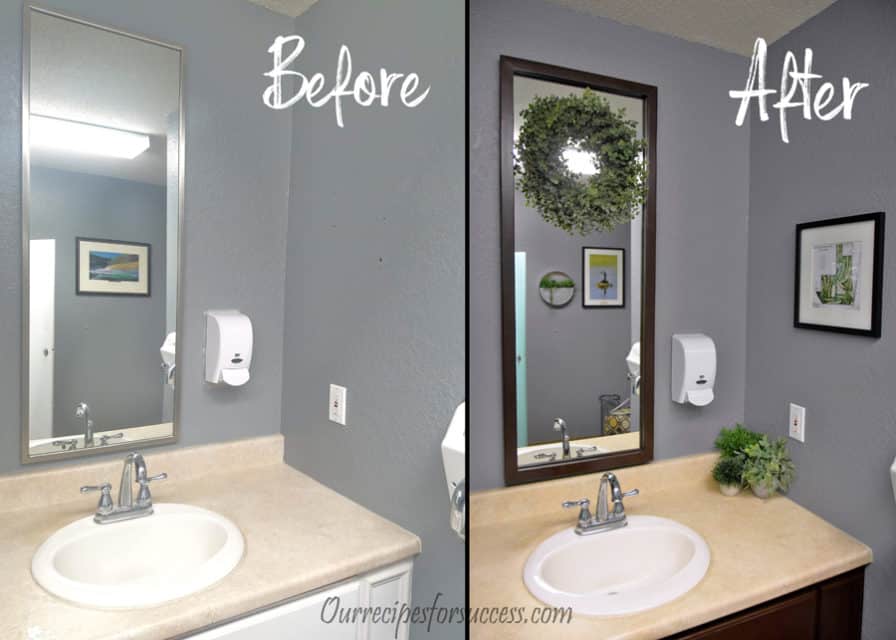
It was decided that the things that couldn’t be changed were the beige countertop and the entry door with the beige colored door jam There are plans to replace the toilets and faucet soon as well (yah!!!). The walls had just gotten a fresh coat of gray paint, so we decided that could stay, but we had to cover up the white. That consisted mainly of the bathroom vanity and the bathroom stalls. The whites and the beiges together just didn’t work.
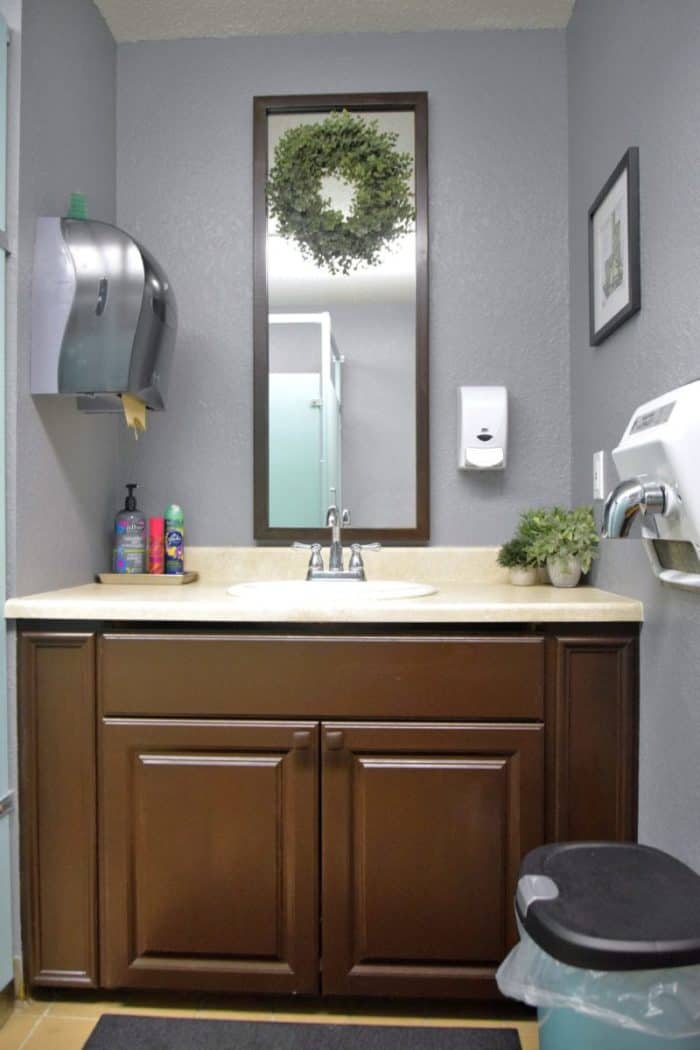
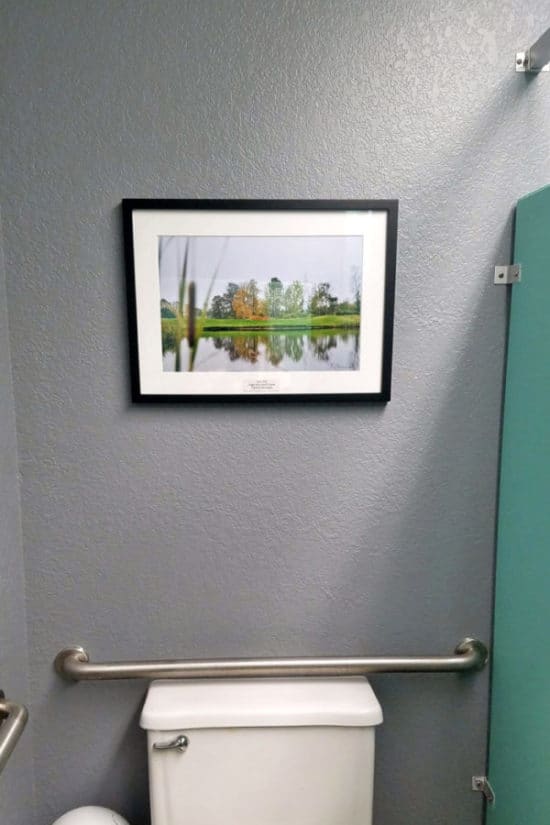
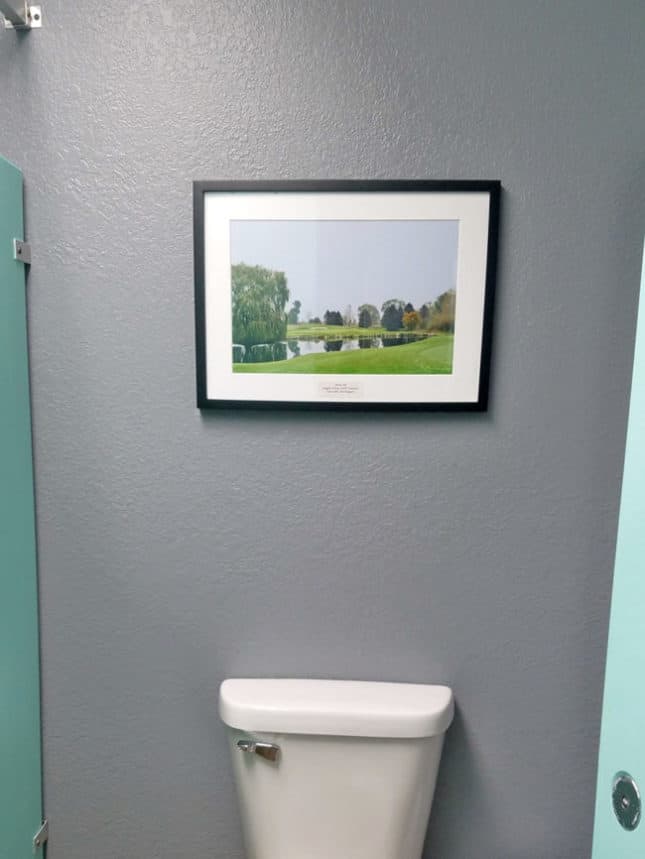
I have worked with a Minwax walnut gel stain before to revitalize our garage doors and thought that would work well on the vanity. I love the dark, rich color it has! Bear (the Hubs) knew I had taken hundreds of pictures at the golf course and suggested I hang some of those. I was dying to use our new photo printer, a Canon Pro-100, and was able to print out 11×17 prints!! We used dark-colored frames with these, to go with the vanity as well.

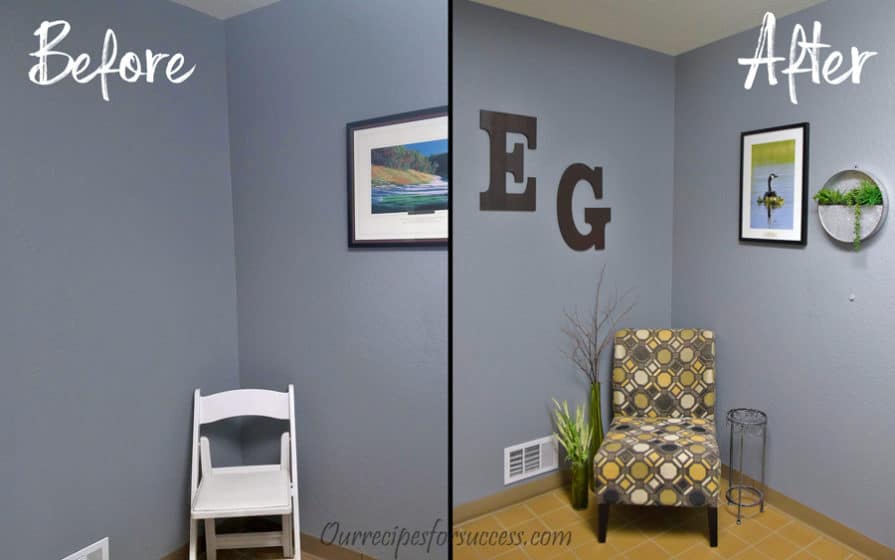
We thought a jade color on the bathroom stalls would highlight the greens and blues of a golf course and also the golf course pictures I’d be hanging on the walls. And to bring it all together, we brought in some artificial greenery to place here and there. My sister, Sandy, knew I was looking for an accent chair and saw this steal at a garage sale…….SCORE!!
To modernize the mirror, I’d seen wooden frames made to go around mirrors on Pinterest and thought this was the perfect solution here. And it would bring the walnut color of the vanity up.
My creative daughter, Kendra, gave me the idea of putting a wooden “E” and “G” letters (Eagle Glen) on the one wall. They were also finished with the dark walnut stain.
For additional ideas on how to spruce up spaces, check out our article on wall decor ideas. We offer tons of options for filling those bare wall spaces. Another great resource for ideas or to purchase items from is Etsy. They have a great selection of unique wall decor ideas.
Time To Get To Work
With a plan in place, it was time to started. I bought the materials I needed and rolled up my sleeves and got to work.
The Vanity
The product we used on the vanity was the Minwax Walnut colored Gel Stain. One quart of the gel stain was enough to refinish the vanity, the “E” & “G”, the mirror frame, and there’s still plenty left for touch up. The cabinet was a laminate coated white. This needed to be roughened up with sandpaper to allow the gel stain to stick better. It took a couple of coats to cover nicely. Of all the updates, this was the zinger!! Everyone loves the cabinet.
The Bathroom Stalls
The product I used on the stalls was the Valspar Expressions paint and primer (Jade Isle 254-3). The stalls required two coats of paint, so we ended up using two quarts, with just a little leftover for touch-ups. The surface preparation varies with the Valspar paint, so be sure to follow their instructions for the surface you’re covering.
The Fine Details
My Dad always taught me “If you’re going to do a job, do it right!”. This has stuck with me my whole life. With that said, I noticed the hinges and handles were partially painted over on the bathroom stalls. I spent hours scraping off all the old paint to uncover the brushed nickel finish underneath. It just gives everything such a nice, clean look. Glad I took the time to do it.
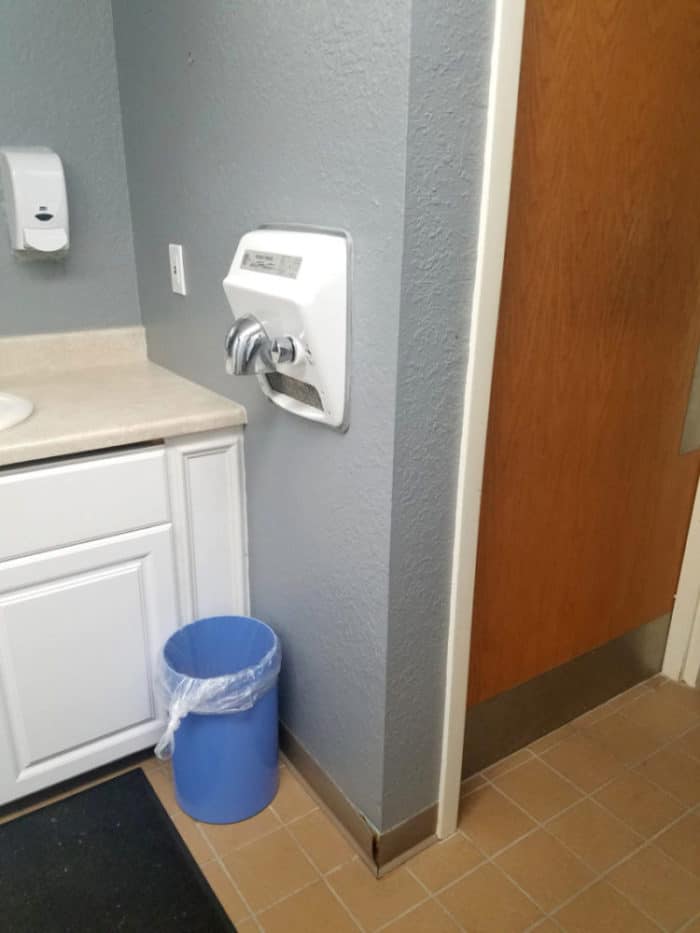
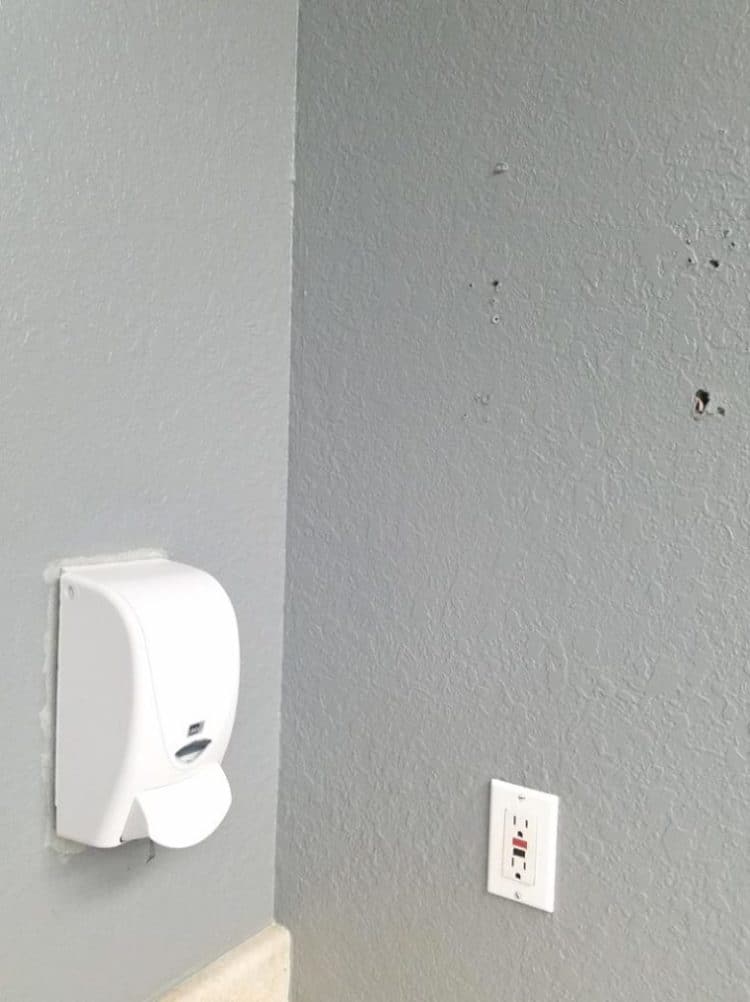
Along with the major parts of this update project, there were several smaller items that needed to be addressed. There were screw holes that needed to be patched after a hand towel dispenser had been relocated. A new, smaller hand soap dispenser had been hung on the wall, which left an unpainted area around it.
These spots, and a few areas along the baseboard trim needed to have the gray paint touched up. Even some of the baseboard trim had come loose and needed to be re-attached. Attention to details can make a huge difference (thanks again Dad!).

Paint On Hardware 
Hole Repair and Touch-up Paint Needed

Project Cost
Along with a thorough cleaning and the addition of a new trash can, that matches the stalls, our bathroom update project was finished. The total cost was just over $250, but that did not include my time. I spent roughly 3 to 4 hours an evening, for the better part of a week. To hire the work done would probably double the cost! That’s why we encourage others to take on DIY projects.
| Materials Needed | Material Cost |
|---|---|
| Valspar Paint (2 quarts) | $30.00 |
| Minwax Gel Stain (1 quart) | $24.00 |
| Wood (2, 1″x2″ – 8′ long) | $3.00 |
| Frames (15″x21″) x3 | $53.00 |
| Frame (8″x8″ matted) | $13.00 |
| “E”, “G” (18″ Chestnut Wood Letter) | $20.00 |
| Table | $7.00 |
| Greenery | $50.00 |
| Trash Can | $15.00 |
| Vanity Tray | $10.00 |
| Chair (garage sale) | $30.00 |
| Total Cost Of Project | $254.00 |
For many of us, this was more than just another DIY project. Eagle Glen Golf Course is a special place and we wanted the women’s restroom to reflect this. So if you’re ever in mid-Michigan, book a tee time at Eagle Glen and check out my handy work. Enjoy a great round of golf!!
If you have any comments or questions, you can leave them in the comments section below or you can email us at [email protected]. FYI, we do not collect or share email addresses. We will only use them to reply to your comments or provide answers to your questions. We are also required to let you know that some of our links are “affiliate links”. This means if you click on a link and make a purchase, we could make a small commission, at no extra cost to you. This helps offset the cost of maintaining our website. So, if you like what you’ve seen, please be sure to give us a “Like” and “Share” on Facebook and Instagram too. Thank you for reading and good luck with all your home projects!