For anyone who has a garage and a few hand tools, you can easily change the oil in most vehicles and save money. In this article, I will walk you through changing the oil on my 2008 Chevy Silverado. The procedure and parts below should be the same for all 2007-2013 Chevy Silverado, 1500, 4X4, with the 5.3L engine.
Truthfully, the money saved by changing your own oil won’t allow you to take a family vacation, but you could order a couple of pizzas and have a nice family dinner. Follow along and let’s change the oil in your Silverado.
In this article, we will be providing you with a few links to some products for pricing and informational purposes. We are required to let you know some of these links are “affiliate links”. This means if you click on a link and make a purchase, we could make a small commission, at no extra cost to you. This helps offset the cost of maintaining our website. Now, let’s get started.
How Much Can I Save By Changing My Own Oil?
Table of Contents
Most of the newer vehicles today are using synthetic oils and the cost of an oil change is typically in the range of $50 to $70. Full synthetic oil changes normally run at the high end of the range mentioned above. Here’s a Goodyear Auto Service Center price list as an example. You can buy the oil and filters at the local big box stores for about $35. And that’s for full synthetic oil and a longer life oil filter. You’re looking at close to a 50% cost savings. With that, you could probably splurge for 3 toppings on your pizzas!
Replacement Oil And Filter
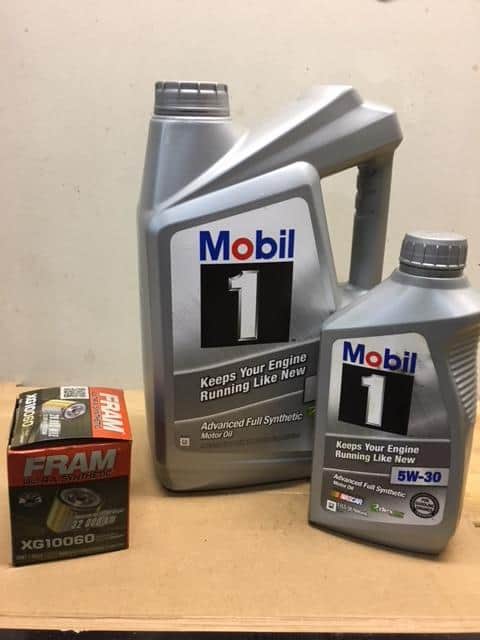
For the 2007-2013 Chevy Silverado, with the 5.3L engine, you should be using
I normally get my oil and filter from Walmart. When I see my oil change is coming due, I go online and order my Mobil1 oil (full synthetic) and filter. It gets delivered to my front door and the best part is on orders of $35 or more, the shipping is free. Once you have the oil and filter you can easily work it into your busy schedule.
If you need additional filters or parts for your vehicle, Walmart has a vehicle parts lookup page for all their automotive parts. It can be a little tricky to find, so to help save you a little time, here is a link to the Walmart auto-parts lookup page. Scroll down to “Find the right Part” section, click on the part category you need (oil filter, air filter, bulbs, brakes, etc…) and enter in your vehicle information. They have lots to choose from.
What Tools And Equipment Do I Need To Change My Oil?
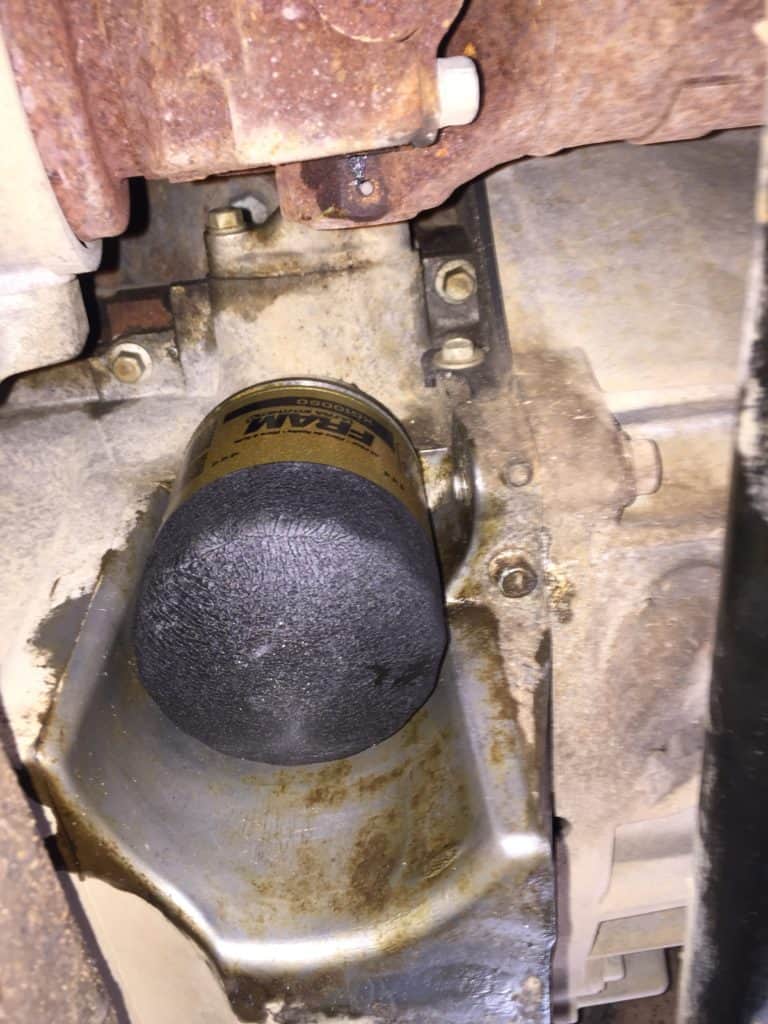
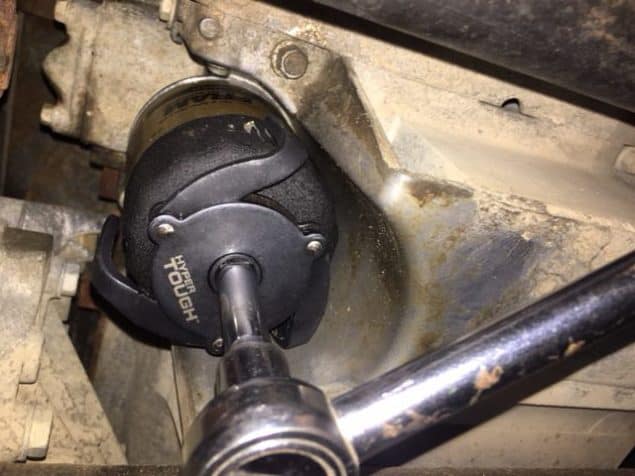
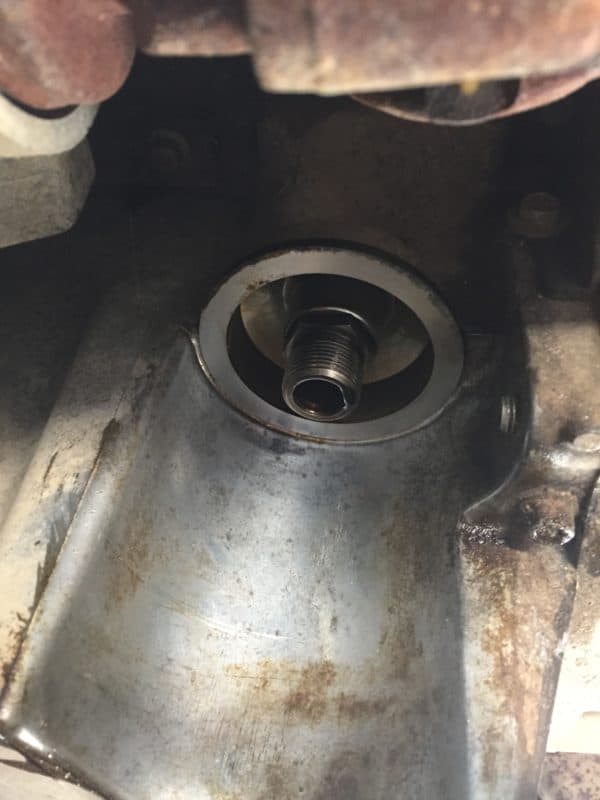
To change the oil in most vehicles surprisingly only takes a few tools. Basically, you need a wrench to remove and re-install the drain plug and an oil filter wrench to remove the oil filter. The oil filter can be the wild card when switching between vehicles. The size and the location are different on every vehicle. Some adjustable wrenches will not work on certain vehicles. As you can see from the picture below, the filter on the Silverado is somewhat hard to reach. I am able to get ahold of it good enough to remove it with a pair of slip-joint pliers (Channelocks). However, I decided to invest in an oil filter wrench that will make the job even easier.
What Is The Best Oil Filter Wrench For A 2007-2013 Chevy Silverado?
It turns out not all types of oil filter wrenches will work on the Chevy Silverado. Even strap wrenches and other similar wrenches will not work in this confined area. As I mentioned above the Channellock pliers work, but it’s certainly not the easiest way to get the job done. Here are a couple of options that will help you get the job done easier.
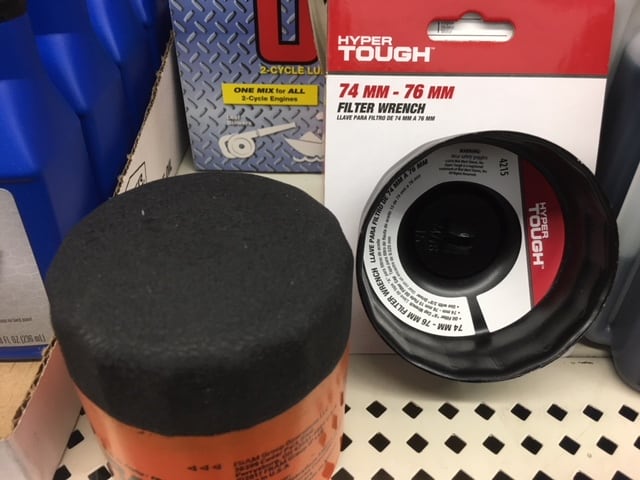
One of the most effective is the “cap” type oil filter wrench on the Chevy Silverado. It easily fits in the narrow space between the filter and the engine. Add a ratchet and an extension and it works well. The drawback is it will only fit a couple of specific sizes of filters. If you are removing filters from several different vehicles or equipment, you’ll need several different sized cap wrenches. I wanted a wrench that was a little more universal.
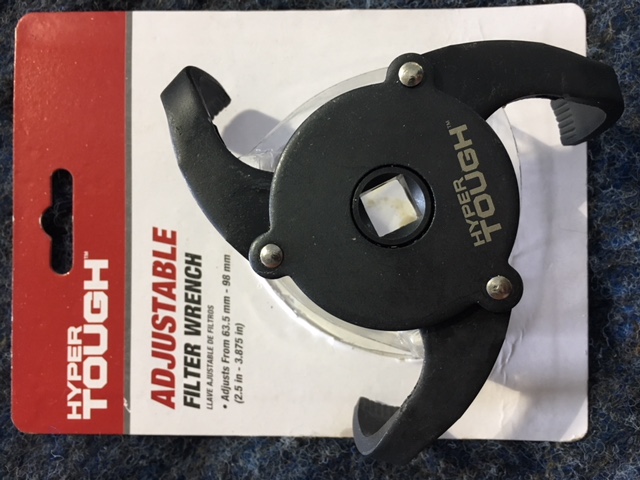
I ended up getting a three-jawed oil filter wrench pictured above. There are a couple of different versions of this style oil filter wrench. This version has the jaws that “sweep” out from the body. On the second version, the jaws stick straight out from the body. For the Chevy Silverado, you have to have the type with the sweeping jaws.
If you’re wondering how I know this, I, in fact, purchase the straight-jawed version first without giving it much thought. I quickly discovered it would not work on my 2008 Silverado. As the straight-jawed oil filter wrench starts to clamp down on the filter, the jaws rotate out. They do not stay parallel to the filter body. The outside edge of the jaws that stick out hits the engine and will not properly grab the filter or turn.
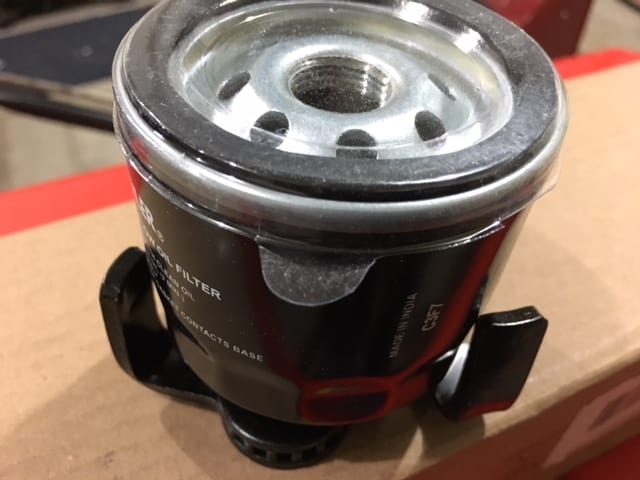
My Oil Filter Wrench Choice
The best option I found to work on my 2008 Chevy Silverado was the adjustable sweeping jaw wrench. As the jaws tighten and grip the filter housing they remain parallel to the filter housing. This allows the jaws to fit between the filter and the engine. It still is a tight
The other things I like about this wrench is its flexibility and the cost. This oil filter wrench will fit several sizes of filters (2-1/2 in. to 3-7/8 in.) and normally costs around $5. Click the following link for current pricing and further details on the sweeping jawed oil filter wrench I recommend and use.
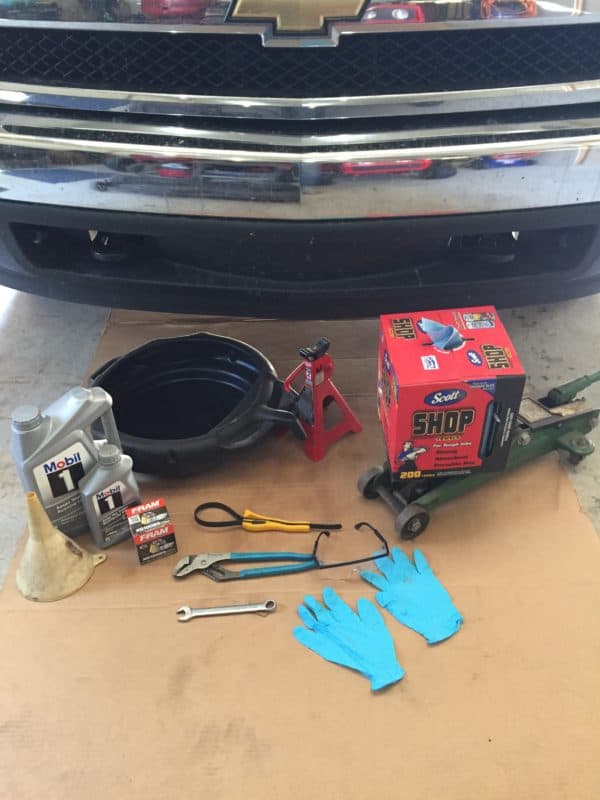
The rest of the job is pretty much straightforward. Let’s look at the rest of the equipment you’ll need to complete the job.
Time To Change The Oil
If done with a little care, the mess is minimal and cleanup can be done in less than 15 minutes. One good way to help with this is to slide a large piece of cardboard under your vehicle. Should you have any drips or spills, the cardboard will catch it. This helps prevent stains on your concrete floor and as mentioned, aids in the cleanup. It also provides a little cushioning on your knees and helps keep your clothes clean. This job really isn’t as dirty of a job as it sounds. Let’s walk through the steps.
What Are The Steps To Change The Oil In My Silverado?
There really are only a few basic steps to changing the oil in your vehicle. Each step does have some details you’ll want to pay attention to so the job is done safely and goes smoothly.
Before starting, make sure the engine can not start. Know where all the keys are and don’t forget your remote starter! If the engine is started without oil, it can cause significant damage. I would like to suggest you read my article on Lockout/Tagout (LOTO). It has suggestions for keeping you safe while working on your vehicles and other home projects. Now let’s look at those basic steps.
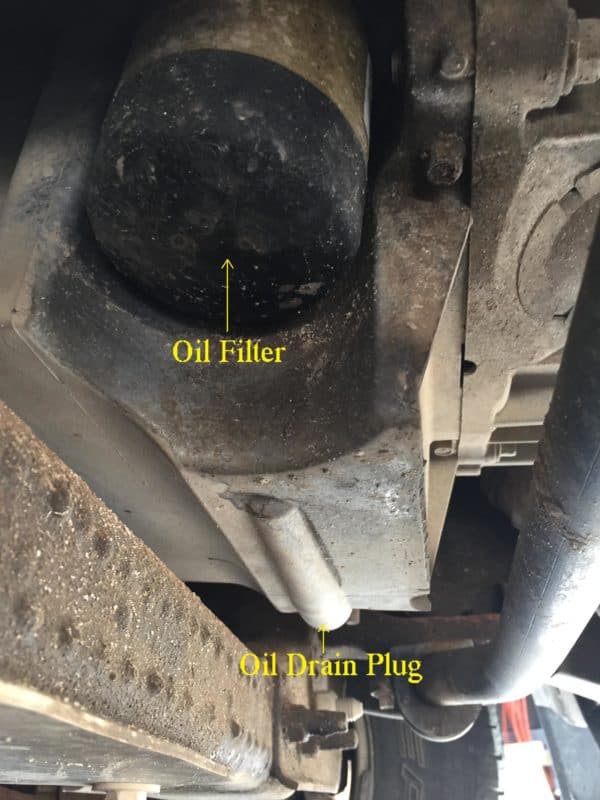
Access The Filter And Drain Pan
On most vehicles, you will not be able to reach the drain plug and filter without raising them up. Some larger trucks will not need this, but it is even required on my stock Silverado.
Start by jacking the vehicle up and support it with jack stands. Vehicle ramps will work as well. Properly supporting the vehicle is very important. Never just rely on a jack when working under a vehicle. This is another item addressed in the LOTO article.
I like sliding a large piece of cardboard under the vehicle. It does a few things for you. It can help insulate you from a cold floor, help keep you clean, and catch any oil that may drip or gets spilled while working. It’s also a good time to put on a pair of safety glasses. There is always the potential for falling dirt under a vehicle. I like wearing a pair of rubber gloves too.
Remove The Oil Filter
Lately, I’ve started by removing the filter before draining the oil. This eliminates the possibility of accidentally dropping the filter into a full pan of oil. That can make a mess!
Place the drain pan under the oil filter. Using your oil filter wrench, or a large pair of Channelocks, loosen the filter by turning it counterclockwise. Once the filter seal breaks loose you will get some oil running down the sides of the filter. To help keep the mess to a minimum you can let it drain for a minute. Finish unscrewing the oil filter and place it in the drain pan.
Clean the oil filter sealing surfaces. It’s good to clean the entire area to make sure no dirt gets on the oil filter seal while installing the new one.
Install The New Oil Filter
Lubricate the oil filter rubber seal with a little clean motor oil. First, this helps make sure you get a good seal between the engine and filter when screwing it on. Secondly, it reduces the chance of damaging the seal.
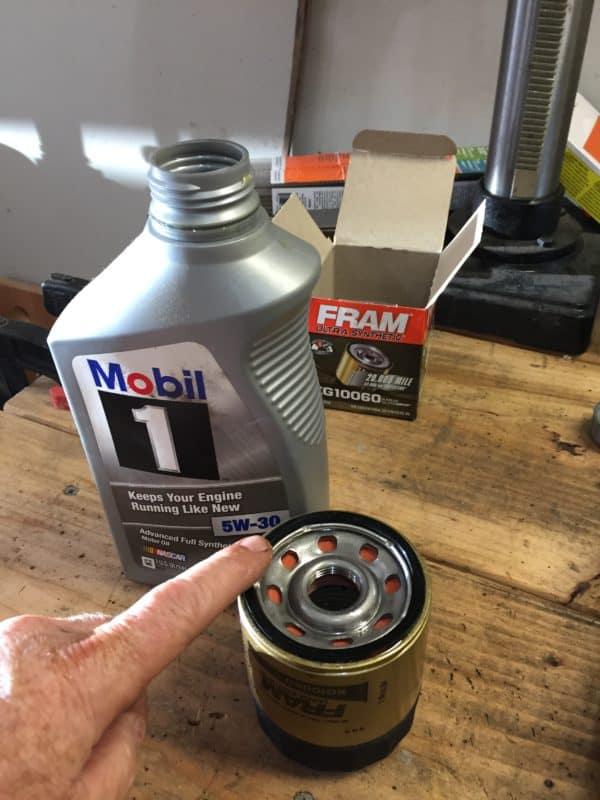
Install the new filter by screwing it on in a clockwise direction. HAND TIGHTEN IT ONLY! You can snug it as tight as you can by hand, but do not use the oil filter wrench on the filter to tighten it. I have never had a hand tightened filter leak and it will definitely need a wrench to remove it in the future.
The Fram XG10060 fits the 2007-2013 Chevy Silverado 1500, with the 5.3L engine. This filter is designed for
Drain The Engine Oil Pan
Position the drain pan under the drain plug. Be sure to remove the old oil filter from the pan before draining the engine. That just makes clean up and disposal of the filter that much easier. Using the 15mm wrench, break the drain plug loose. Once the plug is loose, it should screw out by hand. Let the oil drain completely into the pan. I usually remove the oil fill cap under the hood to allow air into the crankcase. This may help the oil drain a little quicker and it has to come off later anyway.
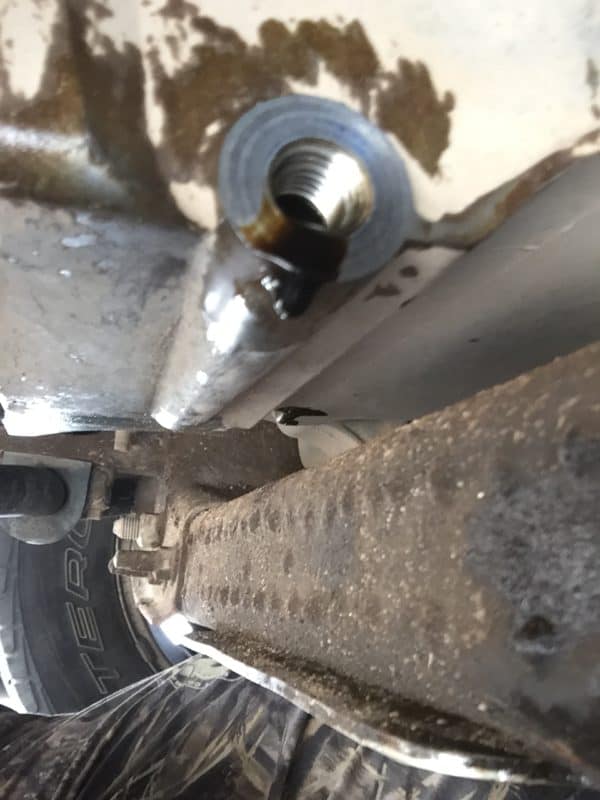
Once the oil is down to just a drip every 10 seconds or so, clean the threads and sealing surface on the plug, and the sealing surface of the drain hole. Re-install and tighten the plug.
At this point, you are finished working under the vehicle. I like to remove all the tools and drain pan from under the car first, before lower it. Next, remove the jack stands and lower the vehicle. It makes it easier to get under the hood for the next step and I prefer to start and test run the engine with the vehicle sitting on the ground when we get to that stage.
Adding New Oil To The Engine
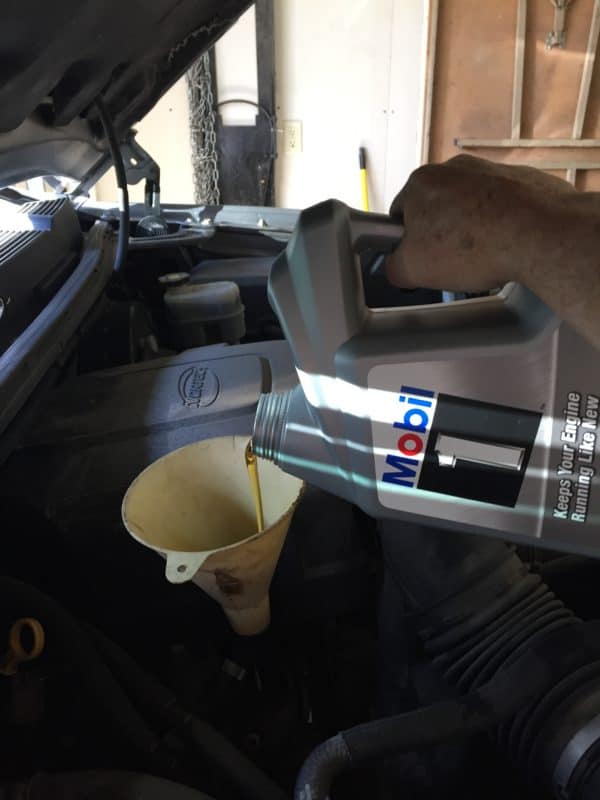
Time to add the oil. I use Mobil1 5W30 Full Synthetic oil. The 2007-2013 Chevy Silverado 1500, with the 5.3L engine, requires 6 quarts of oil. If you have any question on what type of oil to use or how much, consult your owners manual.
It’s good to use a funnel when adding the oil. You’re less likely to spill any oil, which will end up running down on the exhaust manifold and eventually down to the floor. That’s another reason why we haven’t removed the cardboard from under the vehicle yet. It’s a good idea to take a quick look underneath the vehicle to make sure there are no signs of leaks, while you’re adding the oil.
Test Run The Vehicle
With all the oil added its time to start the engine and check for leaks while it’s running. Start the engine normally. It’s best to keep your foot off the gas and don’t rev the engine when it first starts. The oil pump has to fill the filter before it starts circulating oil throughout the engine. Be sure to watch the oil pressure gauge to ensure the oil pressure comes up within a few seconds of starting. If the pressure does not come up shut the engine off to prevent possible damage. I have never had this happen, but it is always good to be aware of the possibility.
Check for leaks with the engine running. The main area of concern will be the oil filter. The oil pressure on a running vehicle is usually in the 40-60psi range and the filter will be subjected to that pressure. Let the engine run for a few minutes, in a well-ventilated area, and check again. If there are no signs of leaks, you can shut the engine off. It’s always a good idea to pull the oil dipstick and check the oil level. Especially if its the first time changing the oil on a vehicle. Having the proper oil level is critical.
Clean Up
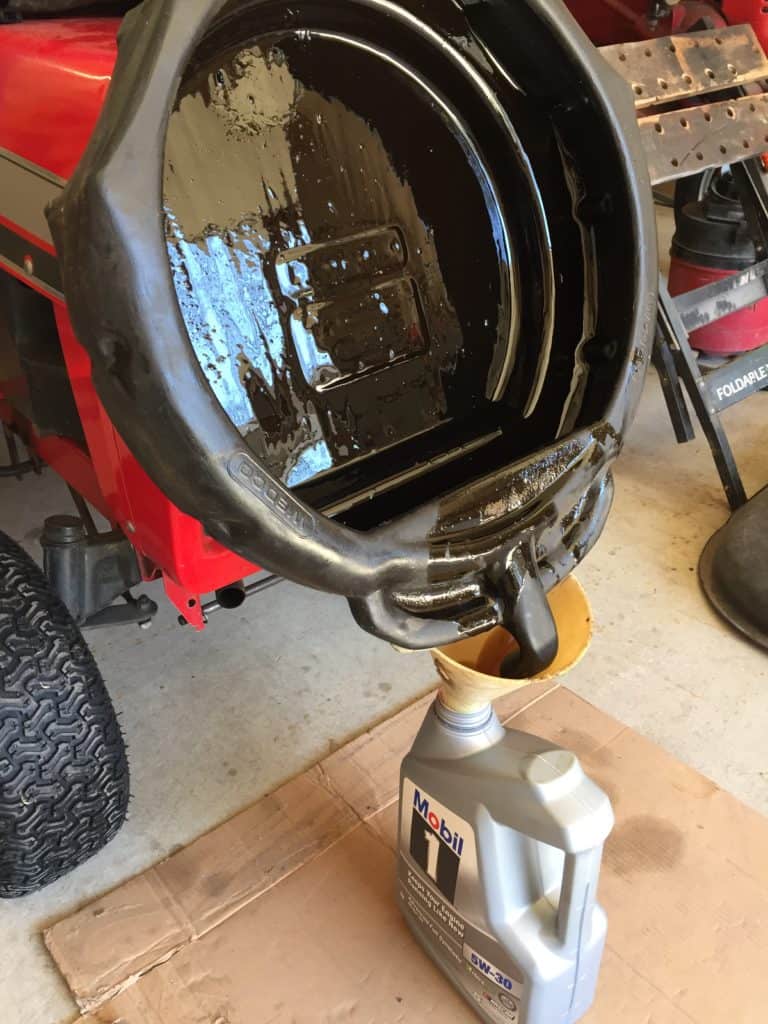
Finally, the last step is to clean up. Slide the cardboard out from under the vehicle, wipe your tools off, and put them away. The used oil can be poured back into the empty oil jugs and is ready to be recycled. I recommend doing this on your cardboard because you will always have a few drops of oil. Having a drain pan equipped with a pour spout makes this part of the job a snap! Another good way to dispose of used oil is to find someone with an oil-burning stove. They’ll be happy to take it. Check Craiglist. I’ve found people there looking for used oil for oil burners. The oil filter should be turned upside down and left to thoroughly drain for several hours. They are made of metal and can be recycled or discarded at that point.
You’ve Done It
That’s all there is to the job. You may want to check the oil filter again after the vehicle is up to full operating temperature. Again I’ve never had an issue, but it’s just
Another good practice is pulling the dipstick and checking the oil level occasionally in between oil changes. As your vehicle ages, it is not unheard of to have to add a quart of oil between changes.
How To Reset The Oil Life Monitor On A 2007-2013 Chevy Silverado
After changing your oil a couple of times you should be able to do it in about ½ hour. I’ve shown my son how to change the oil on a few different vehicles. All the steps above are roughly the same, just the oil filter and drain plug locations vary. I think it helps make him a little more self-reliant and will give him the confidence to make other vehicle and home repairs in the future.
And don’t forget that your garden tractors, lawnmowers, ATV’s, and other yard equipment and “toys” need to have the oil changed regularly too. Many of the above basic principals above apply for them
Changing the oil in your vehicles and yard equipment is the single most important maintenance item you can do! It will extend their life and it’s something you can easily do. It only requires a few hand tools and the supplies are readily available. Don’t be afraid to give it a try. It will save you money and it’s very rewarding.
If you have any comments or questions, you can leave them in the comments section below or you can email us at [email protected]. FYI, we do not collect or share email addresses. We will only use them to reply to your comments or provide answers to your questions. We are also required to let you know that some of our links are “affiliate links”. This means if you click on a link and make a purchase, we could make a small commission, at no extra cost to you. This helps offset the cost of maintaining our website. So, if you like what you’ve seen, please be sure to give us a “Like” and “Share” on Facebook and Instagram too. Thank you for reading and good luck with all your home projects!