
Kitchen Countertop and Tile Backsplash
Table of Contents
After 15 years in our new home, the signs of wear and tear were starting to show on our kitchen counter-top. So my wife and I decided it was time for a kitchen makeover. The laminate countertop was starting to show its age, so we thought a new countertop and tile backsplash would do the trick.
If you stop and think about it, the kitchen is one of the busiest rooms in your home. It’s where all your meals are prepared. Especially the big holiday meals with family and friends. Don’t forget all the parties and events you host, like birthdays and high school graduations.
Then there’s fall canning season. I even get into the act making my venison summer sausage, jerky, and beer brewing. So no wonder its time for a little kitchen makeover.
Countertop Options
There many different materials to choose from when considering a countertop replacement. We wanted something a little more durable than the laminate, so we started looking at all the options and narrowed it down to granite. It’s durable, stain resistant and there are many beautiful patterns to choose from.
Choosing the color and pattern was the toughest part of the job. Of course, you have to factor in the cost as well. Granite is definitely more expensive than laminate and the different colors and patterns affect the price. This part of the process is all on you! Find something you like, that is within your budget.
DIY Project?
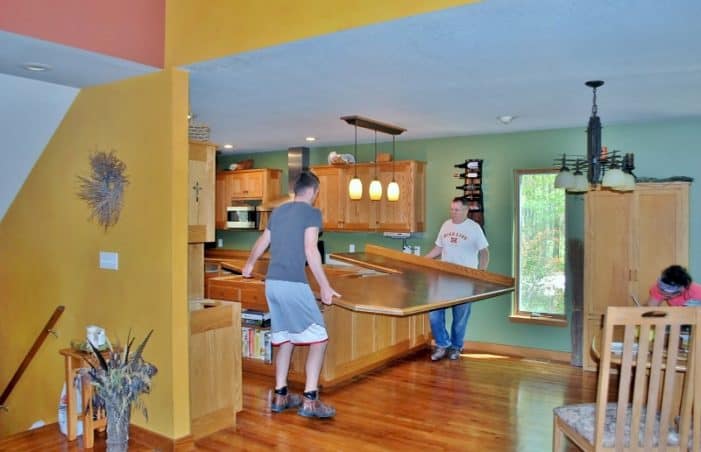
This is a do it yourself website and we love to take on all kinds of projects. But if you’ve read any of our other posts, you know we say you must know your limitations. For us, installing a granite countertop is definitely outside of our realm of expertise.
First of all, they’re very heavy! It comes in several pieces and has to be leveled and bonded together. And in our case, they needed to bore a hole through the granite for our kitchen faucet. So we left this job to the professionals!

They came in and took very accurate measurements using a laser and computer. Those measurements would be fed into their granite cutting equipment back at their shop. They also checked and verify how level your existing cabinets were, that the granite will be installed on. If the cabinets are significantly out of level, it may require leveling of the cabinets. In our case, the cabinets were in good shape and only require minor leveling when the granite was installed.
Demo Day
Now even though we did not take on the installation, there are things you can do that can save you money! On this project, we removed the old countertop. I used a couple of my Dewalt cordless power tools to make the job easier. Consider reading our article on cordless power tools to see how they can help you with your home projects. Always be sure to wear your safety glasses when using any power tool.
There were many screws that held the countertop in place. Some were in tough to reach places under the countertop. My Dewalt drill/driver worked great for getting them out. We also needed to make a few cuts using my Dewalt reciprocating saw to get one section of the old countertop out.
Doing the demolishion easily saved the installers a couple hours, which I’m sure saved us a few hundred dollars. We probably would have leveled the cabinets, if they had needed it too. I’m sure that would have been another big saving in time and money.
Countertop Installation
The installation went well, with no issues, and we love our granite countertop. Its durable, stain resistant and beautiful to look at, there are a few things to be aware of.
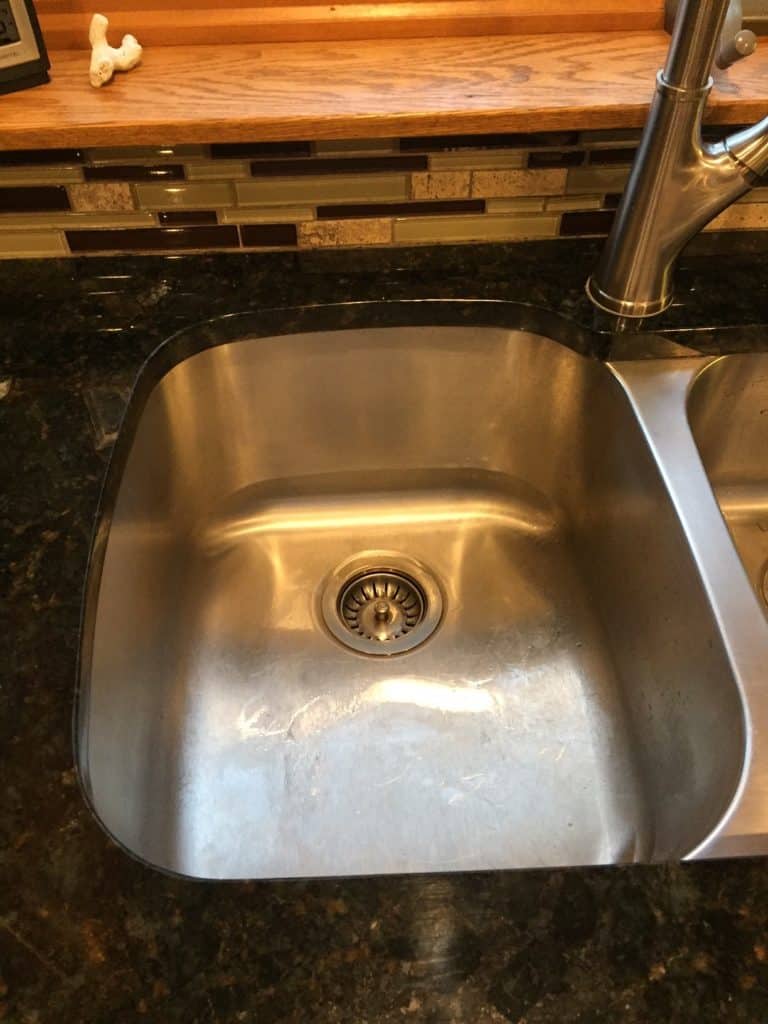
On the underhung sinks, the exposed granite edge can chip if hit with something heavy, like a cast iron skillet. On the other side of the coin, if you strike a drinking glass or glass bowl on that same edge, they can easily break or chip as well. The takeaway on this is to use a little extra care when washing dishes, or using the sink, and you will be fine.
I also want to let readers know one more thing about darker colored granite. Spills wipe up easily, but they tend to show the water swirls that are left over after drying. To prevent this you need to use a clean dry towel to wipe up the swirls immediately after cleaning up the spills. They are like owning a black sports car; there’s nothing more beautiful, but they take a little extra care.
Phase 2 Of The Countertop And Backsplash Update
After the granite counter-top was installed, we decided to install a new tile backsplash. We went with a glass and stone mosaic tile with multiple colors to tie the wall color and counter-top together. We are very happy with the results. The tile can be installed right over the painted drywall with the correct preparation and using the right mastic or thin-set mortar.
Tile Backsplash Installation
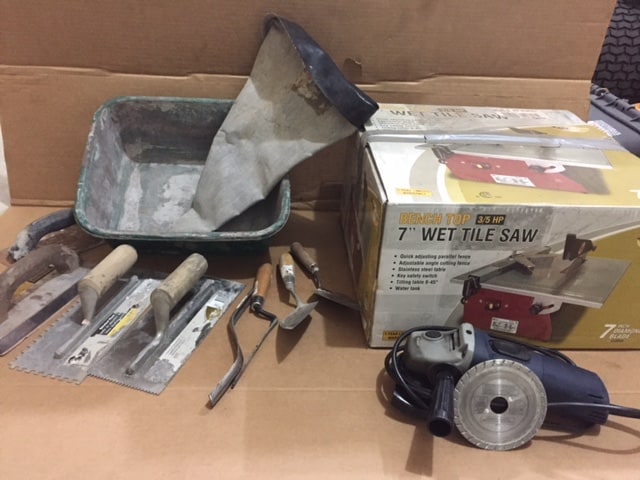
We went with the thin-set mortar because we’ve used it on other tile projects and had good success. The tile backsplash installations can be done using the same trowels, saws and hand tools we call out in our article about installing veneer brick and stone
Installation Safety
What I would like to offer you is practical ways of installing the tile safely. 99% of the time you are going to have to make some cuts when installing tile. Whether it’s on an edge or around receptacles or windows. The best way to do this is with a wet tile saw. They cut the tile the cleanest, for a nice looking finish.
With that said, they still produce small, flying particles and chips. This is even more noticeable when cutting the glass tile. It’s minor and you still end up with a nice finished product. On a project like ours, I would set your wet saw up in a garage or outside. They can make a bit of a mess.
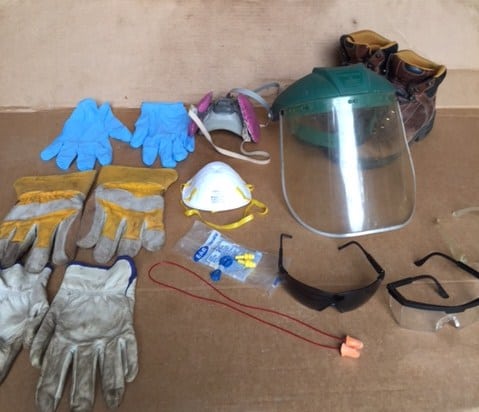
When using a tile saw you do need to protect yourself. Always wear eye and hearing protection! I recommend using both safety glasses and a face shield when using a tile saw. Please take time to read our article on using PPE for home project safety!
Finished Product

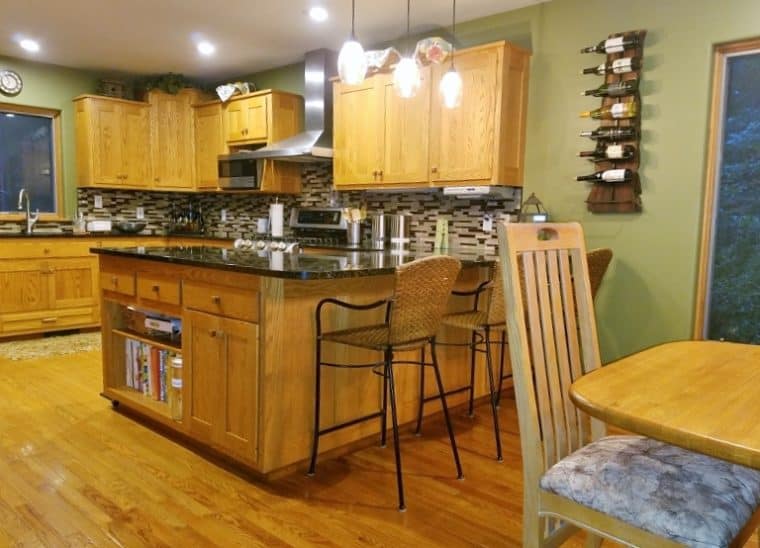
We are very happy with our new granite countertop and tile backsplash! It gave our kitchen a fresh new look. These types of projects can easily be done by most homeowners. To be successful all you have to do is have the right tools, following manufacturers product instructions, and work safely. You’ll be proud of your accomplishments and save money in the process!
If you have any comments or questions, you can leave them in the comments section below or you can email us at [email protected]. FYI, we do not collect or share email addresses. We will only use them to reply to your comments or provide answers to your questions. We are also required to let you know that some of our links are “affiliate links”. This means if you click on a link and make a purchase, we could make a small commission, at no extra cost to you. This helps offset the cost of maintaining our website. So, if you like what you’ve seen, please be sure to give us a “Like” and “Share” on Facebook and Instagram too. Thank you for reading and good luck with all your home projects!
Thank you!
Spot on with this write-up, I absolutely think this site needs far more attention. I’ll probably be back again to
read more, thanks for the info!
Thanks, I’m glad you like it.
Hello, I log on to your blogs daily. Your humoristic style is awesome, keep
it up!