Is the plywood floor in your aluminum fishing boat starting to get soft and spongy? The last thing you need is to be stumbling around trying to land that big fish. Maybe it’s time to have that boat floor replacement done? But, before you shell out hundreds of dollars to have someone else repair it for you, have you ever considered making the repair yourself?
I’ll walk you through the steps I took to replace a rotted plywood floor in my 14’ fishing boat. I’ll share the experience and a few ways I was able to save on costs. If you take this project one step at a time, you’ll find it’s easily doable.
In this article, we will be providing you with a few links to some products for pricing and informational purposes. We are required to let you know some of these links are “affiliate links”. This means if you click on a link and make a purchase, we could make a small commission, at no extra cost to you. This helps offset the cost of maintaining our website. Now, let’s get started.
Materials Needed
Table of Contents
Below is a list of the materials needed to make a boat floor repair similar to mine. Keep in mind that the sizes and quantities may vary some with the size of the boat being repaired. This list is a good starting point for the types of materials you’ll need. Let’s take a look.
Tools Needed For Boat Floor Replacement
Most of the tools needed to make this repair are basic tools that many homeowners already have. If you’re new to the “do-it-yourself” crowd, our articles on DIY “Homeowner’s Tool Kit” and “Basic Carpentry Tools” are a great place to begin your tool gathering journey.
The one exception is an air compressor. You can borrow or rent air compressors, but they are a great tool for many DIY projects and home use. Then by adding additional tools, like the air hammer or an impact wrench, you’re ready for even more home projects. Here’s what you need to get this project done.
Aluminum Boat Floor Replacement Steps
Here are the basic steps you’ll go through to replace the damaged plywood floor in your boat. You can read down through all of them (recommended) or click on the specific step you want to read about. In each step, I go over things I encountered and offer tips and info to help you through your repair.
- Boat Seat Removal
- Damaged Boat Floor Removal
- Floor Covering Removal
- Lay Out The Plywood Boat Floor
- Prepare Plywood Floor For Installation
- Prepare Bottom Of Boat For Installation
- Install New Boat Floor
- Re-install Boat Seats And Storage Compartments
Boat Seats And Storage Compartments Removal
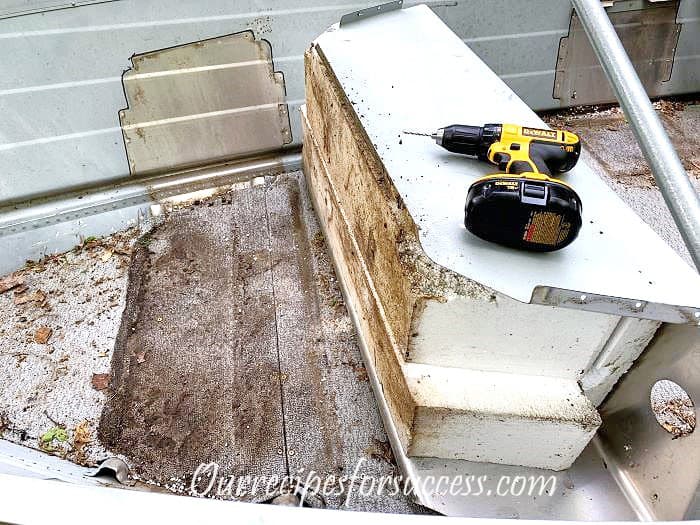
On my 14-foot aluminum boat, the ends of the flooring were under the front and rear bench-style seats. The only way to gain access to the ends of the floor was to remove the seats. There was also a storage compartment and a live well located in the middle of the boat. Both of them would need to come out for easy removal and installation of the floor.
With most of these types of aluminum fishing boats, the seats and compartments are attached to the hull using solid aluminum rivets. The easiest way to remove rivets is to drill them out. Below is a section on how to drill out rivets, complete with a short video.
Once you get the rivets drilled out, they are ready to be removed. Some boats, including mine, have screws along the base of the seats and storage compartments that will need to be removed as well.
With all the fasteners removed, the seats and storage compartments should lift right out. FYI, most bench seats in aluminum boats are filled with foam or foam pieces. Be sure to mark them and duct tape the pieces together for easy handling and reassembly. Also, if you have a live well, there will be a couple of hose clamps and hoses to remove before it can be removed.
How To Drill Solid Rivets Out
Rivets are a great fastener. They come in different sizes and materials. To connect two pieces of material together a hole the exact size of the rivet is drilled in both pieces and a rivet is inserted and expanded to secure them.
The easiest way to remove a rivet is to drill it out. By that, I mean only the rivet’s material, not the surrounding material. Enlarging, or elongating, the holes in the two base pieces could affect the integrity of the replacement rivet. This requires you to drill as close to the exact center of the rivet as possible.
For this reason, I like to use a drill bit that’s a little smaller than the rivet being used. For example, when drilling out the 3/16” rivets in this project I used an 11/64” drill bit. If the hole you drill is a little off-center, you are less likely to damage the holes in the seat and the boat hull. This is very important for ensuring a secure, watertight connection when reinstalling the seat.
Because the drill bit is a little smaller, the rivet may not break off right away. To aid this simply insert a small tapered punch in the hole and roll it around in a circular motion with a little force. The head of the rivet will easily break off leaving nice undamaged holes.
Note: If the holes in the base materials are damaged, there is no need to panic. When reinstalling the new rivets just install the next largest size rivet available and you’ll be fine. But if you take your time centering the bit and using the above method, you should have no problem.
Here’s a short video demonstrating how I drilled out the rivets on my boat.
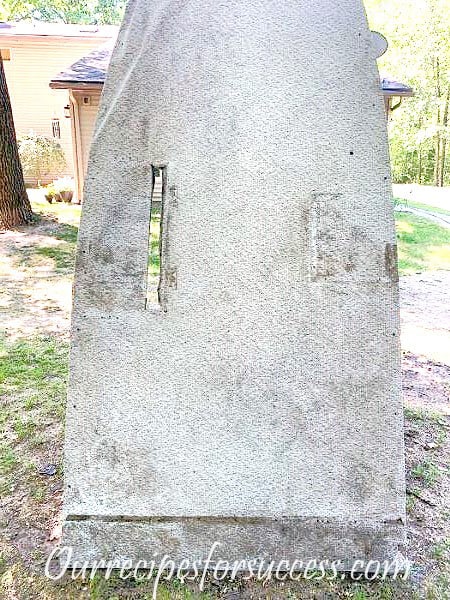
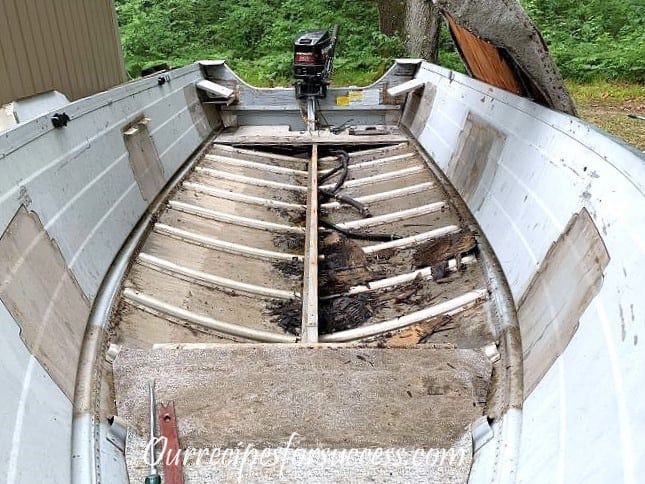
Damaged Boat Floor Removal
Once the seats, and any other storage or other equipment have been removed, you should have full access to the floor. The plywood floor will probably be held in place by aluminum pop rivets, or possibly screws. Remove all the fasteners taking care not to damage the floor covering. Leave the floor covering (carpet/vinyl) on the old plywood. In many cases, it can be reused or help aid in the preparation of the new floor.
Having an extra hand lifting the old floor out of the boat is recommended. They can be a bit heavy and awkward to lift for just one person. Also, be sure to wear a pair of leather gloves when handling the old floor. There may be loose, rusty staples securing the floor covering, sharp edges on the rivets that were drilled out, or a stray old fishing hook lurking along the edges or under the old floor.
Floor Covering Removal
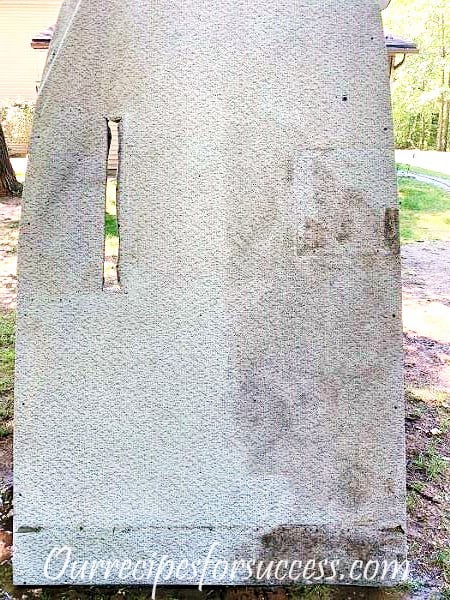
If the carpet or vinyl floor covering is not damaged, reusing it is a great way to reduce the cost of the project. Before removing the floor covering now is a great time to use a pressure washer and/or scrub brush to clean it.
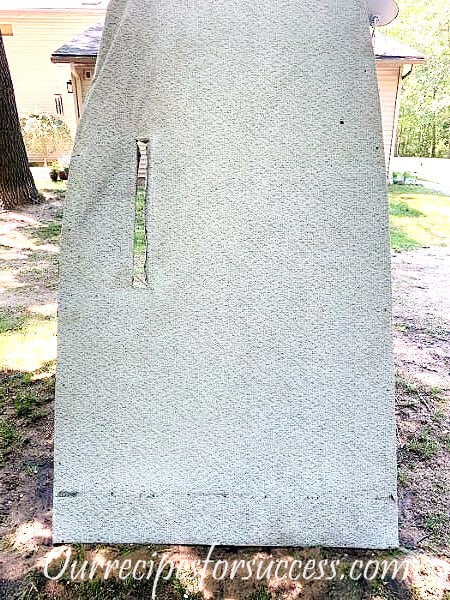
To remove the floor covering, set it up on a couple of saw horses with the bottom side up. Remove the staples around the perimeter of the old floor. Normally floor coverings are glued to the plywood, so you will need to slowly work it loose. Using a wide putty knife works well for this, as you lift and pull it away from the old plywood.
The difficulty of how it comes up depends on the type and amount of glue used. My vinyl floor covering actually came up quite easily. I only had to use the putting knife a few times.
If you do not intend on reusing the floor covering, I suggest laying it out and flattening all the creases and folds. Laying some 2×4 boards on them with a little weight will help flatten them. The old floor covering will make a good template for cutting your new floor covering to size.
If you plan to reuse the old floor covering, now is a good time to clean it up. Remove all the old staples that may have broken off during the removal. Also, be sure to remove any pieces of rotted plywood that may have pulled off and are still stuck to the flooring by the glue.
Reusing the floor covering can easily save you $75 to $150, depending on the size of the boat. Also, having the creases and folds in the old floor covering, makes the reinstallation much easier. And the original rivet holes that attached the floor to the boat can be a good reference for drilling and riveting the new floor back in place.
Selecting And Laying Out The Plywood Boat Floor
Depending on the width of your boat and how much money you want to spend you have a few options. I also think the “difficult factor” of removing and installing the floor will play a role in your decision as well.
If the floor in your boat is easily accessible and removable, then maybe you are okay with choosing a material that might only last 4 or 5 years. But as you can see so far in my floor repair project, for some boats this is not a simple one-day project. With that said, you’re definitely going to want to use materials and installation practices that will last much longer. Let’s take a look at a couple of the better options you have.
Plywood Selection
If you want plywood that will last, it’s highly recommended to use marine-grade plywood. Marine plywoods are made out of better materials, have no internal voids, and uses waterproof glue.
Regular plywoods typically have an “acceptable” number of external blemishes, internal voids between layers, and not all glues used are waterproof. This will definitely shorten the overall life of the plywood for this application.l
Warning: Do not use treated lumber on aluminum boats! Chemicals used in the wood treating can actually react with the aluminum and corrode. It can eat holes in the hull and/or damage rivets or other aluminum components. The Family Handyman has a good article on best practices for using treated lumber and covers this issue a little more in-depth.
If your boat floor is wider than the standard 4×8 foot sheet of plywood, then you have a couple of options. The more expensive option of the two is to buy an oversized sheet of marine plywood. Sometimes it’s difficult to find and you can expect to pay twice as much for a standard 4×8 sheet of marine plywood.
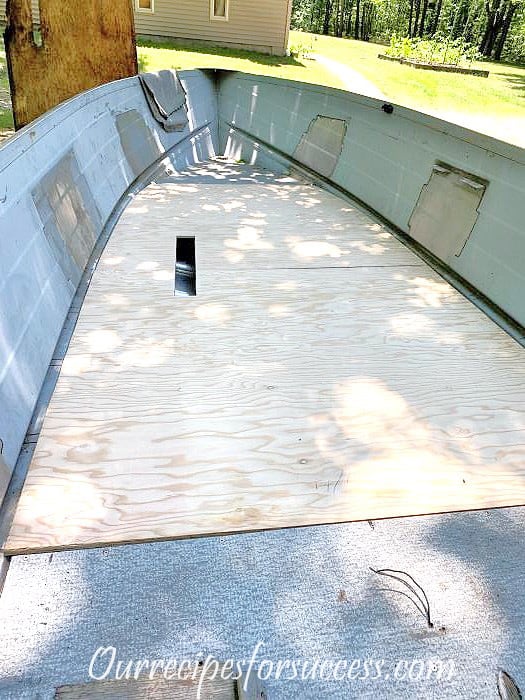
The plywood needed for my boat floor repair project was about 52 inches, by 8 feet. A standard 4×8 size sheet of plywood wouldn’t work. It would require purchasing an oversized sheet of marine-grade plywood which would be very expensive.
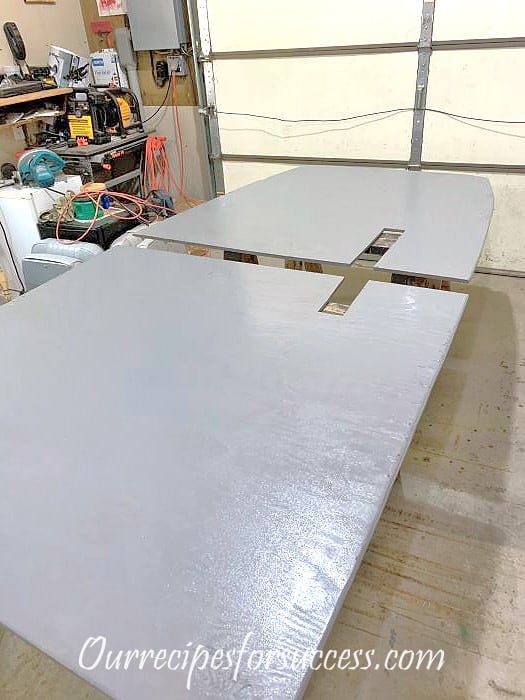
So to keep the cost down I bought a 1/2”, 4×10 sheet of marine plywood and cut it in half, making two 4×5 pieces. I rotated both pieces and spliced them together making a 5×8 foot sheet.
This worked well for my boat because the main support for my floor ran the full length of the boat keel (center of boat), providing good support in the middle. The outside edges of the plywood are attached to the hull cross members where they meet the sides of the boat.
For additional strength, I reinforced the plywood seam with a 1/8”x2” aluminum strap, secured with the large flange pop rivets. The end result was a very firm floor. I have more details on this in the “Prepare Plywood Floor For Installation” section below. This could be a viable cost-cutting option for your repair as well.
Helpful tip: If you need to cut plywood for your project, check out our article on “How to Cut Plywood with a Circular Saw”. It offers some great tips on how to make straight cuts safely on full sheets of plywood.
Laying Out The Boat Floor
Once the old plywood floor has been removed and you have the plywood for the new floor, it’s time to layout the floor pattern on the new sheet of plywood. There are actually a couple of ways to do this.
The first method is to simply lay the old floor on top of the new plywood and trace around it. If you have any other opening on the old floor, like for a live well, don’t forget to trace around those as well. This is probably the easiest method.
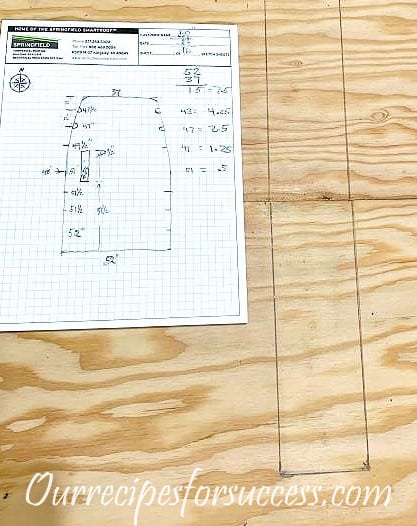
However, if your floor is in bad condition and portions of it are missing, you may have to create a diagram based on the dimensions of the boat. This may take a little more time but still allows you to create a good fitting floor.
I recommend starting by making a rough diagram of your boat floor. Then add the location of any floor supports. For example, on my 14’ fishing boat that included the location of all the cross member supports on the bottom of the boat and keel support that ran the full length of the boat. The cross member support only contacts the floor around the perimeter of the floor.
Once you have the rough diagram made, you’ll want to add the exact location measurements to the diagram. How far apart are the cross members from each other. What is the width of the boat at each of the cross member locations? What is the distance of the keel support from each side of the boat? You’ll want to include both sides, or at least verify both sides, because there’s no guarantee it is exactly in the middle.
If you are replacing the floor covering, this becomes even more important. You may want to even include the location of all the rivet holes in the supports as well. That way you can either try to hit the existing holes or try to avoid them, so the new rivets will have a good solid gripping location.
Now transfer all your marks to the new plywood sheet. Note: if you cut a 4×10 sheet of plywood to make your own 5×8 sheet, as described above, they are not connected together yet. Just make sure they are butted snugly together when transferring your marks.
After you have the floor traced out on the plywood you can use a jigsaw to cut out the new floor. You may want to cut on the outside of your marks when cutting. It’s always better to have a little extra material than not enough.
Once it’s cut out I recommend “dry fitting” the floor in the boat. You want it to fit snugly, but don’t forget you’ll have your floor covering wrapped over the edges on both sides. I would leave at least a 1/8” gap on each side. You may have to trim or sand the edges of the plywood to get a good fit before moving on to the next step.
Prepare Plywood Boat Floor For Installation
Once you have the new plywood floor cut and dry-fit, there are a few things you’ll need to do before it can be permanently installed. These steps will help ensure your new floor is strong, secure, and will last for many years.
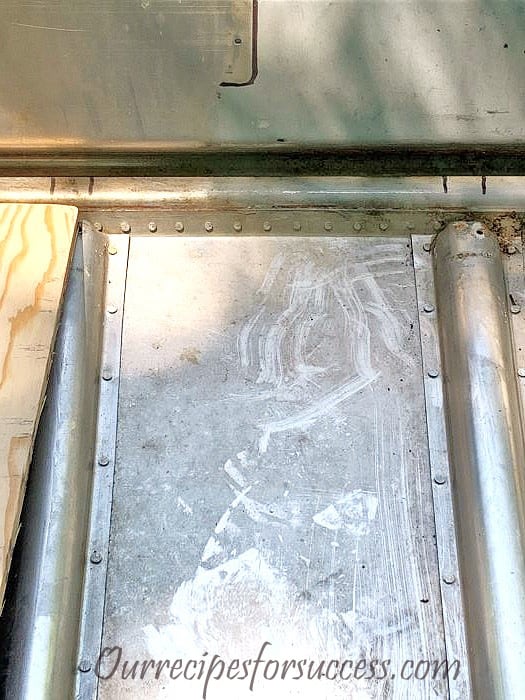
Sealing The Plywood Floor
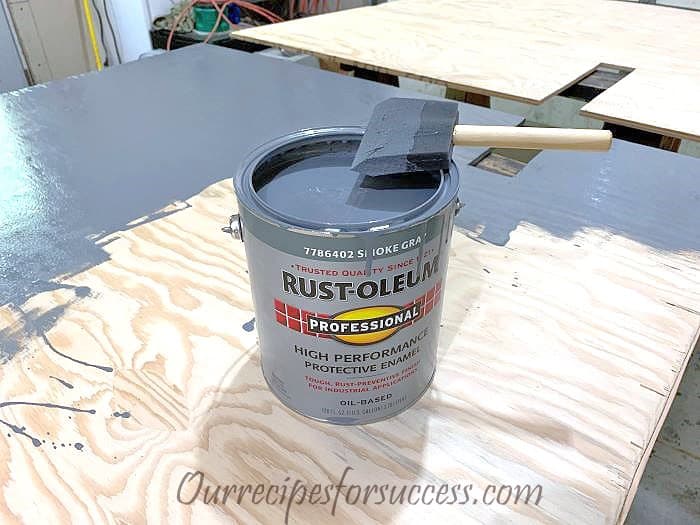
The first thing you’re going to want to do is to seal the plywood. This is very important to significantly extend the life of the plywood. If you are making any splices, I would recommend sealing all the surfaces before joining the pieces together.
I used good quality oil-based paint for this. There may be other more expensive options, but my research showed that most people had good results with oil-based paint. I applied two coats to all surfaces top and bottom.
Painting the plywood took the most time in this project. It called for allowing the paint to dry a full 24 hours before applying the second coat. So to put two coats on top and bottom will take 4 days.
That’s why I saved a few items to work on below. It’s also the perfect time to make other repairs or upgrades to your boat. I made some repairs to my boat seat mounts and installed a small float-type bilge pump to help keep excess water out of the boat.
Splicing Plywood Sections Together (if required)
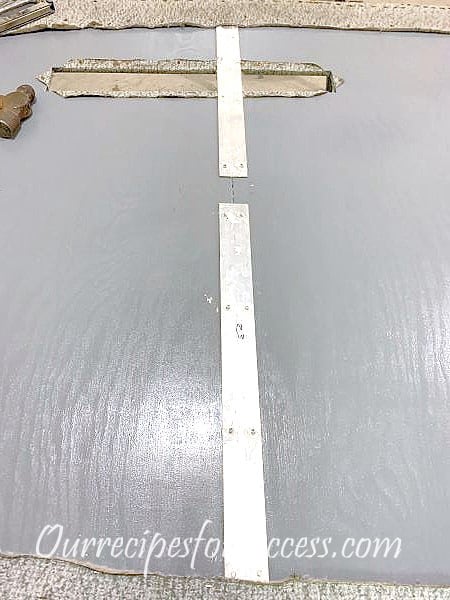
After the paint has totally dried, you can move on in the preparation. If you have splices, now is the time to join the pieces together. I used a 1/8” thick, 2” aluminum strap, secured with large flange rivets, to the underside of the floor. I spaced the rivets about 6 to 8 inches apart. The aluminum strap was placed so it did not sit on, or come in contact with, any of the keel or cross member supports. I wanted the floor to sit as flat as possible with no potential for wear spots.
To make the splice start with the plywood upside down sitting on saw horses and a couple of 2×4’s for support. Pre-drill the aluminum strap with the rivet holes. With the aluminum strap in place on the plywood, drill the rivet holes through the plywood.
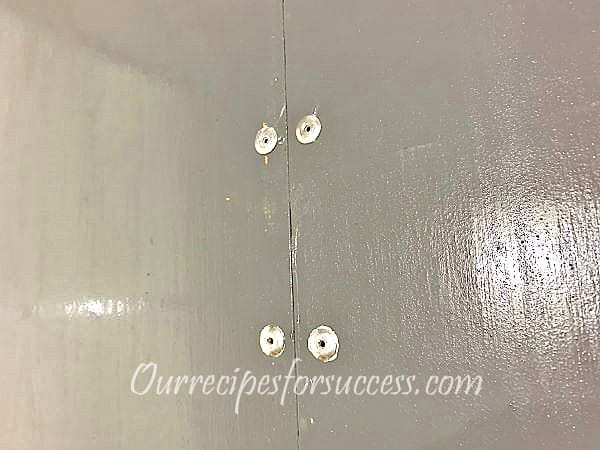
Before beginning to rivet, lift the aluminum strap and put a small dap of the marine silicone in and around each hole in the plywood before placing the strap back in place. Now you can start installing the rivets from the underside of the plywood. Be sure to put a small dap of silicone on the holes in the plywood before inserting the rivet. I also used washers on the aluminum strap side to help ensure a good connection. Once the rivets are in, wipe any excess silicone that may have squeezed out from under the rivet flange. This will leave a nice smooth surface.
From this point forward it’s recommended to get help when handling the floor. Although the joint in my boat floor rebuild was solid, I did not want to put any undue stress on it. Besides, at this point, the floor is quite large and awkward for one person to handle.
Installing The Floor Covering
If you are installing a new floor covering, hopefully, you were able to use the old floor covering as a template to mark the new material for cutting. If not, place the new floor covering, face-up, on a smooth surface, and set the new floor on top of it, also face up. Note: if you have a splice in the plywood with rivets on the underside, you may want to flip both the floor covering and the floor over. This will help prevent the rivets from damaging the floor covering.
Once the floor is on the floor covering, draw a line out 5 or 6 inches along the perimeter of the plywood floor. This should be plenty for wrapping around the edges and securing it. Set the plywood floor on saw horses face-up, while you cut the floor covering out.
Now you’re ready to glue the flooring onto the new plywood floor. Apply the appropriate glue for the type of floor covering you’re using, per the manufacturer’s instructions. Lay the new floor covering, face-up, on top of the glue. A helping hand is really nice for getting the floor covering in place. Most manufacturers recommend rolling, or pressing, the entire surface into the glue for proper bonding.
Wrap the excess floor covering around and under the edges of the plywood floor and stapling it to the underside. Do this in a few locations around the perimeter of the plywood. At this point, it’s much easier to flip the entire floor over to finish securing the floor cover.
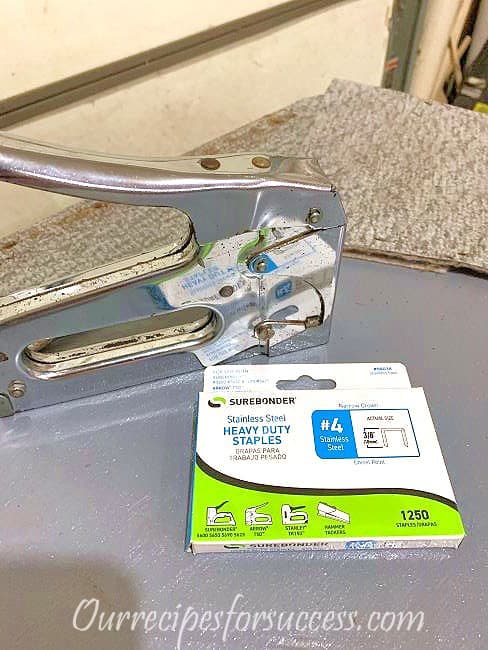
Continue wrapping and stapling the floor covering around the entire perimeter of the plywood. At the corners of the floor, you will need to fold the covering over prior to stapling it for a nice clean finish. I recommend using stainless steel staples. They will last much longer than regular metal staples. The new floor is now ready to be installed!
Prepare Bottom Of Boat For Installation
While you’re waiting for the paint to dry, in between coats, is a great time to prepare the bottom of the boat for installing the new floor. I would start by thoroughly cleaning the inside of the boat. A pressure washer works great for this. They can easily remove years of nasty dirt and debris.
Next, you’ll want to remove the old rivet pins that are left after drilling out the rivet heads to remove the old floor. A few may fall out but the majority of them will remain in the floor supports. You may need to use a combination of a pair of pliers or a hammer and tapered punch to remove them all. This will allow the new floor to set down evenly on all the existing floor supports.
Another very useful tip is to mark the location of the hull cross members on the side of the boat. Be sure they’re high enough that you’ll be able to see them once the new floor is set in place. This along with your diagram made earlier will help a bunch when installing the pop rivets to secure the new floor. Also, this will be your last opportunity to get measurements for any floor supports and rivet hole locations.
Inspect Bottom Of The Boat For Damage
With the boat floor removed, now is the ideal time to thoroughly inspect the bottom of the boat. Look for loose rivets, that may be leaking, and signs of damage from hitting objects in the water.
The easiest way to do this is to partially fill the boat with water. Put just enough water to cover the rivets in the bottom of the boat. Never completely fill a boat sitting on a trailer with water. That much water would be very heavy and could cause damage to the trailer and/or the bottom of the boat.
And remember the seats that were removed for the project add structural support to the boat’s hull. Plus they are designed to keep water out, not in. That much internal water force and reduced structural strength could allow the boat to deform or bend.
With water in the bottom of the boat, crawl under the boat and look for any signs of water leaking. If you do find any issues, circle the leaking rivet(s) or damaged spot(s) with a permanent marker. Then drain the water and make repairs as needed. Now is the time to make the repairs while the floor is removed.
A leaking rivet can easily be repaired with the tools available for this project. We’ve already gone over how to remove (drill out) rivets and will be covering the installation of solid rivets a further down.
If you find a crack or other type of damage that may require welding, then I recommend hiring a qualified welder for the job. Welding on thin aluminum is difficult and usually requires special welding equipment. I don’t think this is a repair to try and cut corners on. Once all your repairs are made, fill the boat back up and verify there are no leaks.
Installing The New Boat Floor
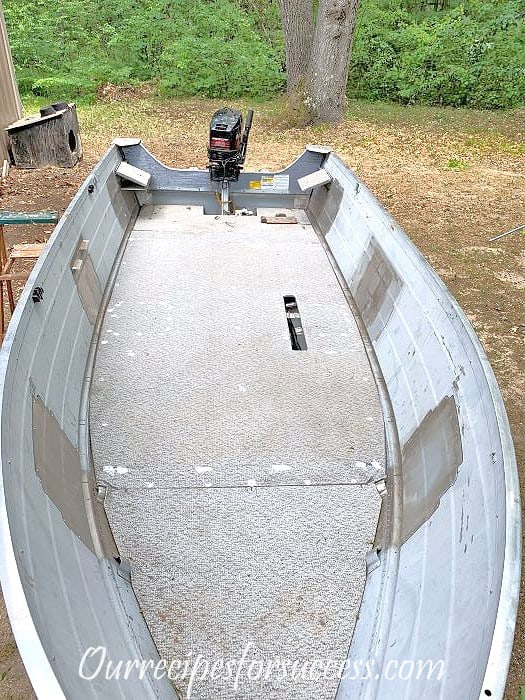
This is probably the most exciting part of the project. Laying the new floor into place in the bottom of the boat. You’ll definitely want some help lifting and installing the new floor into the boat.
If you are reusing your floor covering, the rivet holes that secure the floor to the boat of the boat should be fairly well aligned with the cross member support marks on the sides of the hull you made earlier. Make any slight adjustment to the floor’s position before moving on.
Now you’re ready to start drilling the holes in the new floor for the pop rivets to secure it to the supports on the bottom of the boat. If you’re reusing the old floor covering, you can use the existing holes. Otherwise, use the marks you have on the diagram of the boat floor you created.
When drilling, start slowly and make sure the bit does not grab a hold of the floor covering material. Drill just deep enough to go through the plywood floor and into the cross member support.
Before inserting the pop rivet, squeeze a small dab of marine silicone in and around the hole. If you’re using carpet for a floor covering, keep the amount “around” the hole to a minimum. That way the rivet’s large flange will completely cover the silicone and give you a nice clean finish. On vinyl flooring just wipe up any excess silicone before it dries.
Continue installing the rivets around the perimeter of the floor and in all the floor supports you’ve identified on your drawing. You should now have a firm, secure floor that will last you for many years.
Reinstall Boat Seats And Storage Compartments
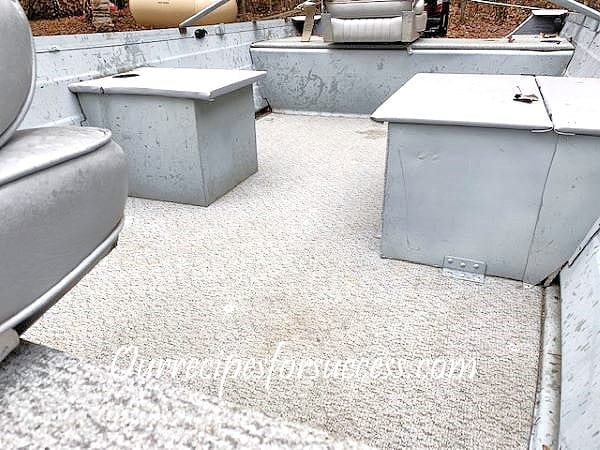
With the new floor installed you can now reinstall your boat seats and any other storage compartments you had to remove. As long as you used the same thickness of plywood the rivet holes should line up fairly well. The aluminum seats may flex a little, but they should move into place relatively easily.
The best way I found to do this was to align one boat seat flange rivet holes to the boat hull rivet holes at a time. Once the holes are aligned you can install the solid rivets one at a time. Below is the method I used to align the holes and it worked well.
To help with the alignment I recommend having at least one small, tapered punch. Having a couple of them is even better. Simply put the end of the tapered punch in the hole on the seat flange and then into the corresponding hole in the boat’s hull. As you push it in the taper aligns the two holes perfectly.
They do make a special tool for aligning the holes and holding the two-piece snugly together. It’s called a “Cleco”. For this small of a project, the tapered pins worked just fine. Plus they can be a little pricy. However, if you have a larger project, they can be a great addition to your toolbox.
On my boat, each seat flange had three holes that attached to the hull. By using two tapered punches I was able to align the top and bottom holes and the center hole naturally lined up. I started by installing the center rivet to help hold the seat flange in place for the other two holes.
If you only have one tapered pin, you can make that work as well. You can use a 3/16” screw and nut in place of the second tapered punch or Clecos. Insert the punch in the center hole and work it around until you can get the screw into either the top or bottom hole. Then pull the punch out and put it into the other hole (top or bottom) and the center hole should naturally line up.
Before you can install the solid rivets you want the seat flange and boat hull to fit together snugly. For the most part, this was not an issue on my boat, but I did have a couple of holes that the two surfaces did not meet up tightly.
If you have a loose fit between the seat flange and the hull, then you’ll need to use the screw and the nut. Insert the screw as described above then thread the nut all the way onto it. Snug the nut and screw up until the seat and hull surfaces meet. Now align the other two holes using the tapered punch. Even if you have two punches, you may want to have a 3/16” nut and screw handy to deal with any loose fit-ups.
Once you get the holes lined up you can begin riveting. If you are new to installing solid rivets, don’t worry. In the next section, I will demonstrate how to install them. The process is pretty straightforward and actually easy to do.
How To Select And Install Solid Aluminum Rivets
Solid rivets provide a strong, durable connection between two pieces of metal and have been around for centuries. In the watercraft industry, you’ll find that most of the older aluminum boats were made using rivets on the hull.
However, with improvements in materials, manufacturing processes, and welding technology, many of the newer aluminum boats have welded hulls. But it’s not uncommon for the seats to still be riveted in place. Maybe it’s for ease of access for projects like this.
Selecting The Correct Solid Rivet Size
Above we’ve already covered how to remove rivets, now it’s time to go over how to install new aluminum rivets. The first step is to use the correct rivet diameter. This part is pretty straightforward. You should always use the same diameter of rivet that you removed. The rivet must fit snugly into both the hull and seat flange to get a secure connection.
The only time you should deviate from this is if one of the holes was damaged from either being loose or damaged during the rivet removal. In this case, you should go to the next available size rivet and drill the holes to match. Never try to use a rivet in a hole that is too large or damaged. That connection will not be as strong and will run the risk of leaking.
Next, you’ll need to select the proper length of rivet. According to the NJ Rivet Company, you need a rivet long enough to reach through the two pieces being joined, plus 1.5 to 2 times the diameter of the rivet shaft. This will give you the proper “clinching” length.
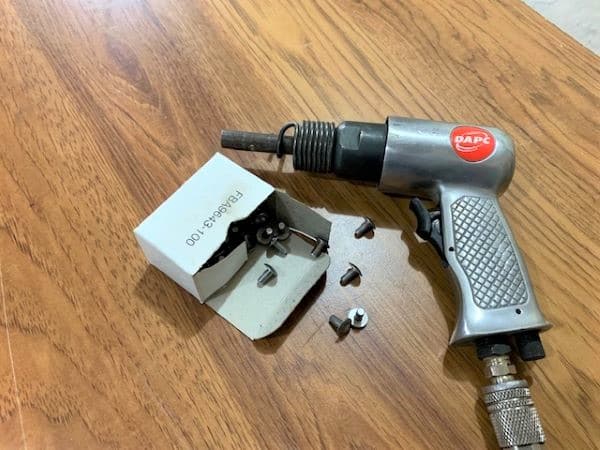
How To Install Solid Rivets
Before starting there are a couple of items you need to do first. Number one is to set the pressure regulator on the air compressor to the recommended pressure for the air chisel/hammer. Then install the rivet set tool into the air hammer.
If you have an old chisel tool for your air hammer, it is possible to make your own rivet set tool. It’s fairly easy to make and can save you from having to buy one. Below is a short video showing how I made mine. It worked very well.
The second item I highly recommend is to wear hearing protection. An air hammer on an aluminum boat creates quite a bit of noise. And be sure to wear a pair of safety glasses too. For more safety related tips, when doing DIY projects, check out our article on “Wear The Proper PPE”. There’s lots of helpful pointers.
Once you have the holes in the seat flange and the boat hull lined up and pulled together using your tapered punch and a 3/16” screw and nut, you’re ready to start riveting. I put a small dab of marine silicone around the hole on the outside of the boat’s hull to help ensure a watertight seal.
Insert the rivet into the hole and hold it in place, against the hull, with the air hammer and rivet tool. Place the bucking tool (hammer) on the end of the rivet inside the boat. Be sure to hold it square to the rivet shaft, so it peens it evenly.
When using the air hammer just use 4 or 5 short, one or two-second bursts, to set the rivet. When finished the diameter of the peened end of the rivet should be roughly 1.5 times the diameter of the rivet shaft. The height of the peened end of the rivet should be roughly 1/2 the diameter of the rivet. Over-tightening the rivet can damage the pieces being fastened together. Here is a short video demonstrating the process.
Conclusion
That’s all there is to make your own boat floor replacement. On the surface, you may think a job like this may be more than you want to take on, but let me assure you that is not the case. If you take one step at a time, I think you’ll find each step is in fact something the average DIY’er can easily do.
So roll up your sleeves and get started. Not only is it rewarding to complete a project like this, but you can save yourself hundreds of dollars in the process. Believe me, If I can do it, so can you. Good luck and let us know how your repair went.
If you have any comments or questions, you can leave them in the comments section below or you can email us at [email protected]. FYI, we do not collect or share email addresses. We will only use them to reply to your comments or provide answers to your questions. We are also required to let you know that some of our links are “affiliate links”. This means if you click on a link and make a purchase, we could make a small commission, at no extra cost to you. This helps offset the cost of maintaining our website. So, if you like what you’ve seen, please be sure to give us a “Like” and “Share” on Facebook and Instagram too. Thank you for reading and good luck with all your home projects!