When you’re driving down a road with a few bumps in it and you hear clunking noises under your vehicle, it’s trying to tell you something. Obviously, there are many potential causes for these noises, but one of the easiest things to check for are sway bar problems.
Sway bars are very common on many vehicles today and are an integral part of the vehicle’s suspension system. The good news is most of these sway bar problems can be repaired using just a few basic hand tools and in less than an hour.
In this article, we will cover exactly what the sway bay does and look at the components of the sway bar system. We will be making the repairs on a 2009 Mercury Mariner (same suspension as the Ford Escape), but the function and components are the same on most vehicles. The components will be in varying locations, but the basics of troubleshooting and making the repairs will be the same.
We will walk you through diagnosing the problems, the tools needed to make the repairs, and the basic steps to repair these common problems right at home. Making these types of relatively easy repairs can save you money and allow you the convenience of making the repairs at a time that best fits your busy schedule.
In this article, we will be providing you with a few links to some products for pricing and informational purposes. We are required to let you know some of these links are “affiliate links”. This means if you click on a link and make a purchase, we could make a small commission, at no extra cost to you. This helps offset the cost of maintaining our website. Now, let’s get started.
Sway bar components
Table of Contents
The sway bars are an important part of your vehicle’s suspension system. They help reduce the roll, or lean, as a vehicle takes corners. When a vehicle leans as it goes into a corner, that motion “loads” or “torques” the sway bar transfers pressure to the suspension on the opposite side of the vehicle. That pressure helps to level the vehicle, improving the control and ride of the vehicle.
Because of these forces, most of the sway bar system components will wear over time and need to be replaced. Depending on road conditions and how long you own your vehicle, they may only need to be once in your vehicle’s lifetime. The important thing to know is they do need to be inspected and maintained from time to time. Let’s take a look at those components.
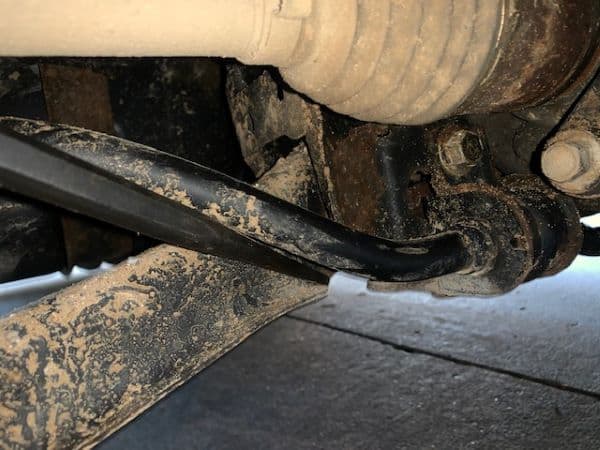
Sway Bar – The sway bar, sometimes called a stabilizer bar, is a “U-shaped” bar that spans across your vehicle’s frame and connects the wheel suspensions together. They are made of spring steel and are designed to help reduce vehicle leaning and swaying when cornering.

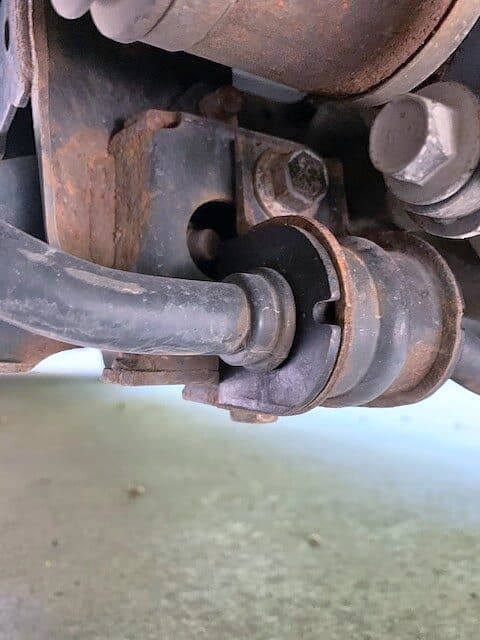
Sway Bar Clamp and Bushing 
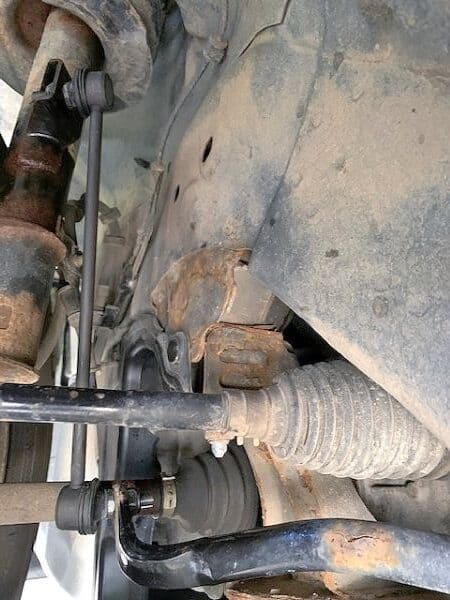
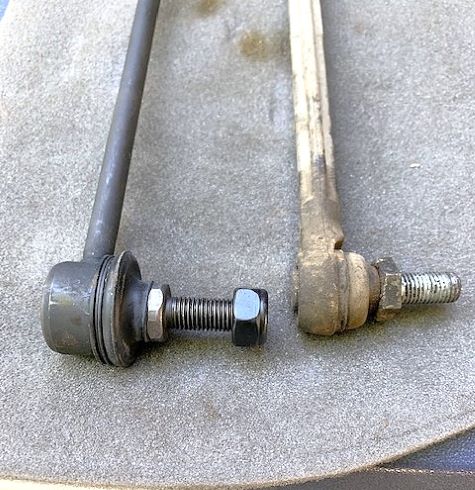
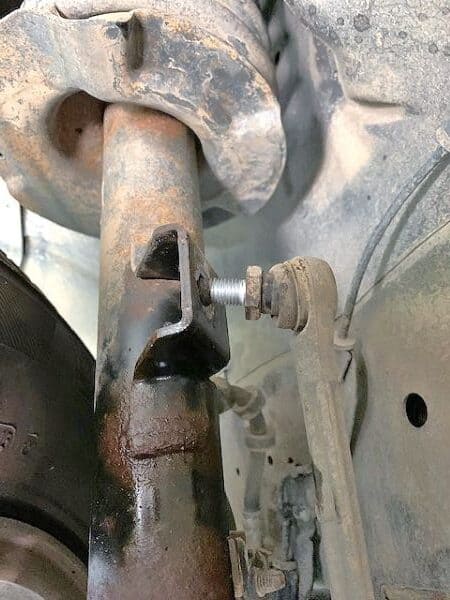
Sway Bar Link Connected To Sway Bar
Symptoms Of Common Sway Bar Problems
During normal driving, your sway bar components are susceptible to wear and tear. This wear is greater when the vehicle is driven on rough, uneven road surfaces. As your vehicle ages the rubber bushings can get harder and wear quicker. As the wear increases the symptoms will become more noticeable.
The typical symptoms include clunking and rattling noise when driving on rough or dirt roads. On front-end sway bars you can sometimes hear the sway bar links squeaking when turning the steering wheel. You may also start to notice a change in how the vehicle handles when cornering. If any of these symptoms are noticed, you’ll want to inspect your sway bar components.
While under your vehicle it’s always a good practice to look around and check out other suspension components for signs of damage or failure. Another common component that needs to be replaced occasionally, and can cause clunking under your vehicle, is the shock absorbers. If in doubt, check out our article on “Shock Absorber Replacement” for more information.
How Much Does It Cost To Repair Sway Bar Problems
Replacing worn sway bar components yourself is a great way to save money. Making these repairs require only a few basic hand tools and are relatively easy to do. There are many good-quality aftermarket replacement parts available at the local automotive supply stores that can save you money. If you combine replacing sway bar bushings and links, you can save hundreds of dollars!
The RepairPal.com website has a great auto repair estimator tool to see the cost of vehicle repairs in your area. According to their estimator, below are the repair costs I could expect to pay for the repairs I made to our 2009 Mercury Mariner. Visit their site and see what your repairs will cost.
Vehicle Sway Bar Component Repair Cost
| Sway Bar Component Repair | Sway Bar Component Repair Cost Estimate |
|---|---|
| Front Sway Bar Links | $90 – $212 |
| Front Sway Bar Bushings | $95 – $120 |
| Rear Sway Bar LInks | $130 -$140 |
| Rear Sway Bar Bushings | $95 – $120 |
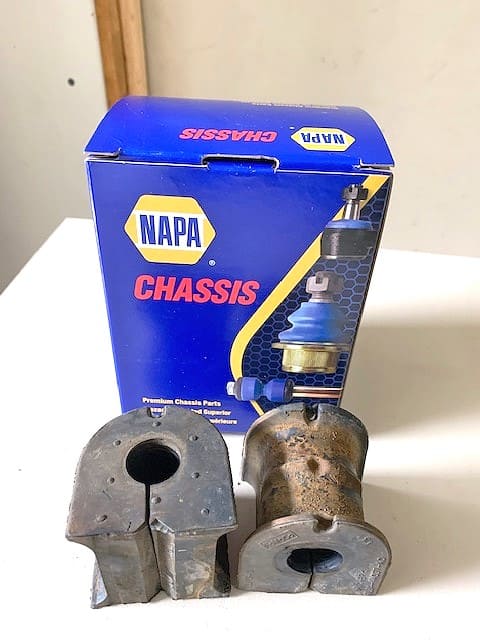
On our Mariner, I replaced both of the front sway bar links and the rear sway bar bushings. I bought the replacement parts at a local NAPA for the prices listed below. Even using the lowest repair estimates listed above, I was able to save in excess of $130 by making these repairs myself.
| Mercury Mariner Sway Bar Components | Local NAPA Replacement Parts Cost |
|---|---|
| Front Sway Bar Links | $18.49 each (2 required) |
| Rear Sway Bar Bushings | $13.49 (set of 2) |
Diagnosing Sway Bar Component Problems
Diagnosing issues with the sway bar components are pretty straightforward. However, I have a few tips to help make it easier to identify the issues. I’ll cover the techniques I use to identify issues with both the front and the rear sway bar components.
As mentioned earlier, our repairs were made to a Mercury Mariner. The advantage here was I was able to access and make the repairs without having to jack the vehicle up. That made the repairs a little faster and much safer. That may not always be the case, so we’ll cover a few tips to help with or without using jacks.
Keep in mind that you may be able to use tips from both of these sections for diagnosing and then making the repairs. I’ll point out these options at the end of this section.
Sway Bar Component Inspection Tips Without Jacks
When inspecting your sway bar components I have a couple of tips to help you easily and successfully diagnose which sway bar components are causing you problems. Let’s get started.
Vehicle must be on even, level ground – This is probably the most important bit of advice I can give you. As mentioned above, the sway bar connects the vehicle’s wheel suspension across the vehicle frame. Therefore, when the vehicle is sitting on level ground the sway bar is in a relaxed state. This is how you’ll want to do your inspection.
If you jack one wheel up or are on an uneven surface, one of the wheel’s suspensions will be compressed. This will put the sway bar and all the components under pressure. When they are under pressure any excess wear (slack) on the components will be taken up and movement cannot be seen or felt.
If your vehicle is low enough that it is difficult to gain access to the sway bar components, a set of vehicle ramps is a good way to raise the vehicle and still keep the vehicle, and suspension, level.
Front wheels should be pointing straight forward – When checking the front sway bar links, I highly recommend having the front wheels facing forward. If you turn the wheels to one side for easy access, it can put the links in a bind, which can make it much more difficult to diagnose worn links.
Check for worn components by hand – In most cases you should be able to check for wear in the components by hand. Especially in the sway bar link, as they are typically a metal-on-metal connection and much easier to find. Simply grab the sway bar and try to work it back and forth. As you do this look, listen, and feel for any signs of movement or noise.
Here is a short video demonstrating how I was able to diagnose a bad sway bar link on a 2009 Mercury Mariner.
Video: Diagnosing A Bad Sway Bar Link
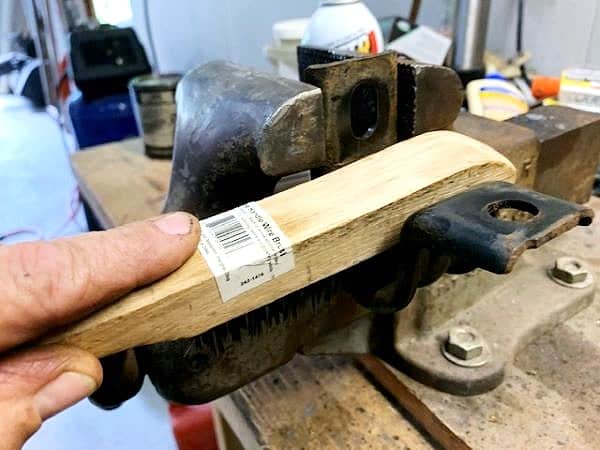
Use a pry bar to check for movement in components – In some cases you may need to use a small pry bar to check for movement. I found this to be useful when checking the sway bar bushings. Because it is a metal-on rubber connection, you rarely feel or hear movement like you might in the links.
When using a pry bar, place it between the vehicle’s frame, or other study structure, and try to both lift and push down on the sway bar. As you do this, closely watch where the sway bar goes into the bushing for any signs of play or movement. Don’t overdo it and actually compress the rubber! It doesn’t take much movement to cause your unwanted thump while driving, especially as the bushing gets old and hard from age.
Sway Bar Component Inspection Tips Using Jacks
If you’re reading this section then you suspect your vehicle is too low in order to get under it and you don’t have a set of ramps to use. If that is the case then here are a couple of suggestions to help you gain access to the sway bar components.
Blocks under the tires – If you only have one jack, then one option is to jack up one wheel at a time and place blocking under each tire. Remember, the blocking has to be exactly the same on both sides to prevent loading (torquing) the sway bar.
Always use good solid blocking material. You should use blocking that is at least 10 to 12 inches wide to provide good stable support and only use what is necessary to safely access the sway bar components. Once you have access then the actual inspection is the same as outlined above.
Supporting vehicle using jacks and jack stands – If you have a jack and a set of jack stands, rated to support your vehicle, then you have the best of both worlds. Your best bet is to jack the vehicle frame up until the wheels are just off the ground and support them using the jack stands. With both wheels off the ground, the sway bar won’t be loaded and you can begin your inspection as outlined above.
If issues are found you are also in a great position to make the repairs. In most cases, it is much easier to access the links and bushings with the wheel removed.
Sway Bar Component Inspection / Repairs With And Without Jacks
Once you have identified the issues you are ready to make the repairs. As long as the vehicle is either sitting on level ground or fully supported on jacks and jack stands, the sway bar should be unloaded and the repairs can begin. I’ll provide a little more detail on that below.
However, if you’re in a situation where you can diagnose the bad components, but may not be able to access them well enough to make the full repair, here’s a little tip. As long as you can undo one end on one of the sway bar links, and pull it free from the sway bar, you can jack up one wheel at a time without loading the sway bar. By undoing one of the links you have separated the connection between the sway bar and both sides of the vehicle’s suspension.
Now you can remove the tire and gain access to both ends of the sway bar link and the sway bar bushing clamp bolts. On many vehicles, this will be a must for the bushing clamps.
Once all the components are replaced, set the vehicle back down on the level surface where you started. This will prevent the loading of the sway bar and should align the last sway bar link stud with the hole in the sway bar. Re-attach the sway bar link to the sway bar and the job is complete.
Tools and Equipment Needed To Replace Sway Bar Components

The tools required for the job are fairly basic. You’ll find most of them in our “Basic Homeowner’s Toolkit” article. As you begin to collect these tools, you’ll find you’re equipped to take on even more projects.
Let’s take a look at what you’ll need and cover a couple of things you may encounter.

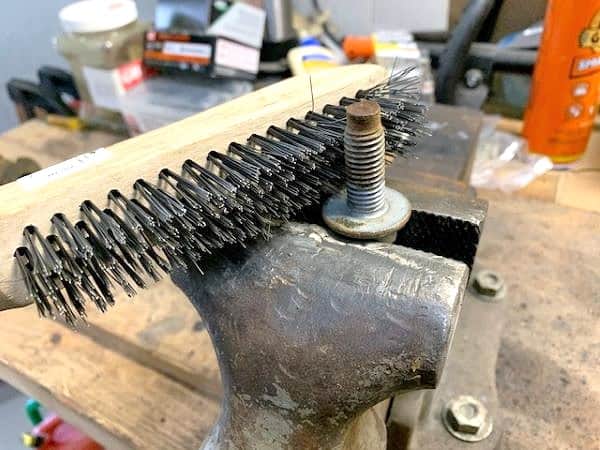
Cleaning Sway Bar Bushing Clamp Bolt Cleaning Sway Bar Bushing Clamp
Conclusion
For sway bar component issues, half the problem is finding the trouble. The information above should help with diagnosing and gaining access to make the repairs. In less than an hour’s time, most of these repairs can be made easily at home.
So the next time you hear a little rattle or clunk under your vehicle, take a quick look. There are no repair appointments to make, working around the repair garage’s schedule, and the potential of big-money savings. And it’s very rewarding. What’s not to like?
If you have any comments or questions, you can leave them in the comments section below or you can email us at [email protected]. FYI, we do not collect or share email addresses. We will only use them to reply to your comments or provide answers to your questions. We are also required to let you know that some of our links are “affiliate links”. This means if you click on a link and make a purchase, we could make a small commission, at no extra cost to you. This helps offset the cost of maintaining our website. So, if you like what you’ve seen, please be sure to give us a “Like” and “Share” on Facebook and Instagram too. Thank you for reading and good luck with all your home projects!