Is your garage door squeaking, squealing, and operating jerkily? Maybe it’s time to develop an overhead garage door maintenance plan. Most of us are pretty good about keeping up on our vehicles maintenance or getting our homes heating and cooling equipment service, but how often do we think about servicing our garage doors.
Garage doors actually have many moving parts. Parts that would benefit from occasional cleaning, lubricating, and adjusting. The best part is most of this maintenance is something any homeowner can easily do themselves. If you have some of the hand tools we suggest in our article on the “basic toolkit for homeowners“, you’ll be all set. Then just add a few cleaning supplies and a little lubricant and you’ll have what you need to get started.
Being willing to take on a task like this can probably save you the $50-$100 it would cost to hire someone to do the job. But more importantly, it can save you hundreds of dollars in replacing worn-out garage door parts and damaged automatic garage door openers. Let’s look at some of the key components of a good garage door preventive maintenance plan.
How Often Should I Service My Overhead Garage Doors?
Table of Contents
It’s highly recommended to perform routine preventative maintenance on your garage doors at least once a year. However, As with many things, this will vary with use. If you use your doors multiple times a day, you may want to consider increasing the frequency. In some cases, some components may need attention every 3 to 6 months. We’ll cover this in more detail in the individual component section below.
At a minimum, we open and close our garage doors two times a day. Going to and coming home from work. That’s roughly 730 cycles per year. I have read on average homeowners open and close their garage doors four times a day. This use will take its toll on the components over time.
Another factor is the environment your doors operate in. Do you live in an area that gets lots of rain and the door components are subject to more moisture? Do you live on a dirt road and carry additional dust and dirt into your garage? I know when I sweep out our garage it creates a cloud of dust. A lot of that will end up settling on many of the garage door components and can leave a gritty, moisture attraction layer.
What Should My Overhead Garage Door Maintenance Plan Include?
I believe there are four main elements to a good preventive maintenance plan to keep your garage doors operating smoothly. They are relatively easy to do and don’t require any special tools or training.
We’ll start by looking at these four elements and what each of them entails. Then we’ll take a look at the list of components you should be maintaining on your garage door. There I will point out which of these four elements should be used on each item.
Cleaning Garage Door Components
I like to start by cleaning all the components involved. I prefer to use my air compressor and a blower nozzle to remove any dust, dirt, and grime. It works well for getting the dirt out of all the nooks and crannies. Air works particularly well for cleaning the hinges and rollers.
If you don’t have access to an air compressor that’s fine. You can use a broom or small hand brush to get most of the dirt. A small paintbrush works well for getting into the tight spaces. Always starting by cleaning the highest garage door components first and working your way down.
Inspect The Garage Door Components
As you’re doing your cleaning, this is the perfect time to begin doing a visual inspection of all the garage door components. You’re looking for signs of loose, or missing, nuts and bolts, bend or dented components, cracks, and frayed cables just to name a few. This includes the automatic garage door opener if you have one. You’re trying to identify the more obvious issues at this point.
Spot check a few of the fasteners (nuts, bolts, screws) for tightness using a wrench. Each time you do this, select different fasteners. Over time you will begin to identify the ones that need the most attention.
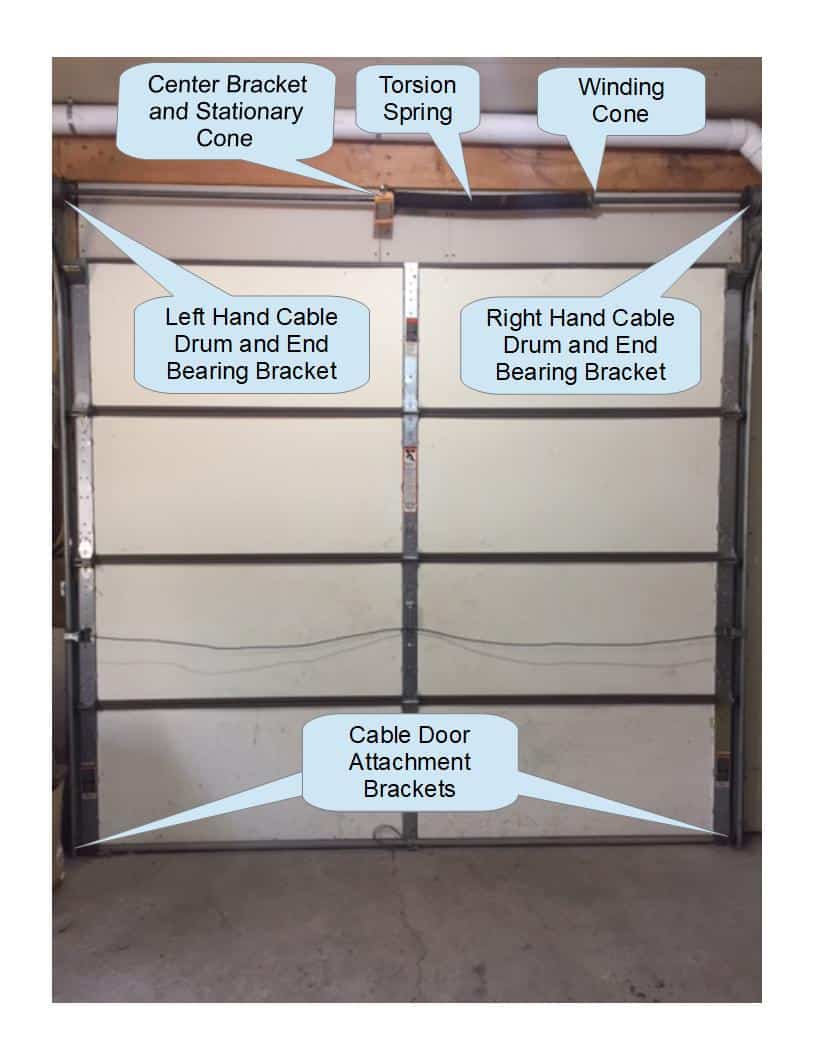
Note: There are several components that are associated with the torsion springs (or extension springs, if equipped) that are under extreme pressure. I’ll identify these components on a torsion spring installation below. Never attempt to loosen or adjust these components while under pressure.
Lubricating Garage Door Components
To keep things moving smoothly you’ll need to lubricate all the moving components. Lubricating the components allows the door to operate more quietly and also helps extends their life. Things like bearings, rollers, hinges, chains, sprockets, latches, and door locks all benefit from lubrication. Even adding a little lubricant to the springs and cables will help prevent rust and reduce friction as they move.
Although any lubricant is better than no lubricant, there are lubricants that are specifically recommended for garage door use. The best lubricants for garage doors are ones that you can spray on and after a few minutes dries to a non-tacky finish. Most of these are silicon-based sprays. The biggest advantage here is that they lubricate and prevent rust by repelling moisture. The other huge benefit is that dust and dirt will not stick to the components. With non-drying lubricants, the dirt and grime build-up can actually lead to issues in the long run.
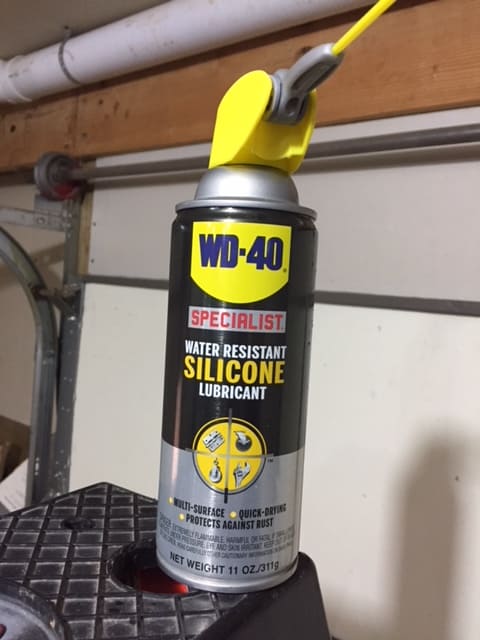
There are several lubricants to choose from. 3-IN-1 Garage Door Lube is a good example of a silicon-based lube. I’m currently using WD-40 Specialist Silicone Spray. It works well and is a little less expensive than the 3-IN-1 lube. Whatever brand you choose, look for the “fast drying” property. It will perform better between maintenance intervals.
Testing The Garage Door Operation
Once you’ve cleaned, lubricated, inspected, and corrected any obvious issues, now is the time to make sure your door operates smoothly, properly and safely. These operational checks should include the automatic door opener if equipped.
Garage Door Operational Checks
Overhead garage doors should be checked periodically to make sure there are operating properly. As mentioned above, right after cleaning and lubricating them is a perfect time to do this. Below are some of the recommended checks you should do on an annual basis.
Check For Smooth Garage Door Operation
Fully open and close the garage door several times. If you have an automatic garage door opener, trip the “emergency door release”, so the door can be operated manually. The door should operate easily, smoothly, quietly, and with no catching or binding throughout the travel.
If the door has any issues, such as catching or binding, you need to identify the issue and correct it. This is especially important if you have an automatic garage door opener. These types of issues can cause damage to the opener and shorten its life.
Dents or misalignment caused by the door tracts being struck by a vehicle, garden tractor or ATV can cause such symptoms. Hopefully, these types of issues will be noticed during the inspection. If you have trouble finding the issue, then call a professional garage door company. There’s no shame in that. Nobody knows everything, including DIY’ers! Knowing your limitations and seeking help when needed is a good thing.
How To Check Garage Door Balance
To check the “balance” of your garage door is easy to do. If you have an automatic garage door opener, you have to start by releasing the emergency release to free the door from the opener. Then simply stop the door anywhere in mid-travel and let go of it.
A properly balanced door should stay in place and not move. No movement indicates that the torsion spring tension is properly adjusted for the weight of the door. If the door starts to move upward, the torsion spring tension it to high. If the door starts to move downward, the tension is to low. An unbalanced door should be adjusted. You definitely don’t want any unexpected door movement and it can help reduce wear on garage door components.
This is especially true if you have an automatic garage door opener. Most residential garage door openers are constructed using plastic gears inside. I know, I’ve had to replace them in our opener. They are designed to open and close a properly installed, well-balanced door. The opener should only have to exert minimal force to move the door up or down.
I’m sure they can take a little abuse, like breaking a door loose that’s frozen down in the winter. Or closing a door on your child’s skateboard that was left under the door. But to continue operating them on an unbalanced door can definitely cause damage and shorten their life.
Note: You should never continue to use your automatic door opener on a door with a broken torsion spring. You run the risk of damaging your opener significantly.
Addition Garage Door Maintenance Resource
Checking the balance on a garage door is something I had never heard about until I did my first Garage Door Torsion Spring Replacement, which I wrote an article about. To keep things brief, in that article I discussed the fact that I have two identical garage doors installed. They had the same door, the same opener, right down to the same torsion springs.
However, the track on one door had to be raised one foot, and used a different track radius, to accommodate an entry door into our garage. This is the door that I had to repair the garage door opener on and had the torsion spring break! Coincidence? I think not!
If you’re having garage door issues, go through these maintenance tips. Then read the above article. It has lots of good information and resources on replacing door components, along with sizing and installing torsion springs.
Automatic Door Opener Safety Checks
Now that you know your garage door is balanced and operating smoothly, it’s time to check out the garage door opener. Most automatic garage door openers installed in the past 20 years should have the three operational/safety devices covered below. Be sure to read the owners manual for your particular opener to make sure you know exactly what devices your door opener has, and how to adjust them, before attempting any of the below tests. Ensuring your door opener has all these devices, and that they are functioning properly, will provide safe operation around children and pets.
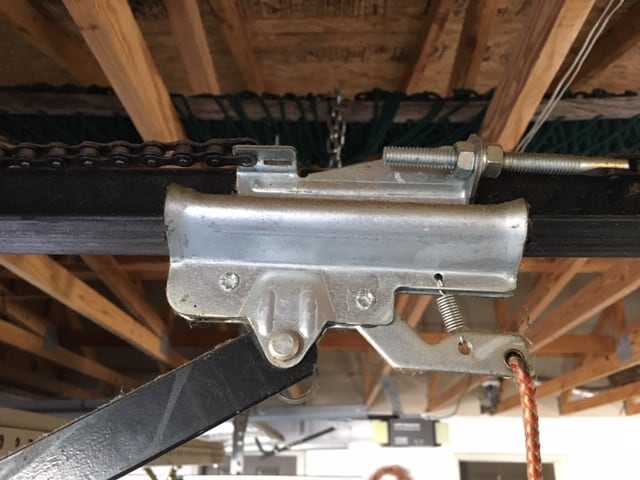
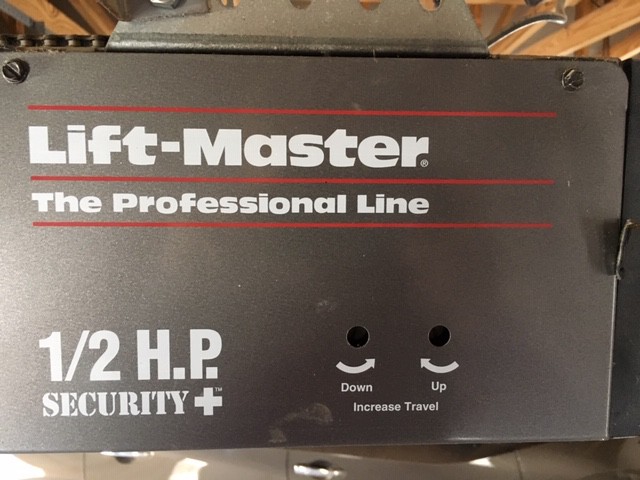
End of Travel Limits
The end of travel limit switches
When the door is closing you want to make sure the weatherstrip on the bottom of the door just comes into contact with the floor. The opener should never push or jam the door hard against the floor. This puts excess pressure on many of the door components.
When opening the door you want it to just clear the top of the door opening frame. Depending on your particular installation, if you open your door too far it can actually start pulling against the torsion spring. This would put unwanted pressure on the opener, which will only lead to bad things.
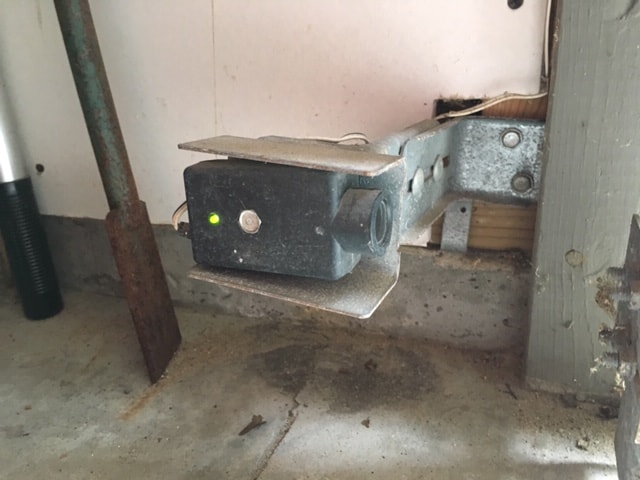
Garage Door Obstruction Optical Sensors
These sensors are mounted near the door track, three or four inches off the floor. There are typically two optical sensors, one mounted on each side of the door, pointing at each other. If something breaks (passes through) the optical beam the door will stop closing and return to the fully opened position. On my particular door model door opener, the light on the opener will flash several times indicating the activation of the device.
If your door will not close, this sensor could be at fault. To keep these sensors working properly you must clean the lenses and make sure they are properly aligned pointing at each other. Most sensors will have an indicator light that will be lit to help verify the alignment.
Excessive Opening or Closing Pressure Cut-Out
Most automatic garage door openers are equipped with this safety feature as well. If for some reason the opener is having trouble moving the door it will cut out or stop. For instance, if you are trying to open the door and it’s frozen to the garage floor or there is some sort of mechanical issue and the door won’t move, the opener will stop.
The same is true for closing too. If there is an object under the door, below the above mentioned optical sensor, when the door hits it the opener will stop. In many models of openers, the opener will actually reverse direction and fully open the door.
The amount of pressure it takes to stop the door travel is adjustable. To test it simply grab the bottom of the door while it is in motion and try to resist the travel. You should be able to stop it in either direction somewhat easily. If you’re testing the door for the first time be careful until you’re sure the pressure limits are reasonable set.
You don’t want it set too loose, but you don’t want it to crush something in its path or try to open a 100-pound garage door with a broken torsion spring either. If properly set, this feature, along with the other two features can help prevent injuries to humans and pets, along with protecting your garage door and opener from expensive damage.

Garage Door Maintenance Safety Precautions
Before beginning the maintenance on your garage doors, there are a few safety-related items you should be aware of. Below are the main areas of focus. Let’s look at what to look for and how to protect yourself.
I’ve worked in a “safety-sensitive” industry for over 35 years and have seen first hand how the below items can protect you from injury. There are also some links to other articles I’ve written on each topic with additional information. Please don’t skip this section, it’s very important.
Personal Protective Equipment (PPE)
When working on any home project you should always wear the appropriate Personal Protective Equipment. For this project, it should include safety glasses, hearing protection, if using compressed air, and a pair of leather gloves to protect you from sharp metal edges and frayed cables.
Lockout – Tagout (LOTO)
If you are not familiar with Lockout – Tagout, then please click this link and become familiar with it. LOTO involves identifying all possible energy sources you will be working around and taking precautions to protect yourself from them.
For this project, the main energy sources to be aware of is the potential for an automatic garage door opener to begin moving unexpectedly. To keep a garage door equipped with an automatic opener from moving unexpectedly you should unplug the opener. A moving door could injure your hands or fingers in the door mechanism or knock you off a ladder. Disabling the opener is the only real way to protect yourself.
The other thing to be aware of is that the torsion spring has an enormous amount of energy stored in it. A basic aluminum garage door will easily weigh 100+ pounds and this spring is responsible for lifting it. Any cables or equipment attached to the torsion spring/shaft will be under this extreme pressure. We’ll cover this more below.
Ladder Safety
Even a seven-foot garage door opener has components that will require a ladder to complete the maintenance. Knowing and using Basic Ladder Safety and good practices are essential. Things like never stand on the top two steps of a step ladder or don’t reach out too far from a ladder. Move the ladder instead. For more safe ladder best practices consider reading our article.
Garage Door Components Under Spring Pressure
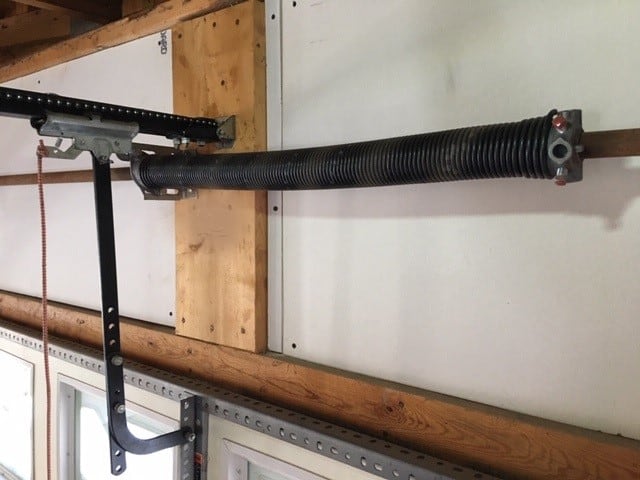
When performing maintenance on garage doors you need to be aware that several of the components are under pressure from the torsion spring. If any of the below components show signs of cracks, fraying, damage, or loose fasteners great care should be taken.
If an issue is found, in the article mentioned earlier on Replace A Broken Torsion Spring there is a section that will walk you through relieving the torsion spring tension. Once the spring tension is removed most parts can easily be replaced. However, if you are uncomfortable working with torsion springs, it’s time to call a professional garage door repair person. The goal with overhead garage door maintenance is to keep things working smoothly and to find small issues before they become big problems.
Tools And Materials Needed
Below is a list of the materials, tools, and equipment you’ll need to perform the maintenance on your overhead garage door.
Maintenance Areas Of Focus
Below is a list of garage door components and what maintenance they’ll need. All the components will need to be cleaned and lubricated. When using the preferred silicone lubricant, be sure to give it a few minutes to dry. Lubricating at least twice a year helps ensure easy movement and prevent rust. Some components should be lubed more frequently, especially if your doors get a lot of use. Let’s look at what you should be looking for during your component inspections.
Door Components Under Pressure
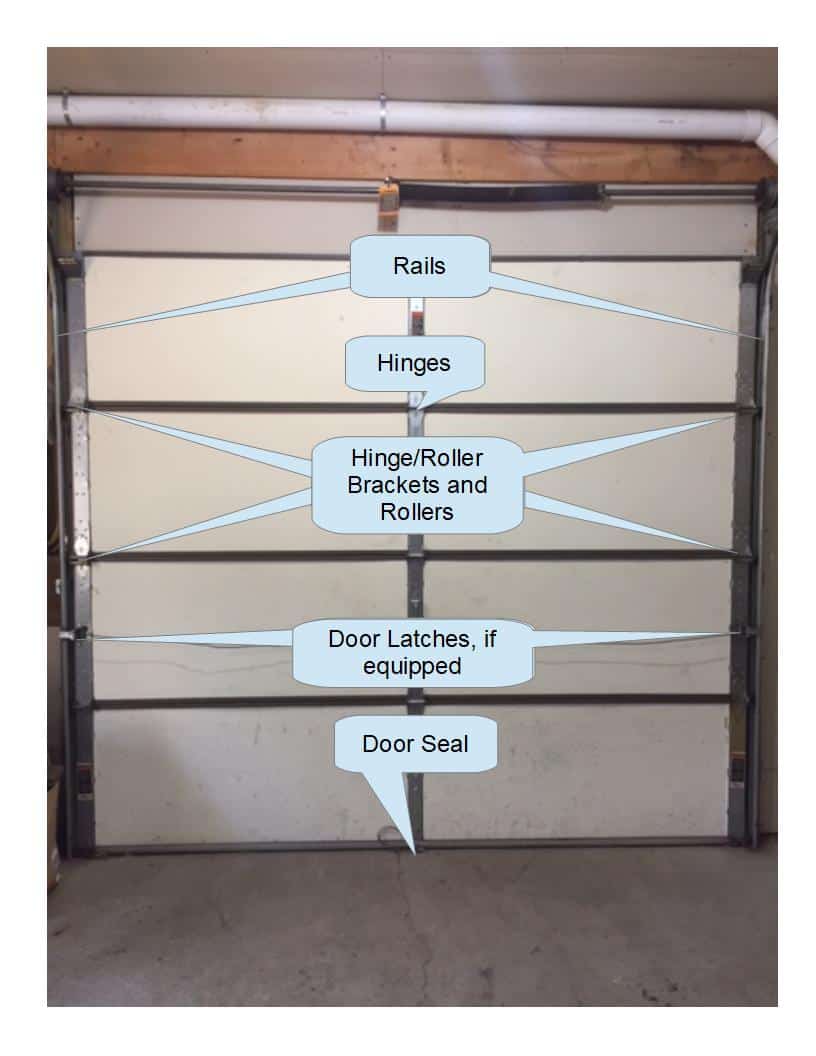
All Other Door Components
Door Opener Components
Conclusion
Taking the time to do a little garage door preventive maintenance can pay huge dividends. Your doors will operate smoother, more reliably, and much safer for many years. It only takes about a half-hour and is straightforward and easy to do. Don’t let small issues turn into big problems that can cost you hundreds of dollars to have repaired. Get started today.
If you have any comments or questions, you can leave them in the comments section below or you can email us at [email protected]. FYI, we do not collect or share email addresses. We will only use them to reply to your comments or provide answers to your questions. We are also required to let you know that some of our links are “affiliate links”. This means if you click on a link and make a purchase, we could make a small commission, at no extra cost to you. This helps offset the cost of maintaining our website. So, if you like what you’ve seen, please be sure to give us a “Like” and “Share” on Facebook and Instagram too. Thank you for reading and good luck with all your home projects!
Checking the balance is a fairly easy bit of maintenance to do. If the balance is not correct and you’re uncomfortable adjusting the torsion spring, then, by all means, contact a professional.
I never knew that it was necessary to check the balance of a garage door in order to make sure it is running smoothly. I don’t trust myself to be able to fix things, so this is something I should probably not do. It would probably be best to hire a professional technician for this.