
Many people looking to get into homebrewing can be intimidated by the whole brewing process. There are so many steps. You need a lot of special equipment to get started. It’s too complicated.
News flash! For someone wanting to try homebrewing, it’s none of those things. Let me show you the basics you’ll need to get started. I will walk you through my typical extract brewing steps on brew day.
I have been homebrewing since 2009 and I still brew mainly using mainly beer kits. I’ve read and understand that all-grain brewing produces superior beer to extract brewing in many ways.
But like many of you, I am not ready to make the investment in the equipment and the extra time it takes to get into all-grain brewing.
I may do some experimenting with the “brew in a bag” (BIAB) method in the near future, which I’m sure I’ll write about in a future blog article. But for now, I am very pleased with the beer I’m making with the extract kits. And I’m sure you will be too!
I do recommend reading my article “7 Reason Why Beer Brewing Is A Great Hobby”. It covers all the basic equipment needed and some good tips for beginners, as well. Then as we go through this brew day journey together I will help show you areas where you can look ahead and get prepared for upcoming steps.
Not only does this save time, but it also helps take all the stress out of the brewing process. We’ll cover all the basics you’ll need so you can have a smooth brew day.
In this article, we will be providing you with a few links to some products for pricing and informational purposes. We are required to let you know some of these links are “affiliate links”. This means if you click on a link and make a purchase, we could make a small commission, at no extra cost to you. This helps offset the cost of maintaining our website. Now, let’s get started.
Before Brew Day
Table of Contents
for starters, there are actually a few things you can do before brew day that will help ensure smooth going once you start brewing.
Take Inventory Of Ingredients
This is best done as soon as you get your ingredients/kit. If you go the kit route, most of them have a list of ingredients and good instructions. Familiarize yourself with both. If steeping grains are used in the kit, make sure a muslin steeping bag was included. If not, you’ll need to purchase one separately.
Have Plenty Of Good Quality Water
Beer brewing requires clean, sanitized, chlorine-free water. I am very fortunate in that I have my own well with clean bacteria-free water. I have never had trouble with my well water affecting my beer.
If you have a water softener, most of the books and information I’ve read recommend bypassing the water softener to get your brewing water. That is as long as your water is good otherwise.
Water softeners remove calcium and minerals and leave higher concentrations of sodium. This can affect the flavor of your beer. If your home’s water is not suitable, then you should consider getting some from a family member, friend, or buying bottled water.
I would recommend having a total of 6 to 7 gallons of water available. Depending on how vigorous of a boil you have, you could evaporate ½ to 1 gallon of water during the boil.
If you have sanitization concerns with the container or the water, I recommend sanitizing the container and boiling 3 gallons of the water ahead of time. Set it aside in a sealed container, so it can be used later for topping off the fermentor.
Be Prepared To Cool Your Wort
If you have an ice maker, start earlier in the week and fill a couple of plastic grocery bags and you should be in good shape. You will go through plenty of ice cooling 2 or 3 gallons of boiling wort in a sink with ice water. It will take you about 30 minutes to cool the wort.
Check Your Yeast
Yeast should have a date on it, so you know how old it is. As yeast ages, they will have less viable cells. This can affect fermentation. Dry yeast will keep significantly longer than liquid yeast. Both should be kept in the refrigerator until ready to use.
If you suspect any issues, you may need to begin preparing your yeast the night before, using a yeast starter. If you have any questions on yeast preparation, read my complete “Guide On Preparing Yeast For Beer Brewing”. It has everything you’ll need to know to make sure your yeast is ready to go on brew day!
Brew Day
I like to look at brew day as a well-choreographed dance. There are many steps you’ll have to complete, but you don’t have to do them all immediately once the music starts. What I mean by that is there are several steps in the process that take time. For example, between heating water, steeping grains (if used), and boiling the wort you could have up to 1-½ to 2 hours involved.
Of course, you’ll still need to monitor each step as you go, but you’ll also be able to prepare for other upcoming steps as well. This can save you up to an hour easily on your brew day.
However, go at your own pace. Brewing beer should be enjoyable. If you’re not enjoying the process, then you’re in it for the wrong reasons.
My Extract Brewing Steps
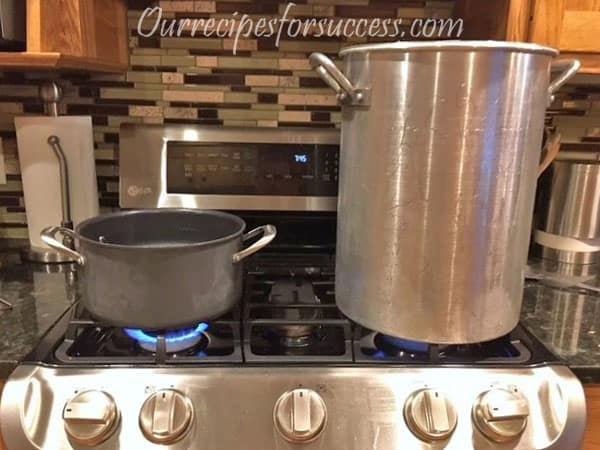
I usually start with heating water. You’ll be surprised how long it takes to heat 2 or 3 gallons of water on a kitchen stove. You’ll want a kettle big enough to hold 16 to 20 quarts. This gives you extra room to help avoid “boil over”.
If you have an outdoor propane cooker, these work well for beer brewing. They can help reduce the time required for heating
Steeping Grains
What are steeping grains? In extract brewing kits, there are often “specialty grains” used to add color, flavorings, texture (creaminess or mouthfeel), or a combination of any or all three. Not all beer recipes call for steeping grains, but for certain styles of beers, they make a big impact and are essential to the recipe.

Filling Muslin Bag Steeping Grains In Bag 
Steeping The Grains


If your recipe has steeping grains in it, I start by heating the water for steeping before starting to heat the water in the brew kettle. You should
Once the water reaches 155°, place the steeping grains into the water. Make sure the water covers the entire bag. Steeping times vary anywhere from 30 to 45 minutes. During that time monitor the temperature of the steeping water, now officially called wort, and keep it at 150°, ±2°. This can be done by turning the burner on low, for short intervals.
Other Activities While Steeping Grains
While monitoring the steeping grain temperature there are a couple of things you can be doing to prepare for the next step. First, start heating
You’ve already got 1-1/2 gallons of water from the steeping and rinsing of grains. If you’re boiling your wort on the kitchen stove, I would recommend limiting your volume to a total of 3 gallons of water.
The reason for this is so you’re able to obtain and maintain a good vigorous boil. Much more than 3 gallons and that becomes difficult to do. So while your waiting you can add 1-½ gallons of water to the brew kettle and start heating it. This is called a partial wort boil. I will cover this more in the boiling section below.
After the grains have steeped for the required time, lift the bag out of the water. Let as much of the liquid run out of the bag as possible. Do not squeeze the bag! This is said to force tannins and other off flavors out of the grains that can negatively affect the beer. Instead, you rinse the grain with the water you heated above to
I usually sit a colander, or a strainer of some sort, in a large bowl. Put the grain bag in the strainer and slowly pour the rinse water over it. Once the grain bag has fully drained, take the steeping water/rinse water and add it to the brew kettle. You now should have up to 3 gallons of water (and steeping wort) heating in the brew kettle.
As I mentioned earlier, you’ll have a little time until the water comes to a boil. This is a great time to lay out all the other ingredients to be added to the boiling water (liquid malt extract, dry malt extract, flavoring hops, second hop addition, spices, flavorings, etc…). If you still have time continue with gathering your fermentor, sanitizing solution, and all the other equipment you’ll need (siphons, tubing, funnels, etc…).
If you need to mix up sanitizing solutions, now is a good time too. Remember, any of this equipment that will come in contact with the cooled wort must be sanitized. This is crucial. If you’d like more information on cleaning and sanitizing your equipment, my article on “Cleaning And Sanitizing Beer Brewing Equipment” covers this in-depth.
Boiling The Wort
I’m not a chemist, so I’m not going to pretend I know all the chemical/physical changes that the malt extract, hops, and other ingredients go through during the boil. The good news is you don’t have to be a chemist to brew good beer.
What I will do is share the basic information I’ve learned from reading countless books, magazine articles, and online forum threads that will help you through the broiling process. This will include why we need to boil the wort and the benefits of boiling. I also want to provide you the actual different boiling options that are available to you as you progress along your homebrewing journey.
Why Do You Need To Boil Wort?
Boiling your wort is an essential part of the brewing process. It does several things, all of which makes for better beer. I’d like to share a few of the basics with you.
Get Rid Of The Nasties
Boiling the wort kills all the bacteria and any wild yeasts that may have been present in the water, ingredients, or the kettle. When it’s time for fermentation this helps ensures that the pitched yeast will have a better chance of producing the desired flavors for the particular beer style being brewed.
Form The Hot Break
A good vigorous boil helps cause the proteins, and other compounds, from the malts to separate out in the wort. This is called the hot break. It’s some of the foamy looking material floating on the top of the wort during the boil.
If you want to scoop it off the top, that’s fine. After cooling the wort, the bulk of this material will drop out and settle to the bottom of the kettle. This will improve the clarity of the beer.
Improve Hop Utilization
Boiling improves the bittering hops utilization. This simply means more of the alpha acids are extracted out of the hops during the boil. Not only does this help with bittering the beer, it also helps extract the flavors and aromas that go into producing a specific style of beer.
Reduce Off Flavors
Another benefit is that a few off-flavors are evaporated off during the boil. This helps get rid of astringent flavors and improve the quality of the beer. For this reason, once the wort begins to boil you should remove the lid from the kettle.
These are just some of the important ones in my eyes. There are yet others like it darkens the wort and it concentrates the sugar contain through evaporation. In short, it’s an important part of the process, so don’t cut it short.
Different Types Of Boils To Choose From
Like many things, there are different ways to get a job done. Brewing beer is no exception. Depending on the size of your brew kettle and the heat source available to you, there are a couple different ways to brew
Full Wort Boil
A full wort boil is when you boil the entire 5 gallons of wort all at once. To do this you will need a good heat source and a large pot capable of holding 7 or 8 gallons. This lets you start with 6 gallons of water, to allow for evaporation, and a little space to help prevent boil over.
As for the heat source, an outdoor propane cooker is a good choice. They can bring the entire kettle of wort to a rolling boil, which is what you need.
The benefits of a full wort boil are that the wort is typically lighter in color, which is obviously good when brewing lighter colored beers. The other main benefits are it helps with hop utilization, mentioned above, and reduces the risk of wort contamination when adding water to the fermentor when using a partial boil.
The biggest downfall is it’s much more difficult to quickly cool the larger volume of wort after the boil. You may want to invest in a wort chiller once you get to this stage. But for starting out, the next type of boil works well for getting your feet wet.
Partial Wort Boil (concentrated)
A partial boil is just what it sounds like. You start with 3 gallons of water to boil the malt extract and hops in. After boiling you may only have 2 or 2-½ gallons of wort, due to evaporation. After it’s cooled and put in the fermenter you top the fermenter off to 5 gallons with fresh sterile water.
Partial wort boils normally result in darker colored beer. If you’re brewing an amber or darker colored beer that’s not much of a concern. However, if you’re brewing a lighter colored beer I have tried the next method, which helps keep the beer a little light. I believe it did help with the color and I did not notice any harm to the quality of the beer.
Late Addition Malt Extract Boil
This method of a boil is normally used in conjunction with a partial wort boil. Only half of the malt extract is added to the brew kettle for the full 60-minute boil. The main reason for this is to help keep the beer lighter in color. The high sugar content in a high gravity wort it susceptible to darkening during a 60-minute boil.
Another benefit involves the hops bittering. The hops utilization and bittering quality are said to be much better when boiled in the presence of the sugars in the wort. In fact, some sources I’ve read claim a lower gravity wort improves the bittering over the higher gravity wort in a partial boil.
The remaining half of the malt is added with only 10-15 minutes left in the boil. Unlike hops, which require the full 60 minutes of boiling, malt only requires 10 to 15 minutes of boiling to reach the hot break (mentioned earlier). This may be the best way to make a lighter colored beer for an extract brewer.
Beginning The Boil
Once the water begins to boil it’s time to add the malt extract to the brew kettle. At this point, you have already determined the type of boil you are going to use, from the three choices above. The malt extract is usually added to the kettle as you near the boiling point, or at first signs of boiling.
When adding your malt it is best to remove your brew kettle from the heat and stir while slowly adding the malt. This is to prevent scorching the sugars in the malt on the bottom of the hot
kettle. The liquid malt syrups are more susceptible than the dry malt extracts (DME) because it is thick and dense and will settle right to the bottom. The stirring helps prevent it from reaching the bottom and should be done for a couple of minutes to help ensure the malt extracts are dissolved and suspended in the water. It can then be placed back on the heat, stirring occasionally, and bring it back to a boil.
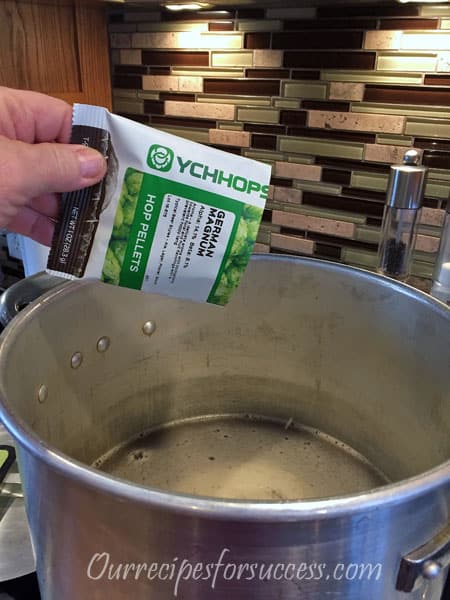
Once the wort begins to boil again it’s time to add the first addition of hops. Also known as the “bittering hops”. As mentioned above, this can be done at the same time the malt is added, but I usually wait until the water begins to boil.
I do this because this is when you should start timing boil and it will give you a more consistent time to judge your bittering hops utilization. The typical boil time is usually 60 minutes, but some recipes require longer boils.
Keep the wort boiling at a nice rolling boil. It’s also the time to watch out for the dreaded boil-over! I’ve never had too much trouble when boiling 2-½ to 3 gallons of wort, in a 5-gallon kettle, on a kitchen range. But you shouldn’t walk away and leave it unattended for very long.
If you are ever boiling outside on a bigger propane cooker, which is nice during the summer, you’ll definitely need to watch for boil-overs and be prepared to stir the wort and adjust the heat.
Other Activities During The Boil
Even though you will be watching the boil and giving it an occasional stir, you’ll still have plenty of time for other tasks. Here are the tasks I usually do during the boil.
It’s at this time, if I am using dry yeast, I would boil the water used to rehydrate the yeast. I simply heat the ½ cup water to a boil in a Pyrex measuring cup in the microwave. Sit out on the countertop, lightly covered, to let it begin cooling. At the end of the 1-hour boil the water should be close to the 100° recommended to rehydrate yeast in.
For more information on how to prepare the yeast for beer brewing, check out our article. It covers rehydrating yeast and much more.
I also like sanitizing my fermentation equipment at this time. This includes anything that will come into contact with the cooled wort! That includes items such as the fermentor (carboy or bucket), siphon, tubing, hygrometer, thermometer, wort thief and funnel.
You’ll also need to sanitize anything used to prepare the yeast, like a small spoon (stir hydrated yeast), scissors, and the yeast packet. I usually keep a container and a spray bottle with sanitizer in them to re-sanitize something I may inadvertently drop or sit down on a non-sterile surface. Sanitization is very important for producing good beer.
2nd Hops Addition
The next event you will normally come to is the 2nd addition of hops. This is usually referred to as the flavoring hops. Flavoring hops are normally boiled for anywhere between 15 to 30 minutes. The time of this addition is dictated by the recipe.
Because this addition of hops is done later in the boil, the hop utilization is less. All that means is less of the alpha acids are extracted, so it adds little bitterness and just more of the hop flavor. Adding different hop varieties throughout the boil contributes some unique flavors and aromas to the beer.
Other Activities After 2nd Hop Addition
Any remaining time here can be used finishing up sanitizing your fermentation equipment. If you are rehydrating dry yeast, you will also want to check the temperature of the ½ cup of water you boiled earlier. Remember, you’re shooting for about 105°. You will probably start rehydrating as soon as you start cooling your wort with the ice bath in the sink, which will soon be here.
Malt Extract (Late Addition Method Only)
If you’ve chosen to use the “late malt addition” brew method discussed earlier, this is the time to add that malt. This is typically done with about 15 minutes left in the boil. Remember to either continually stir the wort while adding your malt extract (LME and/or DME) or remove it from the heat when adding it.
3rd Hop Addition (optional, recipe dependant)
Some recipes call for a third addition of hops referred to as “aroma hops”. This hop addition is usually done with about 5 minutes or less left in the boil. Sometimes they are added at “flameout”, which is just what it sounds like. Add the hops, then shut your burner off. Most of the aromatics in hops are boiled off in a very short time. This hop addition helps ensure a good hop presence and aroma.
Time To Cool The Wort
Cooling the wort is a very important part of the brewing process. Rapidly cooling the wort does a couple of things for you. The first is to help form the “cold break”. The cold break is when all the floating material that was formed during the boil begins to coagulate and eventually drop out of solution. This helps to make a clearer beer.
The second benefit of quickly cooling the wort is to get it down to yeast pitching temperature. By doing this you can pitch the yeast and get it sealed up in the fermentor sooner, which reduces the chance of exposing the cooled, vulnerable wort to undesired bacteria.
Cooling Wort In An Ice Bath
Most people starting out in homebrew use the ice bath method for cooling the wort. It’s easy, effective, and doesn’t require any special equipment. Why invest in equipment before you are 100% sure you are going to enjoy the hobby. Ice bath cooling does take a little longer to cool the wort, but nothing detrimental to the beer.
Leave the stirring spoon right in the brew kettle. You will use it for gently stirring the wort while cooling it. That also means the spoon is safely sanitized. If you ever remove the spoon from the wort and sit it down for any reason, be sure to spray it or dip it in sanitizer before returning it to the wort.
Ice Bath Cooling Tips
When using the ice bath method for cooling wort, I like to put the kettle in a sink filled with 3 or 4 inches of cold water. Then add a good amount of ice and finish adding enough water to get the ice floating nicely. With the water displacement of the kettle and the ice, an average kitchen sink should be close to
I like doing this so you can swirl the ice water a little around the outside of the kettle. As the ice melts just keep adding more ice into the sink. You will go through quite a bit of ice, so hopefully, you stocked up or bought 2 or 3 bags of ice as recommended above.
You will also want to gently stir the wort in the kettle as well. This helps keep the hot wort in contact with the cold sides of the kettle. This will help cool the wort faster. The stirring action also has another positive effect. It is called whirlpooling.
As the wort lightly swirls around the outside edges of the kettle, the center of the kettle becomes relatively calm. So all the cold break, hop particles, and other materials in the wort, also known as “trub” in the brewing world, all tend to drop out and settle in the center of the kettle.
Once you get close to 80° or 90°, give the wort one last gentle swirl and let it sit for 5 or 10 minutes to allow it to settle one last time. The whole cooling process can easily take up to 30 minutes. So just keep adding ice and finish up the last couple of items below.
Other Activities During Wort Cooling
As soon as you get the kettle cooling in the ice bath, it’s a good time to start rehydrating your dry yeast packet. The water you boiled earlier should be close to the 105° temperature. If not, hold the pyrex measuring cup in the ice bath water and that small volume of water should cool very quickly. Remember, the thermometer and stirring spoon should be sanitized before placing them into the rehydration water.
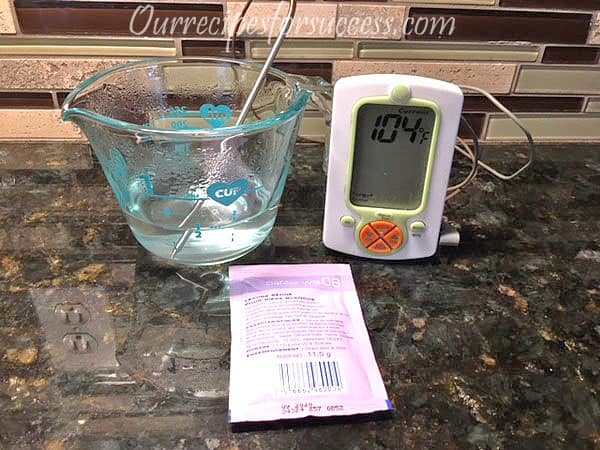
Spray or dip the yeast packet and scissors you’ll use to open the packet in sanitizing solution. Sprinkle the yeast on top of the water, lightly cover it, and let it sit for 10 minutes. After 10 minutes gently stir yeast into the water, creating a creamy mixture. Now let it sit until it’s time to pitch it.
This is also a good time to get the water around you’ll need to top the fermenter off to the 5-gallon mark. Especially if it was water you need to purchase or pre-boil.
If your carboy or fermenting bucket does not have any gallon measurement marks on it, I highly recommend taking the time to do so. It makes this part of the process much easier.
Note: At the risk of sounding repetitive, don’t forget about sanitization! It’s that important. The wort is at its most vulnerable state. An infection can ruin all your hard work and waste the cost of your ingredients.
Siphon The Cooled Wort To The Fermenter
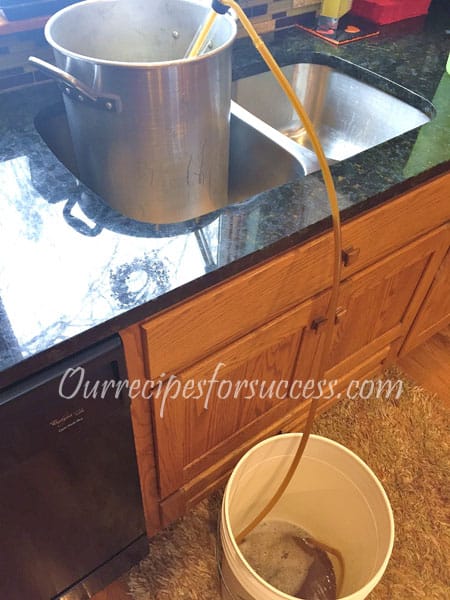
Once the wort has cooled to 80° or 90° I will usually siphon, also known as “racking” in the beer brewing world, the wort into the fermenter. Hold the end of the siphon toward the outside edge and just up off the bottom of the kettle.
This takes advantage of the “swirling” action from the cooling. It will help leave a large portion of the trub behind. Note: Again at this point, nothing should come in contact with the wort that has
If you do not have a siphon, that’s okay. Just slowly pour the wort from the brew kettle into the fermenter. You will probably get a little more trub in the fermenter, but it will settle out before bottling.
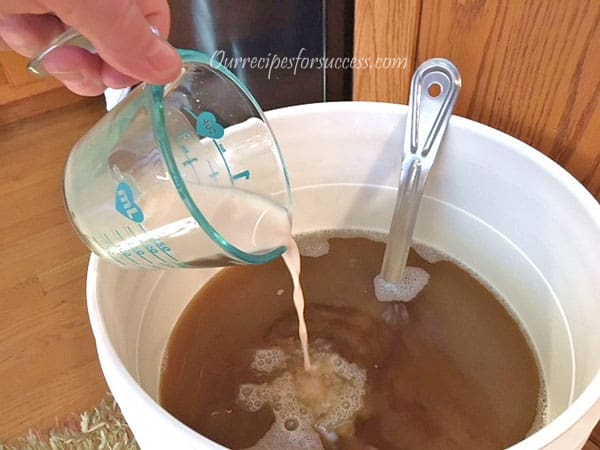
Top off the fermentor with the clean, sanitized water you set aside earlier. Bring it up to the 5-gallon mark on your fermenter.
Because of boiling, much of the oxygen has been removed from the wort. Unfortunately, yeast needs oxygen to be able to complete fermentation. Some advanced brewers inject oxygen into the wort while others simply shake the sealed fermenter.
I usually just vigorously stir the wort while pouring in the water, trying to introduce as much air into the wort. This seems to work fine, as I have not experienced any notable issues with fermentation.
Note: This is one of the only times you want to knowingly introduce oxygen into your wort. Introducing air/oxygen to hot wort, or after fermentation begins, can create off-flavors in your finished beer.
Take A Hydrometer Reading
Once you have your full 5 gallons of beer in the fermentor, it’s time to take a hydrometer reading. The hydrometer will give you a measurement that is representative of how much sugar is in the wort.
Water has a specific gravity (density) of 1.0. As the sugars from the grains are added to the wort, that density increases. Knowing the sugar content in beer brewing is very important. Let’s take a look at a couple of reasons why it can help you make better, more consistent beer.
Why Should I Take A Hydrometer Reading
All beer styles have a certain alcohol range they should fall into to ensure they fit within that style. For the beginner, brewing with ingredient kits, this step may be optional. Most ingredient kits will supply you with an estimated “original gravity” (OG) based on the ingredients provided. And most beers will ferment out close to 1.01 “final gravity” (FG).
If you have the starting gravity and the final gravity there is a handy little calculation you can use to estimate the “alcohol by volume” content (ABV). This calculation is intended to just get you close, and it does vary a little from website to website (ABV=(OG-FG)*132).
Most recipe kits will give you the approximate alcohol content for your particular kit and that’s usually close enough for our needs in the beginning.
However, once you start buying separate ingredients and creating your own recipes, or tweaking your favorite recipe, you’ll definitely want a hydrometer. It’s a must-have tool once you start experimenting with recipes.
If you start out by buying a starter home brewing kit, some kits come with a hydrometer. If you already have a brew kettle, then here is a nice, inexpensive beer brewing starter kit from Amazon. It has everything else you’ll need to get started, except a hydrometer and a recipe kit.
Hydrometer Use Best Practice
Another good habit to get into is taking a final gravity reading. It will give you a good indication of how well the fermentation went. If the yeast was good and healthy, your beer should have fermented down to
If for some reason you have a higher than normal FG, you may have to repitch some fresh yeast and give it a few more days. This type of thing is rare, but it’s good to know before you bottle or keg your beer.
The point is the hydrometer is definitely a useful tool to have as you progress down the home brewing path.
Another factor that can affect the specific gravity reading is the temperature at which the hydrometer is calibrated to. Hydrometers used for homebrewing are typically calibrated for use in the area of 69° to 70°, but be sure to verify the rating on your hydrometer. They could vary between manufacturers and some of the older ones have much lower ranges. If you get your wort to 70°, ±5° you should be fine.
If you have a hydrometer for making maple syrup, most of them are rated for the 200-degree range. One of these should not be used for beer brewing or vise-versa. To see what effect wort temperature has on your specific gravity reading go to brewersfriend.com and try their temperature adjustment calculator.
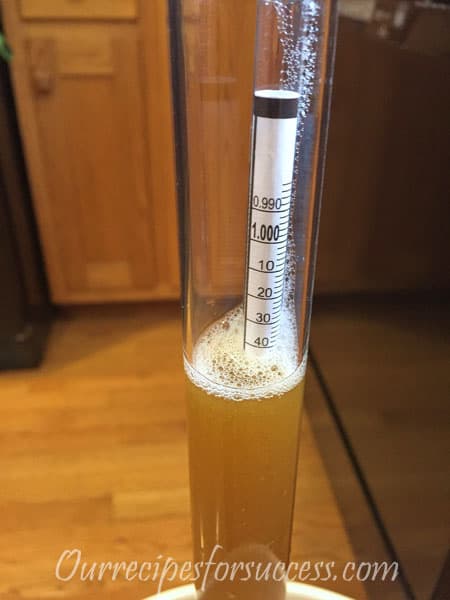
How To Take A Hydrometer Reading
There are actually a few different ways to get a hydrometer reading. The method can vary depending on the type of fermenter your using and also on personal preference. You may need to make a small investment in one or two extra pieces of equipment to go along with your hydrometer.
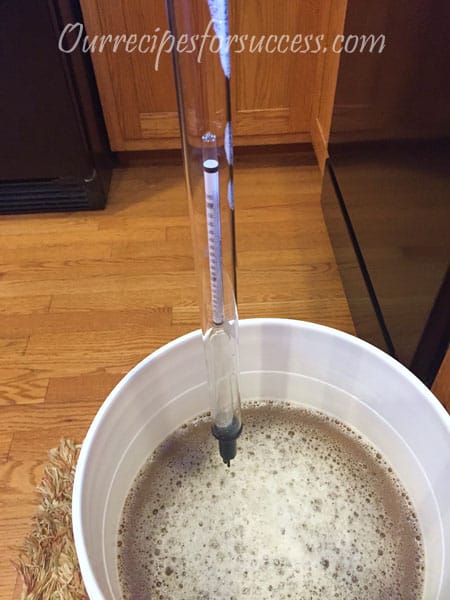
If you are using plastic buckets as fermenters, one of the easiest ways is to just place the hydrometer in the bucket. Sometimes it can be a little difficult to get an accurate reading because of foam on top of the wort from aerating it. Plus the hydrometer sits down inside the bucket five or six inches, but you should be able to get pretty close.
How To Use A Hydrometer Test Jar And Thief
The second way is to use a “hydrometer test jar” and a “thief”. The hydrometer test jar is a tubular vessel you place the hydrometer in and then fill it with your wort sample. It makes it very easy to get a good reading from the hydrometer.
A “thief” is basically a tube with a small check valve in one end of it. When lowered into the wort the check valve lets wort flow into the tube. After the tube fills, lift it out of the wort. The check valve closes holding all the wort in the thief.
The thief I use and recommend (link above) has a small tip on the end that when pressed against the side of the test jar, or fermenter, opens the check valve and allows the sample to flow out.
How To Use A Hydrometer With A Carboy
When using a carboy with a smaller opening the thief and test jar is the best option. You use the thief to collect a sample out of the fermentor and place it in the hydrometer test jar, along with the hydrometer. Because of the wort level in a carboy and the length of the thief, you may need to collect 2 or 3 small samples with the thief in order to get the hydrometer to float in the test jar.
The third option is to put the hydrometer in the thief and collect enough of a sample in the thief to float the hydrometer. This method works well with fermentation buckets, or any fermenter with a large opening, that allows you to fully insert the thief into the wort to collect a large enough sample to float the hydrometer inside the thief. This is the method I use and it works well.
Time To Pitch The Yeast
You’ve got the wort in the fermenter and the specific gravity looks good for the style of beer you’re brewing, so it’s time to pitch the yeast. Whether you’re pitching a yeast start, rehydrated yeast or liquid yeast from vile they should be at room temperature and ready to go. Let’s look at a couple of things yeast related that I believe will help make your beer a success.
What Is The Best Yeast Pitching Temperature
Make sure the wort and yeast temperatures are about the same before pitching the yeast. Much like the hydrometer reading requirement, if you can get the wort and yeast to about 70° (±5°) you should be fine.
If anything I would shoot for the upper end of that scale. The warmer temperature will help the yeast get going. But after you get the yeast pitched, slowly start lowering the wort temperature to the correct temperature specified by the yeast manufacturer.
Your Brew Day Is Complete
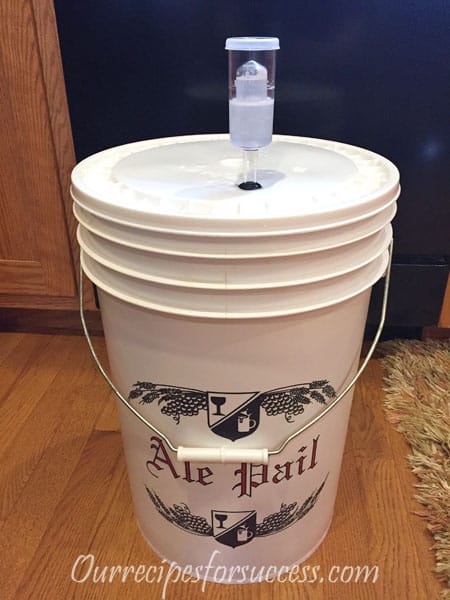
With the yeast pitched, the fermenter closed up with an airlock on it, and it stored away in a nice cool spot, your brew day is officially over. Well, except for a little cleanup. Over the next week or two, you will need to monitor the progress of the fermentation. That only requires a few minutes a day. You need to make sure fermentation starts, by watching the airlock for signs of bubbling, and to maintain a fairly steady temperature.
To help make sure your brew day is a real success, below is some additional information to help make sure your fermentation goes well.
Beyond Brew Day
One of the most important factors for a good fermentation that you can control is the temperature. Most fermentation temperatures are taken with strip-type thermometers that stick to the side of the fermentor or by just monitoring the temperature of the area the fermenter is in.
One thing you should know is that during fermentation the yeast will generate their own heat while consuming the sugars. That means inside the fermenter the temperature could easily be a few degrees higher. High fermentation temperatures can stress the yeast, which can cause several problems and create off-flavors.
Conversely, if you cool the wort too much, some yeast strains will become sluggish or inactive and the fermentation will become stuck (stop, quit). This is another good reason for taking the FG reading with your hydrometer.
If you suspect that your wort has cooled too much and the gravity is still high, try moving it to a warmer area to see if the yeast becomes active and fermentation restarts.
For these reasons, I always aim for the middle of the yeast strains preferred temperature range provided by the manufacturers. If you can find an area in your home with the right temperature range you’re all set. Otherwise, you may have to monitor and control the fermentation temperature by other means (swamp cooler, cardboard box with ice jugs, blankets, etc…) a couple of times a day. Doing this is not as bad as it sounds. If you’re like me, you’ll want to keep an eye on the airlock (bubbler) to see how the fermentation is proceeding anyways.
My Fermentation Chamber

Wort In Fermentation Chamber Ice In Fermentation Chamber


I actually made a fermentation chamber that uses frozen ice bottles and a temperature-controlled fan. It works great. I hope to share that project in a future article. In the meantime, if you have questions about it shoot me an email.
Conclusion
From start to finish my average brew day, including clean up, will range from 3 to 4 hours. It all depends on whether you are using steeping grains and what volume of water you are actually boiling.
By incorporating as many tasks as I can throughout the process, I have shaved off at least an hour from my brew day. Even though homebrewing is a labor of love, it doesn’t have to take up your entire day. Give my extract brewing steps a try and let me know how it works for you. Cheers!
If you have any comments or questions, you can leave them in the comments section below or you can email us at [email protected]. FYI, we do not collect or share email addresses. We will only use them to reply to your comments or provide answers to your questions. We are also required to let you know that some of our links are “affiliate links”. This means if you click on a link and make a purchase, we could make a small commission, at no extra cost to you. This helps offset the cost of maintaining our website. So, if you like what you’ve seen, please be sure to give us a “Like” and “Share” on Facebook and Instagram too. Thank you for reading and good luck with all your home projects!