Is your lawn and garden equipment rattling or making funny noises? One possible cause is a drive belt guard has broken or come loose. We recently experienced just this type of issue. Come along and see what was found and learn how hobby welding was the perfect solution to the problem.
In many circumstances cracked or broken equipment parts are the cause of these unwanted noises and other issues. By identifying these issues early it’s much easier to get them repaired instead of having to replace them. Even better yet, if you are able to make these repairs yourself you can save significant time and money.
Taking up hobby welding is one of the best ways to accomplish this. This article is another good example of how making your own welding repairs can be a big saving. See how easy it was to take care of this issue.
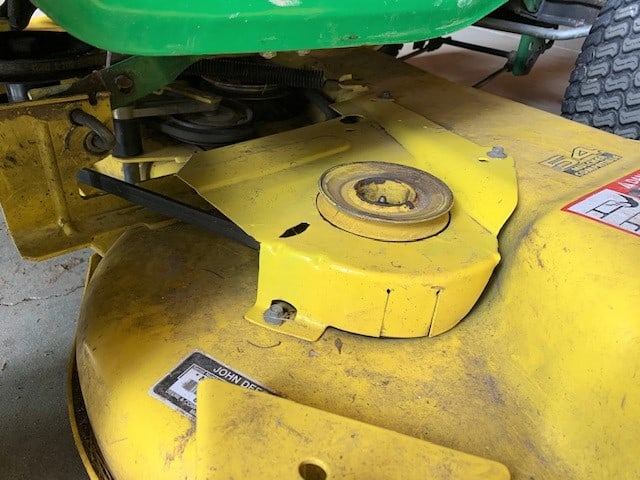
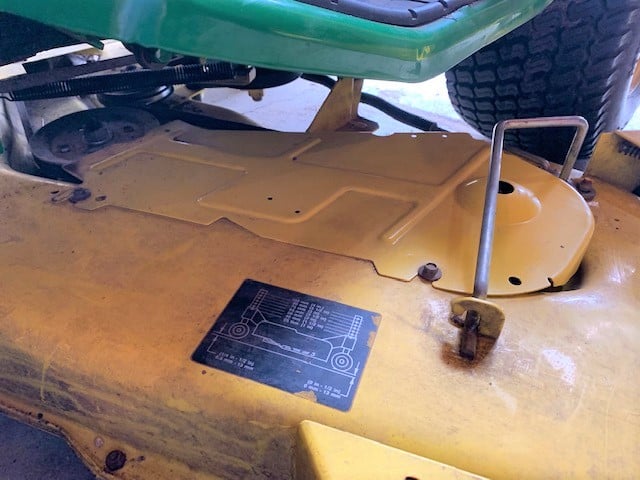
While mowing the grass we had a lawnmower start making an unusual noise. When the mower was disengaged the noise stopped. With a little investigation, we found that the supports that secure one of the two belt guards on the mower deck had broken and came loose. This allowed the guard to drop down and come in contact with one of the belt pulleys on the mower deck.
After further disassembly it was found that the support tabs on the second mower deck belt guard had cracked too. By stopping and checking things out it prevented further potential damage from happening. It also prevented the possibility of injuries from flying parts or broken belts. It’s very important to check out any unusual noises before you end up with a major failure and an expensive repair.
The Problem
Table of Contents
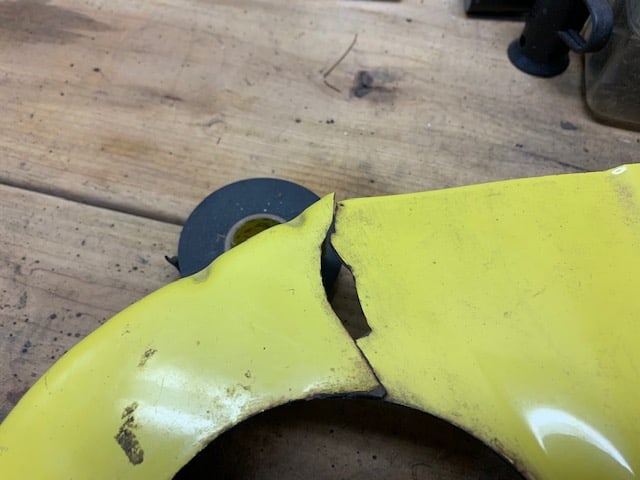
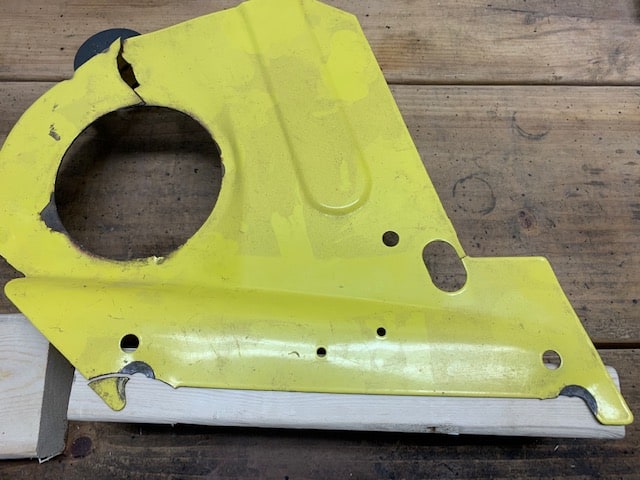
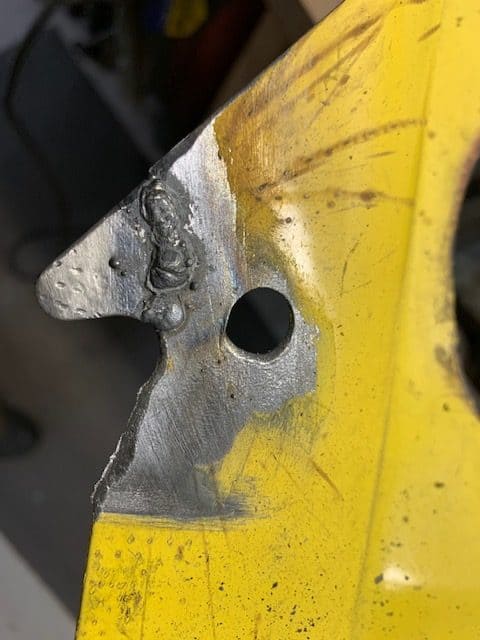
In the photos above you can see that just about every support tab on the two belt guards were cracked and/or were missing pieces. The bolts and washers that secure these guards were covering most of the cracks, so it was difficult to see. However, a couple of the support tab pieces that had broken off were missing, so that indicates that some of the bolts may have come loose as well. Once the mower deck loosened up it could have lead to the large crack in the second picture.
By their nature, these protective guards operate very close to moving parts. They are there to protect us from coming in contact with these moving parts. But in the event they should fail, they can become entangled in the belts and pulleys and become a hazard themselves. Maintaining these guards is as important as changing the oil.
What Caused The Problem
Most lawn and garden equipment operate in harsh environments. Many are used in the heat of the summer, not to mention the heat they make during operation. Heating and cooling screws and other fasteners can cause them to loosen up over time. Coupled with operating on rough terrain and the vibration most of this equipment generates while running it’s only a matter of time.
It’s not just lawn mowers that are at risk of this type of failure. It could be snowblowers, rototillers, sweepers, or any type of belt, chain, or drive shaft driven pieces of equipment. They all need to be inspected on a routine basis.
How To Repair A Broken Belt Guard
Probably the easiest way to repair a broken belt guard is to go to the local dealer and have them order new guards and install them yourself. That typically takes a few days to get them and some of these guards are not cheap.
Another option is you could go online and order them. You can probably find them a little cheaper online, but then you have to pay for shipping and you’ll still have to wait for them to arrive.
The other option is to repair them yourself. If you’ve read any of our other articles on hobby welding, you’ll see why I love this option. In almost all cases you can make quality repairs at a fraction of the cost, and you don’t have to wait for parts.
To see what equipment you need to get started in hobby welding, and to see some of the other welding repairs I’ve been able to make, click on these links. There are lots of projects you can take on with a little practice.
Belt Guard Welding Repairs Needed
The best-case scenario would be to find and make the repairs when they are only small cracks. However, in this case, there were a few pieces missing, so I had to do a little fabricating as well. When you have a welder, some scrap steel, and a grinder, this is typically not an issue.
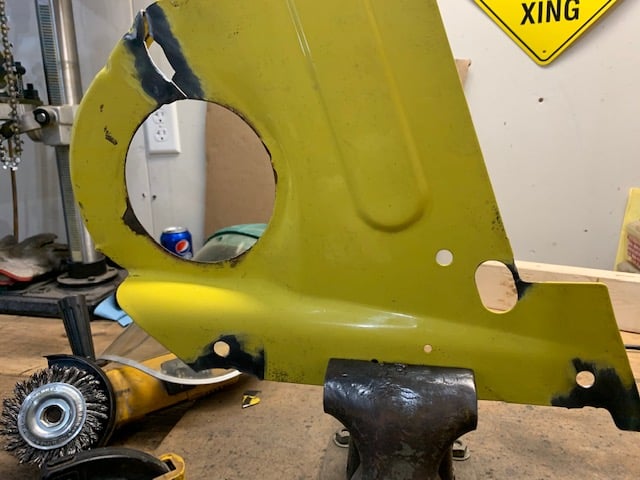
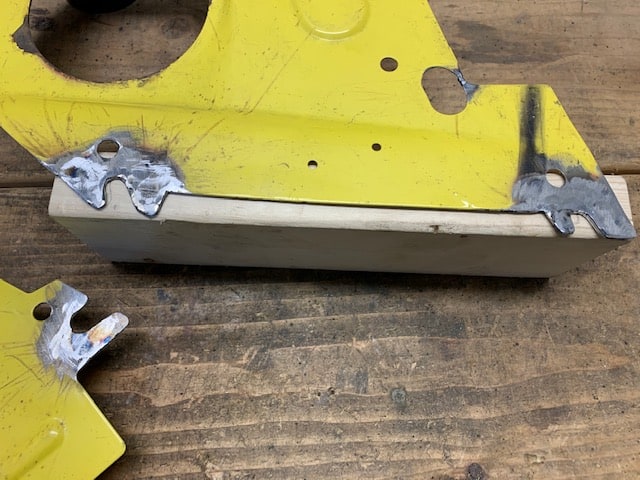
This mower had two belt guards on it and both of them needed repairs. One only needed some minor welding repairs, while the second one was the guard that had a large crack and a couple of pieces missing. We’ll take a quick look at the repairs made to this guard to demonstrate what is possible if you have your own welding equipment.
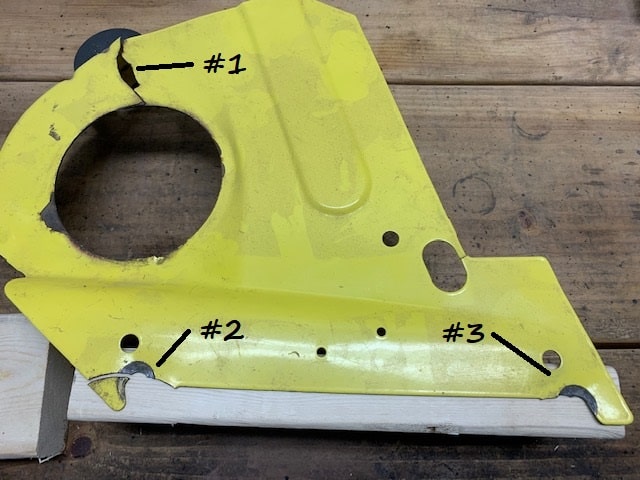
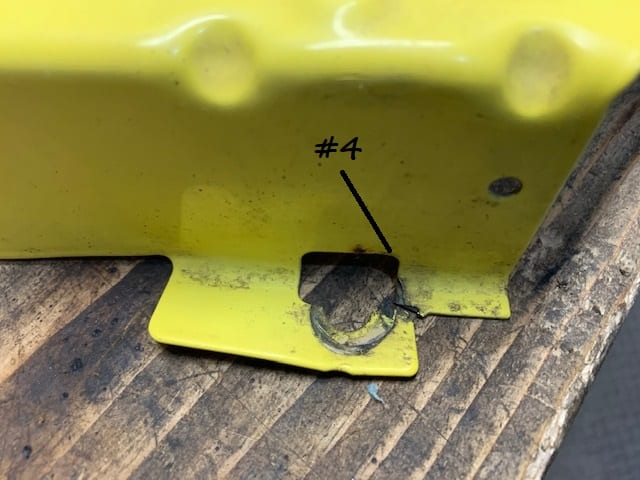
The first thing will be to weld all the broken pieces into place and repair all the cracks. Any welding repairs made to locations #2, #3 and #4 will have to be ground flat with an angle grinder, so they can be secured under the mounting bolts. #1 can be ground smooth so it looks a little nicer.

Guard #1 Guard #2
Steps For Making A Welding Repair
When making a repair like this there are several things to consider and steps to take to make a successful weld. Let’s take a look at a few of the most important items involved in this one.
Selecting A Welder
Like any project, you need the right tool for the job. To make a quality weld you need the correct welder. On thin or worn material, like this, you need to use very low heat, so in most cases, a MIG or flux core welder will work best.
Weld Preparation
Preparing the metal to be welded is very important. Make sure metal is free of any grease or oil and remove all paint from the surface. An angle grinder with a wire wheel works well for this. Please consider reading our article on angle grinders for some important safety tips and other uses homeowners can use them for.
Secure Pieces To Be Welded

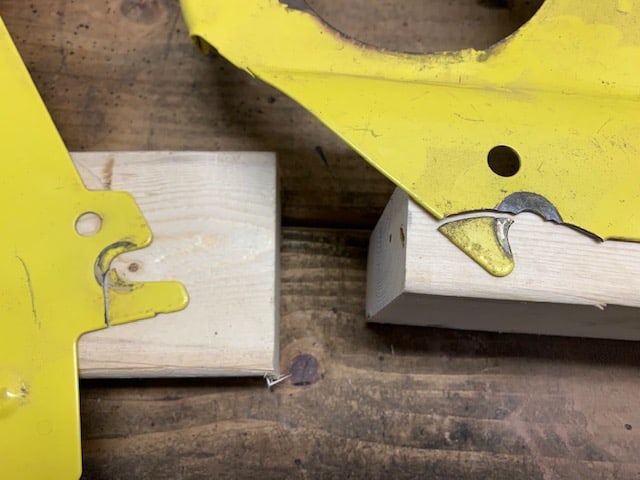
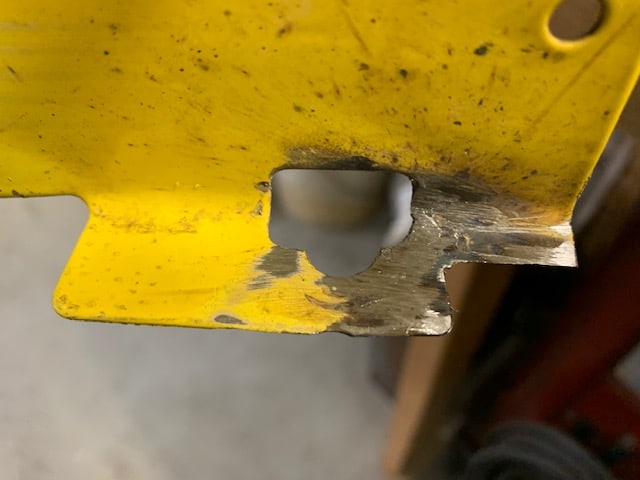
Broken Tab On Guard #1 Broken Tab On Guard #2
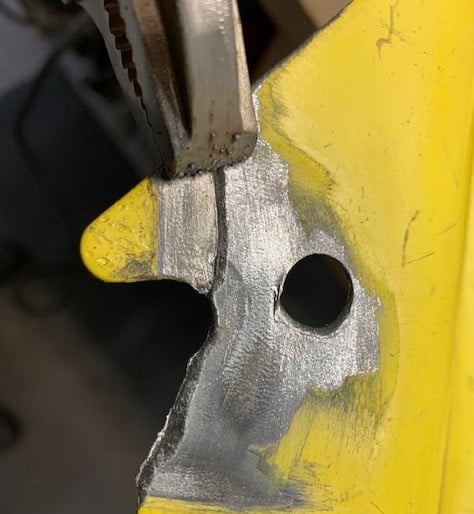
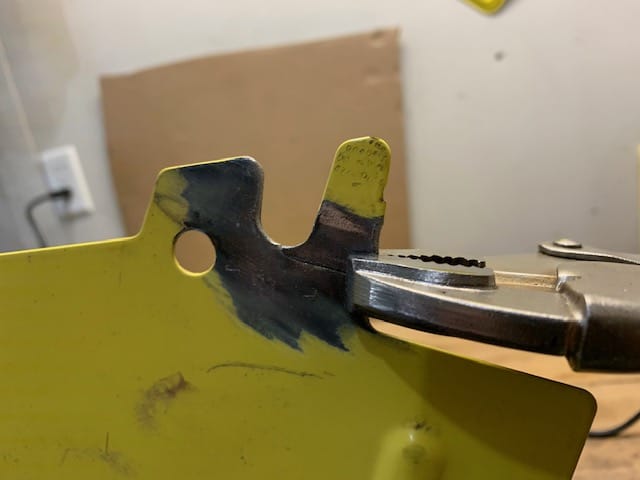
By fitting the pieces into place and securing them you ensure a proper lineup. This is important so that all the tabs and holes line up with the fasteners on the piece of equipment (the mower deck in this case). It makes reinstalling the guard much easier and doesn’t put any stress on the parts after being installed, which could lead to repeated cracking. A small pair of Vise-Grips works great for holding these smaller pieces together without obstructing your view or welding electrode access.
Thin metal can typically be fit tightly together because of the amount of penetration the welder gets. I was also able to turn the guards over and weld from the back too.
Tack Weld Pieces Together
A tack weld is a very short duration weld made to secure the pieces together. After putting a couple of tack welds on the pieces to be repaired, you should be able to remove the Vise Grips so you have full access to the area to be welded.
Welding Cracks On Thin Metal
Whether you’re new to welding or just getting into welding, it’s no secret that welding generates a lot of heat while in operation. When welding on thin metal like the belt guard in this article it can get so hot that you can burn through the metal. For this reason, you need to make many short duration welds lasting no more than a second or two. Then let the material cool for a few seconds and repeat. Do this until the entire crack or broken piece has been repaired.
If you happen to burn through, all is not lost. Just continue to make short welds to repair the hole. I discuss this technique more in-depth in a “mower deck welding repair” article I wrote. Check it out for more information.
Another issue we needed to take care of was the two pieces that had broken off and were missing. With a little scrap steel, of similar thickness, and an angle grinder you can easily take care of these kinds of problems. I welded a small piece of scrap steel on the backside of the mower belt guard and used an angle grinder to cut and shape it to form the missing tabs.
Finished Belt Guard Welding Repair
Three Repaired Tabs Repaired Crack On Guard #2 
Repaired Tab From The Back
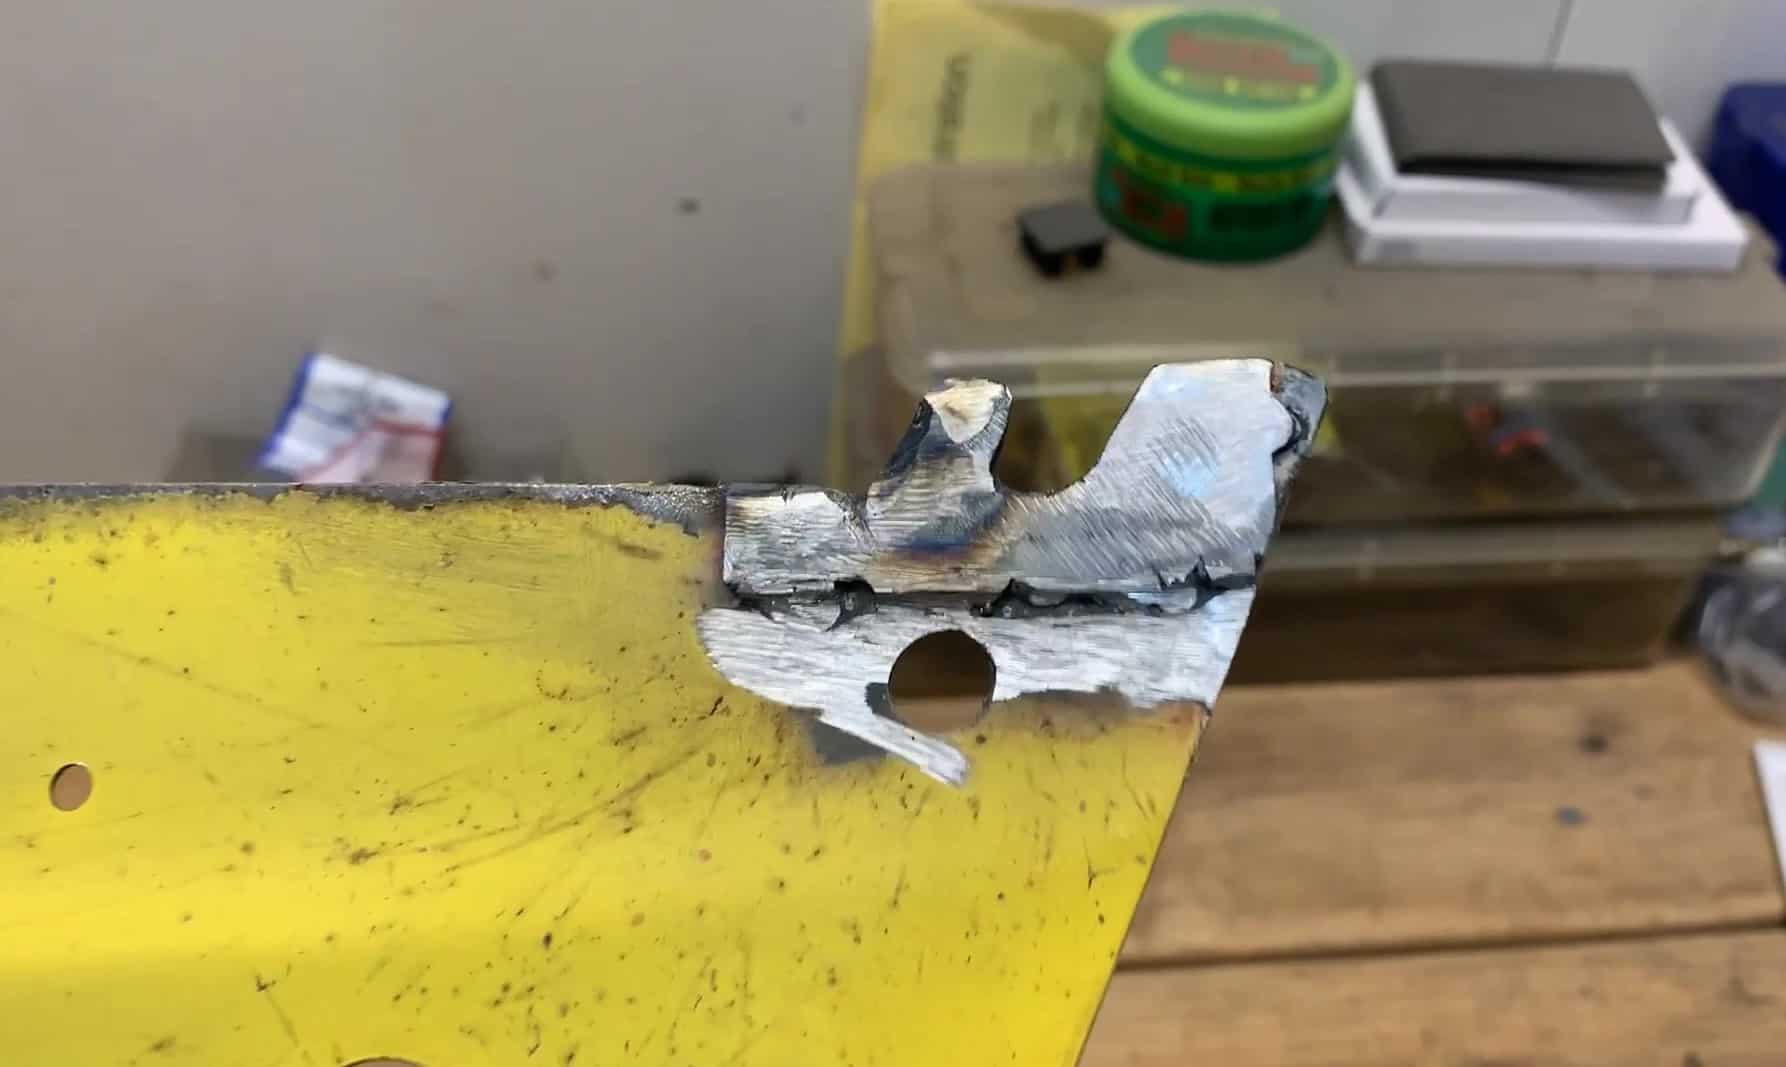
As you can see in the photos above, the repairs didn’t turn out too bad. Are they perfect? No, but I am fairly confident the repairs will last for quite some time. In total, I made five repairs and had to fabricate two tabs that were missing. The total time spent on the repairs was less than an hour.
Benefits Of Hobby Welding Repairs
If you’ve read any of my other articles on welding, I probably sound like a broken record when asked this question. That’s because I always say you can save time and money making welding repairs yourself. Repairing these two belt guards saved at least $60, not including shipping costs, instead of buying new guards. But the benefits are actually much more than that.
You have to consider the inconvenience of waiting for parts to arrive or having someone else making the repairs for you. In many cases, you can make a repair and be back up and running in just an hour or two.
Don’t forget to include safety as one of the benefits also. Running a lawnmower, or any piece of equipment, without a guard or with a cracked part can be dangerous. You should never operate any piece of equipment that is damaged.
The last benefit is the reward and satisfaction you get from making such a repair. Anytime you can help yourself, a friend, or family member, out who’s in a bind, it makes you both feel good. Hobby welding will definitely provide you with a few more of those opportunities.
Belt Guard #1 Installed Belt Guard #2 Installed
Conclusion
One of the best ways to prevent many failures you might encounter on your lawn and garden equipment is to give them a good inspection before each use. Always check for loose or missing nuts and bolts and signs of cracking or wear. But in the event you experience a crack or broken part, it’s nice to know you can take care of it yourself.
This belt guard welding repair didn’t take long to complete, yet it possessed all the benefits listed above. With the right equipment and a little practice, anyone can make these types of repairs. I suggest you look into hobby welding so you can start enjoying all the benefits yourself.
If you have any comments or questions, you can leave them in the comments section below or you can email us at [email protected]. FYI, we do not collect or share email addresses. We will only use them to reply to your comments or provide answers to your questions. We are also required to let you know that some of our links are “affiliate links”. This means if you click on a link and make a purchase, we could make a small commission, at no extra cost to you. This helps offset the cost of maintaining our website. So, if you like what you’ve seen, please be sure to give us a “Like” and “Share” on Facebook and Instagram too. Thank you for reading and good luck with all your home projects!