
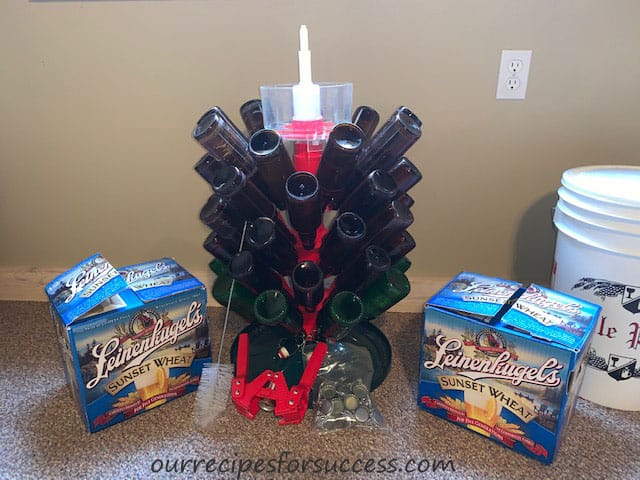
If you’re a fellow homebrewer, then you probably started out as 99% of us did by bottling your beer. Bottling beer is relatively inexpensive, requires very little special equipment and is easy to do. It’s the norm when starting out in homebrewing. You need to find out for yourself, can I make good beer? Is it hard to brew beer? Will I enjoy brewing beer? If you’re reading this article then you’ve obviously embraced homebrewing.
Once you’re hooked you will soon find that the biggest job in homebrewing is cleaning bottles. So what’s the next logical step to help simplify this part of the brewing process? Invest in a Cornelius keg system. Getting started into homebrew kegging will cost you money upfront, but before the cost scares you off you should know kegging systems are not just used for beer. They offer plenty of uses and benefits. I want to share with you the benefits I have enjoyed and a few that I’m looking forward to trying.
Reasons To Own A Cornelius Kegging System
Table of Contents
I initially was going to do a “pros and cons” section right here, but as I looked at my lists cost was the only real con to getting into kegging beer. If you go out and buy a brand new basic single keg system, expect to spend close to $200. Add a single faucet kegerator and don’t be surprised to spend close $600 to $800. Don’t panic! We’ll look at a couple of ways to cut those costs significantly below. So before you dismiss the idea of kegging let’s take a look at the advantages it has to offer.
Kegging Beer Is A Time Saver
I believe the single biggest factor homebrewers start kegging is because of the time savings it provides. Cleaning, sanitizing, filling, and capping 48 bottles for a 5 gallon batch of beer can take upwards of four hours. Compare that to cleaning, sanitizing and filling a single keg, which only takes about an hour. It’s not just the 3 hours of time savings, it’s 3 hours of the most labor-intensive part of homebrewing. What’s not to like.
Enjoy Your Beer Sooner
Carbonating your beer in the bottle (bottle conditioning) takes time. Typically at least a week, but two weeks isn’t unusual. By using kegging equipment you can shorten this time frame to just a few days. With that said, I still think all homebrew can benefit from a little conditioning time, but it’s nice to be able to sample or drink it in an emergency ☺. No matter how much carbonation you like in your beer, a homebrew kegging system gives you full control of the carbonation process.
Make Sweet Sparkling Wine Or Hard Cider
Actually you can carbonate just about any beverage you like. Flavored waters, juices and even coffee. But the ones I’m most interested in creating, besides beer, are the sparkling wines, meads and hard ciders. My wife is quite fond of sweet, sparkling wines and ciders. However, some of the methods suggested for making these types of beverages can be complicated and put you at risk for the dreaded “bottle bomb”.
By using a kegging system you should be able to create these beverages much easier and without the risk of making “bottle bombs”. Just wait until fermentation is complete and then kill off the yeast by using a dose of potassium sorbate and potassium metabisulfite. Then sweeten the beverage to taste with your favorite juice or sugar and rack it into the keg to begin carbonating. I’ve not used this method yet, but I have a sparkling Moscato wine I’m getting ready to make. I’ll be sure to let you know how it goes in a future post.
Special Uses With A Corny Keg System
This takes us into an area that offers a couple of unique uses. Each requires another piece of equipment but can pay big dividends in improving and sharing your homebrew.
Filter Your Homebrew
Some beer styles are meant to be crystal clear. To get this when bottling home-brewed beer requires you to use fining agents (drops out the floaties) and to allow the beer to sit. Great care needs to be taken when racking to the secondary fermenter and/or bottling the beer too, so you don’t stir up the material at the bottom of the carboy.
Homebrewers with a kegging system have another option. First, you rack your beer from the fermenter into a keg. Then using CO2 you force the beer from that keg, through a filter, into another keg leaving you a crystal clear beer. Of course, this is a simplified version of the process. You still need to sanitize and purge your kegs with CO2 to maintain the quality of the beer, but that’s to be expected.
To set this system up in addition to the filter you would need extra tubing lines and clamps, extra set of liquid line connectors for your keg, and an extra keg. As you can see there will be extra costs involved, but the results may be exactly what you need to win that local homebrew contest. Not only does it improve clarity, but it also removes other particles that can affect the flavor of your beer.
It may not be something you start out with, but it certainly is an option as your system grows. After all, how many of us started with fermentation chambers or wort chillers?
Fill Bottles From A Keg
Some will argue that kegs are not portable. I can’t dispute that claim and it may be the only other “con” I could have added to the article. However, with the purchase of a “beer gun” or “counterflow filler” system you can still fill bottles and growlers for those times you need some homebrew to-go.
It is another piece of equipment to buy, but you still get to enjoy all the benefits of kegging that we have discussed to this point. You can easily share some of your favorite beverages by adding this piece of equipment to your arsenal.
Basic Homebrew Corny Keg System
To get started in kegging below is a list of equipment you’ll need to get started. This is the bare minimum. I’ve included links for most of the items below for reference and pricing. Be sure to shop around. We will look at a few ways to save money when buying kegging equipment below.
Hopefully, you have an old refrigerator in the garage that you can remove one of the lower shelves to accommodate a keg. After all, cold beer tastes better and will last longer.


How To Save Money Buying A Cornelius Keg System

Corny Keg Connectors Corny Keg Dip Tube


If you’re thinking of getting a kegging system, but want to keep the costs down, there are a few things you can do that can help. Let’s take a look at some of your options.
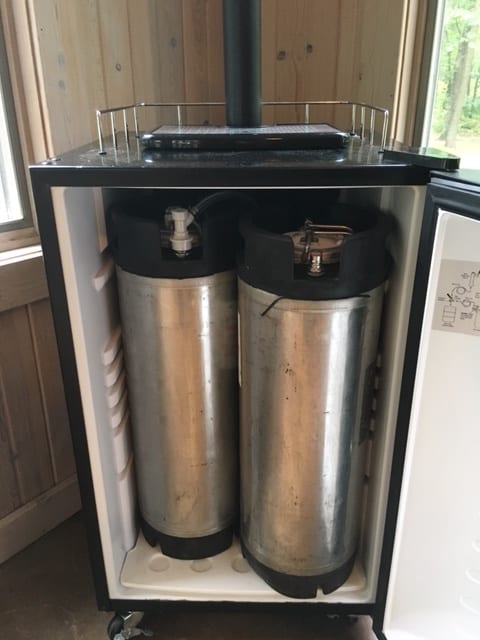
Many of these kegerators have only one faucet and were made for a single half barrel of beer. If you can find one of these, most of them are capable of holding two corny kegs and the CO2 tank and equipment. I have an article on how to convert a single faucet kegerator into a two faucet kegerator. This conversion can save you hundreds of dollars over buying a new two faucet kegerator. If you’re at that point in your homebrewing journey, be sure to check it out.
Conclusion
If you’ve stuck with me to this point in the article, I think we all can agree that homebrewing is a great hobby. Taking the plunge and adding a homebrew kegging system is the logical next step. You’ll experience the immediate benefit of enjoying your beer sooner and with a lot less work. Hopefully, with the other benefits of kegging benefits discussed above, you will be inspired to brew more and to experiment and try new things. Cheers!
If you have any comments or questions, you can leave them in the comments section below or you can email us at [email protected]. FYI, we do not collect or share email addresses. We will only use them to reply to your comments or provide answers to your questions. We are also required to let you know that some of our links are “affiliate links”. This means if you click on a link and make a purchase, we could make a small commission, at no extra cost to you. This helps offset the cost of maintaining our website. So, if you like what you’ve seen, please be sure to give us a “Like” and “Share” on Facebook and Instagram too. Thank you for reading and good luck with all your home projects!
Good blog post. You now have a follower. Cheers, Mate!