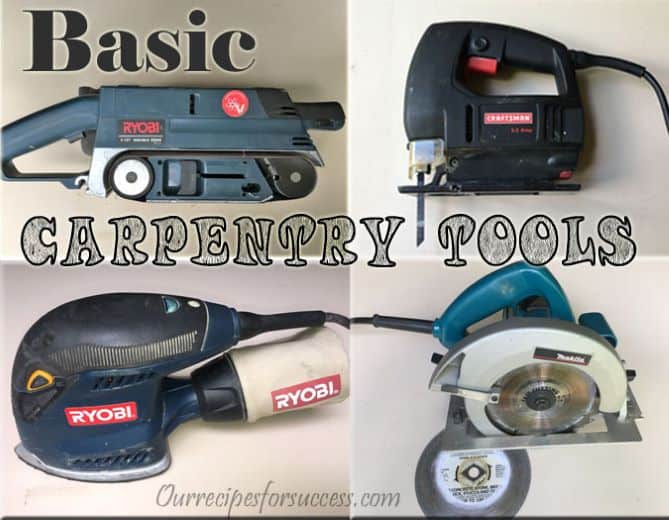
In our first article about tools every homeowner should have, we put together a basic tool kit for you. It covered many of the tools the average homeowner should have for every day repairs. In this article, we’ll look at some of the basic DIY carpentry tools to add to that homeowner’s tool kit. Taking on home repair projects is fairly easy and can be very rewarding. It can also help save you money in the process.
This should make sense beings that most homes are made of wood. This isn’t about being able to build your own home, it’s about being able to make simple repairs that the average homeowner is bound to encounter over the years. Many of these same tools can be used for smaller woodworking projects too. Add some of these woodworking tools to your toolbox and you’ll be prepared even more for keeping your home looking good and operating smoothly.
As I did in the first article, I will include links to several of these tools at Amazon for pricing and so you can see what options are available. I will do my best to show you tools that I own and use, or other equivalent brands that I believe to be of equal or better quality.
As full disclosure I want you to know that we participate in affiliate advertising programs designed to provide a means for us to earn commissions by linking to affiliate sites. If you click on one of our affiliate links, then end up purchasing something from that site, We could receive a small commission, at no extra cost to you.
What’s Better Manual Hand Tools Or Powered Hand Tools?
Table of Contents
There are a few hand tools I’ll recommend that have a manual version, as well as a powered version. Although the hand versions can complete most tasks, the powered versions are much faster and easier to use. For that reason, I recommend adding the power hand tools whenever your budget allows. When practical, I’ll provide you with links to both the manual and powered versions of the hand tools presented for price comparison and available options.
I feel the two most obvious examples for this are the hand drill and the wood sander. Believe it or not, you can still buy a manual hand drill and sanding blocks are available in several different styles. If that’s the route you choose to go, that’s fine. It might take you a little longer, but you will definitely be immersed in your work. For these two particular tools, I have opted for the powered versions. Both come in corded and cordless versions and offer some real advantages compared to their manual counterparts.
Powered Drill And Drill Bits
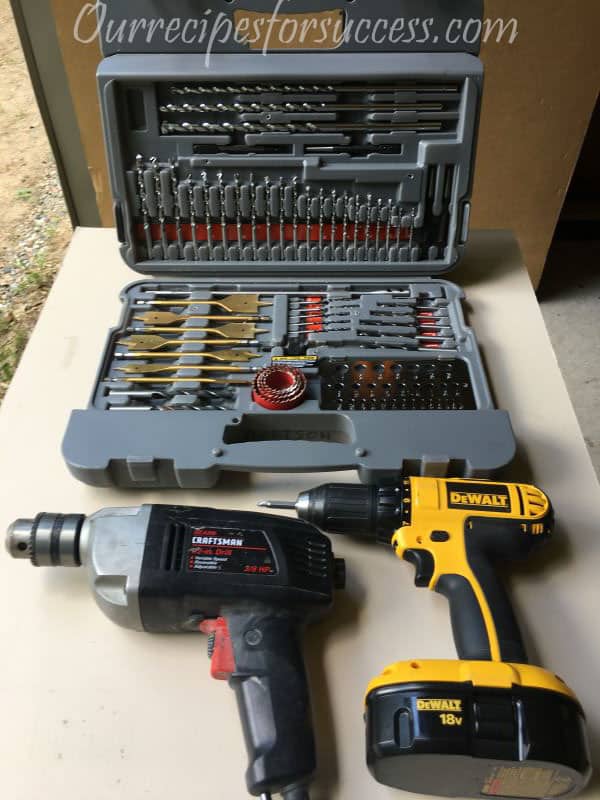
I believe powered drills offer the advantage of consistent speed and torque. They also allow you to use a larger variety of drill bits. That steady speed and torque are perfect when you are using larger drill bits and special bits designed for drilling holes.
Most corded drills offer plenty of torque for drilling large holes or drilling multiple larger holes, without overheating and damaging the drill. Cordless drills have become very popular and for good reason. The newer models have longer runtime on a charge, they’re fast and easy to use. Most importantly they’re portable. It’s nice not having to drag out an extension cord for a quick, small job.
For most home repairs the cordless drill is the way to go. Most have keyless chuck which makes switching drill bits quick and easy. A cordless drill is definitely on my list of must-have tools for the homeowner.
We have an article featuring Dewalt Cordless Power Tools that provides the benefits of using cordless tools. It also points out some of the features to consider when buying any brand of cordless tools. I have a collection of Dewalt cordless tools and they help make short work of home projects.
Benefits Of A Powered Sanders
For small projects or when sanding uneven, contoured surfaces, sanding by hand may never be replaced. However, when working on larger, flat surfaces a power sander can get the job done quicker and with good results. When it comes to basic sanding needs for home repairs I believe there are two main options. The belt sander and the orbital sander.
Both of these sanders can do a good job as long as you take your time and be sure to sand with the grain of the wood. In actuality, it’s been my experience that these two sanders work great as a one, two punch on many woodworking projects. Especially if you are sanding out deeper dents and gouges or have a lot of material to remove.
Belt Sander
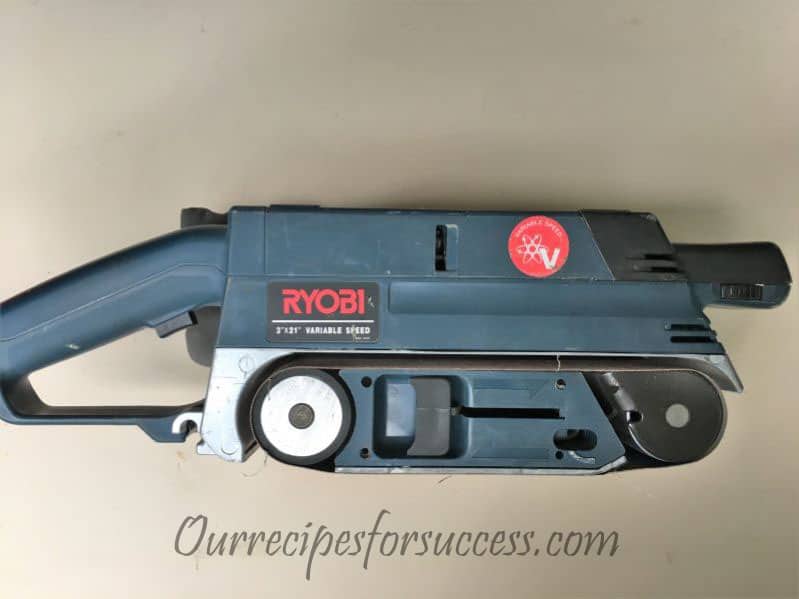
You can buy different grit paper for both types of these sanders, but if you put a 40 or 50 grit sandpaper (very coarse) on a belt sander you better keep it moving evenly over the surface. This combination can remove a lot of material fast! However, by increasing the grit number (finer grit) and going over the material several times you can put a nice finish on any piece with the belt sander. Just remember you have to keep the sander moving covering the entire surface evenly and keep the belt’s rotation in line with the wood grain.
Orbital Sander
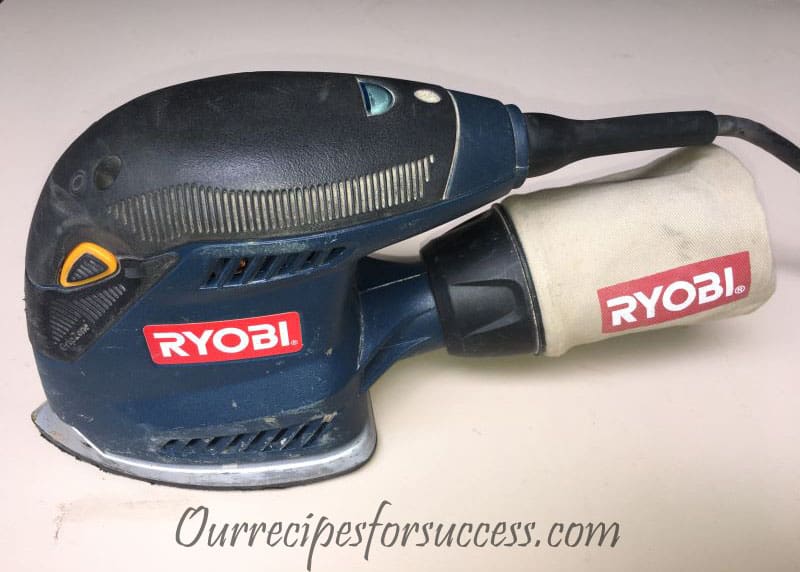
For smaller projects and getting a very nice finish, I prefer to use an orbital sander. To be more specific, if you only want to purchase one sander, I would recommend a “random’ orbital sander. It can’t remove as much material as a belt sander or some of the other orbital sanders, but it will give you a superior finished product.
There are cordless versions of these sanders, which could make sanding convenient. I would probably start with a cordless orbital sander. They’re usually used on smaller projects and are removing less material. Full disclosure; I do not own a cordless sander. If you read our article on cordless power tools referenced above, you would have learned that one thing I try to do is stick with the same “line” of a cordless power tool. Unfortunately, the Dewalt 18 volt line I own does not have an orbital sander. If it did, I would definitely have one. So, for now, I’ll continue using my corded orbital sander, which works just fine.
What Type Of Saw Does A DIY Homeowner Need?
Let me start out by reminding you this article is intended to provide recommendations for basic homeowner repair needs. Because of the sheer number of different saws available, I actually believe several blog articles could be written on just saws. So if you have a question on something I don’t cover here, leave me a comment below and I’ll do my best to help.
When first getting started a manual hand saw may be all you need for a while. However, as time goes by and your life situation changes, or maybe you buy a “fixer-upper” home, then your needs are sure to change. That’s when it may be time to add a couple of different powered saws to your tool kit. That’s why I’ve always tried to look ahead a little so that if I “spend up” now on a particular tool, I know it can be used again in the future.
Moving into a “fixer upper” will probably accelerate the need for buying some of these saws. But adding children and/or pets to your family can make a change also. Before you know it you’re putting up fences, building sandboxes, playhouses, dog houses, or building shelves and shadow boxes to display ribbons and metals. There are other fun projects like our raised garden beds and our DIY cornhole game that the family will enjoy too. For some of these projects, there may be a better option than a manual hand saw. The following recommendations are still on the basic side but offer some real value when making home repairs or creating similar projects to those listed above.
Circular Saw
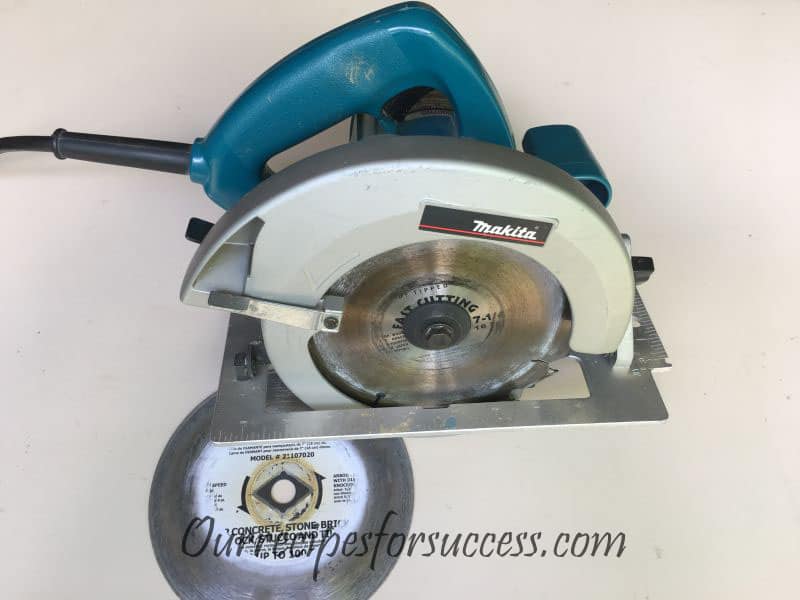
The circular saw is a very versatile saw and easily makes my DIY carpentry tool list. It’s made for making straight cuts. It’s perfect for cutting boards off or with a slow and steady hand it can be used to make larger cuts in plywood as well. If you want to become a cabinet maker, then you’ll probably need to upgrade. But for most home repairs or building Fido his new home you can’t beat a circular saw.
With that said, a circular can make fairly accurate cuts by using the tips you’ll find in our article on “Cutting Plywood With A Circular Saw”. It provides a couple of straight-farward techniques that will have you cutting plywood safely and accurately. You’ll never struggle cutting plywood again!
Although mainly used for cutting wood you can use a circular saw for cutting other materials. There are a couple of different blades you’d need to purchase for your circular saw to do this. They make metal cutting blades that are good for cutting steel panels for siding and roofs on pole barns.
They also make diamond blades for cutting concrete that fit circular saws. We’ve used the diamond blades for cutting some basic decorative designs in concrete and for cutting landscaping pavers and blocks. Again, the circular saw is a versatile tool.
Note: When using a circular saw be sure to follow the manufacturer’s recommendations and be sure to wear eye protection AND hearing protection. You may want to consider using a face shield when using the optional specialty blades. The diamond blade creates quite a bit of dust too, so a dust mask or respirator is highly recommended when cutting concrete and masonry products. For more information on DIY project safety please click this link and read our article. It has lots of practical ideas to help protect yourself.
Jigsaw
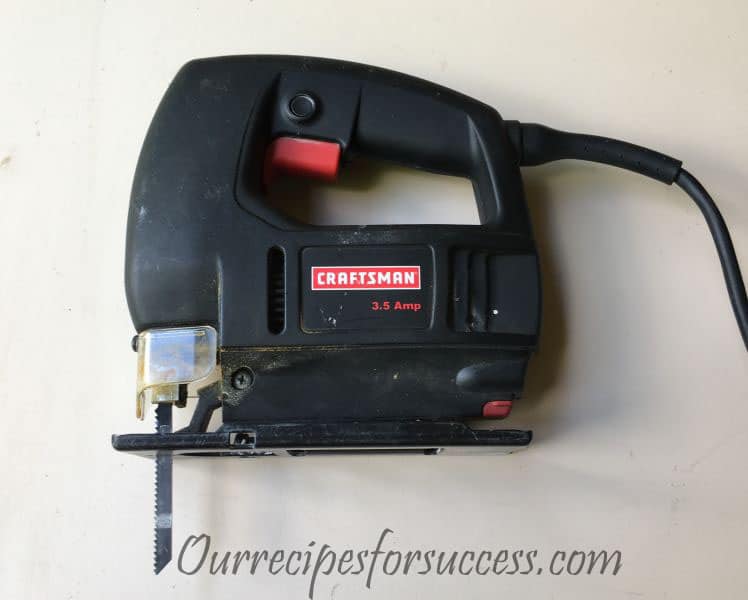
The jigsaw is the other powered saw that made my DIY tool list. It can be used to cut curved lines and circles. It’s perfect for cutting light switch and outlet box opening in paneling or drywall. It’s also great for making arts and craft projects.
The jigsaw also comes with a variety of saw blades too. It can be used for cutting steel and has a diamond blade that can be used on tile. The diamond blade shouldn’t be used in place of a tile saw but is better for making some minor, intricate cuts.
Hand Saw
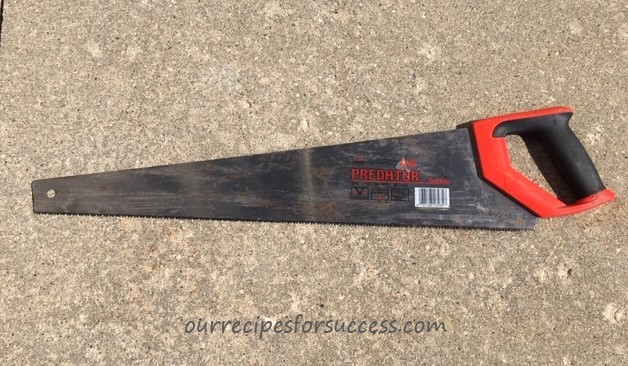
If you choose to hold off on buying a power saw, that’s perfectly fine. A hand saw can be used to finish basic home repairs and projects. They can be used on boards and plywood. The plywood can be a little more difficult to cut due to the alternating layers, but it is totally doable.
Miter Box And Saw
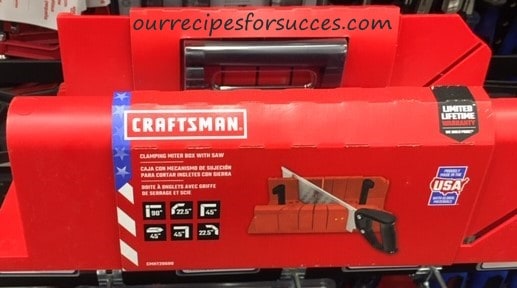
If you need to replace trim boards around a window or door and need to make some precision angled cuts, there is a manual hand saw option that works well. It’s the miter box and saw. They can make a nice square or 45° cuts. Short of using a power miter chop saw or table saw, the miter box and saw would be a better option for precision cuts rather than trying to “free-hand” cuts with a hand saw or even a circular saw.
Keyhole Saw
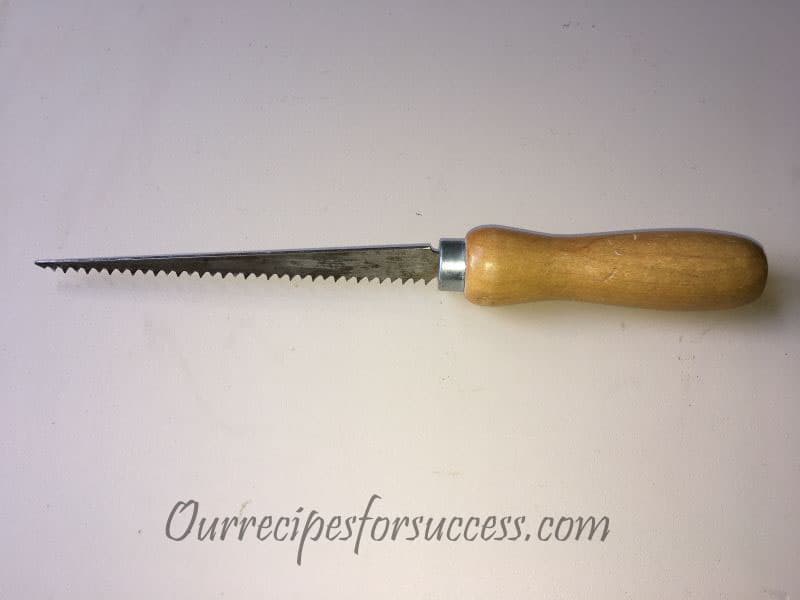
The keyhole saw may not be used all the time, but if you’re doing any drywall work in your “fixer upper”, it’s worth its weight in gold. It is perfect for cutting holes for outlet or light switch boxes and for cutting oddly shaped pieces.
The keyhole saw also works well on wood paneling and other types of thinner plywood and wallboard. If you are going to finish a room in ¾” or 1” tongue and groove boards, it may be time to upgrade to a jigsaw. Although a good keyhole saw could handle the job, a jigsaw will be able to make all your cuts in a fraction of the time. Again, it’s all about personal preference and your budget.
Tape Measure
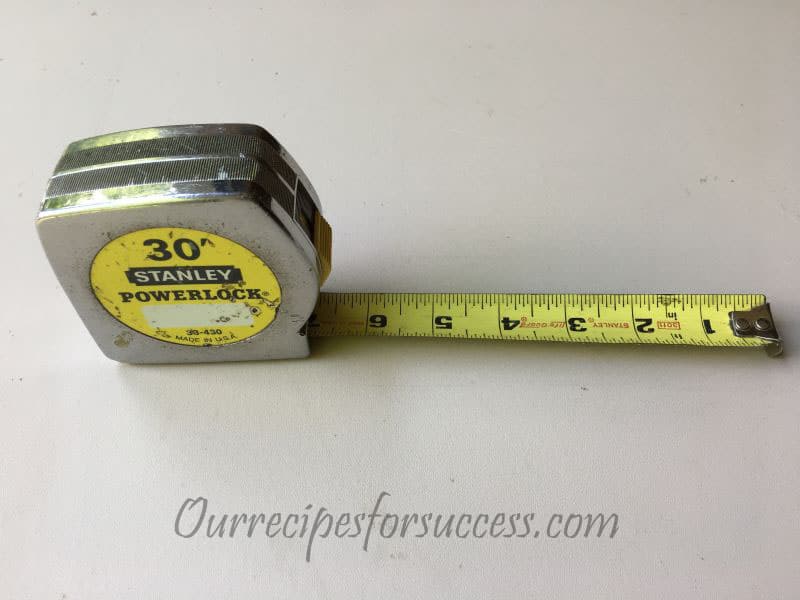
You can have all the right materials and all the correct tools, but if you don’t know exactly where to drill that hole or make the cut things are not going to turn out good. A good tape measure is a must for almost any home repair project and for all woodworking projects.
If you’re working along frequently, I recommend purchasing a 25-foot tape that is 1” wide. The 25’ I’m flexible on, but the 1” width is something I highly recommend. It makes taking measurements by yourself much easier. They are stiff enough to reach out to hook onto the end of a board or slide up a wall to get a floor to ceiling measurement. Narrower tape measures will bend and kink making the job more difficult or impossible without getting help.
Square
Squares are one of the tools that add precision to your projects. They come in different types and in different sizes. I’ll show you the two basic types that should be able to handle most of your home repairs and woodworking projects.
Framing Square
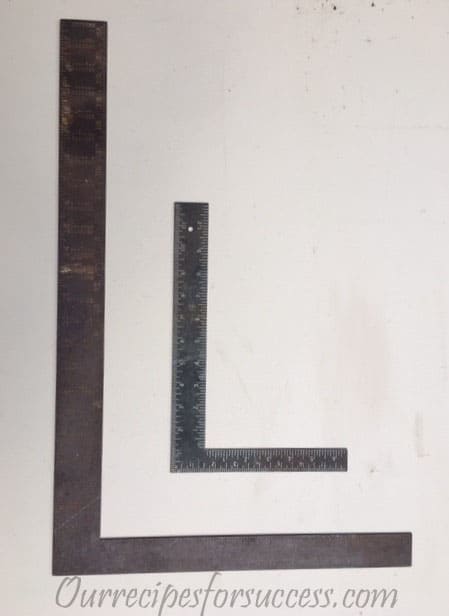
The framing square is typically made of metal and is shaped like the letter “L”. The “L” is made at a precise 90° angle. It is the tool that lets you make sure that the picture frame or shadow box you’re making is perfectly square. We used one on the frame of our cornhole board game project before screwing the top on. The carpenter’s square can make any project better.
Combination Square


Much like the framing square, the combination square can be used to make sure the project you’re working on is nice and square, but I find it very handy for another thing. Because of its construction, it’s ideal for marking wood that needs to be cut. It’s great for marking 90° and 45° cuts boards. Having precise lines is important when you’re making cuts with a circular saw or hand saw.
Level
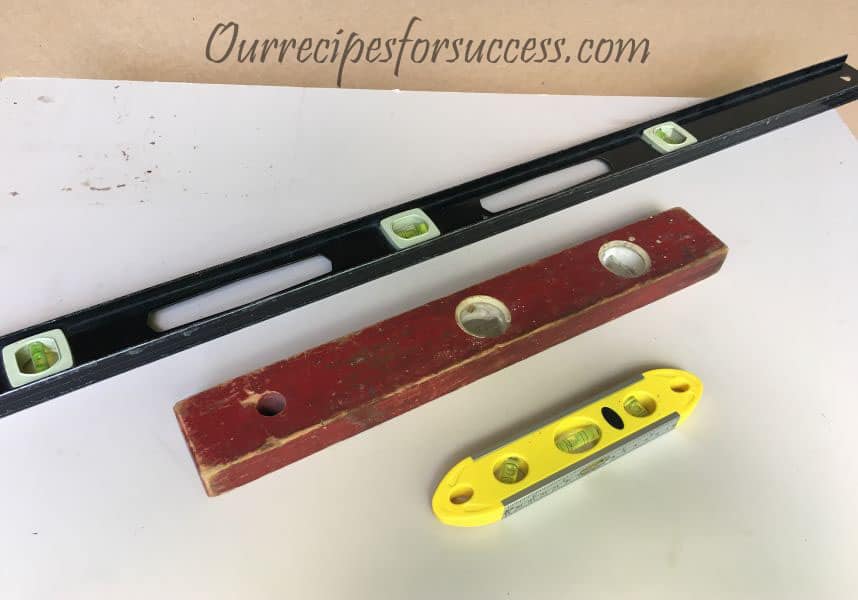
The level is the second tool on my list that can add precision to your home repairs or home improvement projects. Levels are used to make sure your projects are plumb and level. They are essential tools for projects like putting up shelves, hanging pictures, or putting in fence posts. Levels can also double as a straight edge. Along with your tape measure, you can mark larger pieces of wood like plywood, drywall, and paneling.
Levels come in several different lengths. I would recommend starting out with a 4-foot level. Before you’re done I suspect you’ll end up with a couple more. I have a short version, also known as a “torpedo”, and a 2 foot level for tighter locations. However, the 4-foot level will work for most projects and has served me well.
Utility Knife
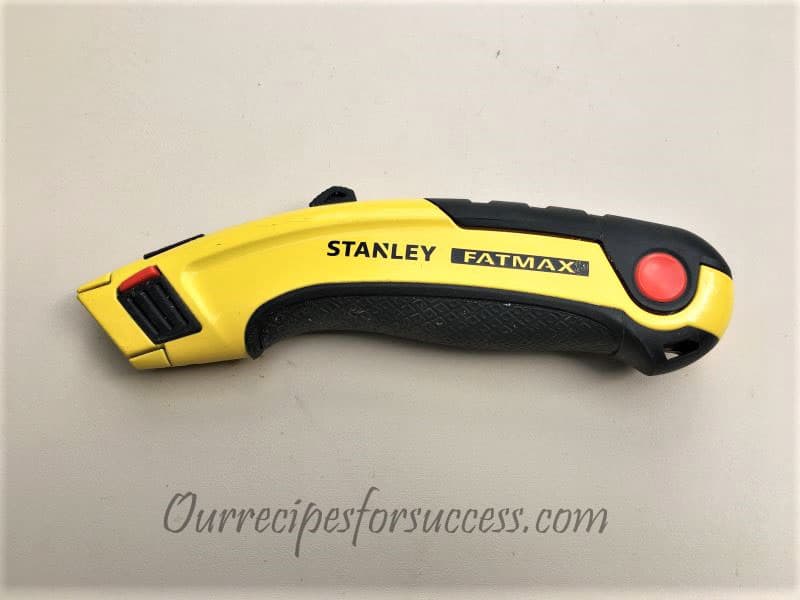
A utility knife it such a useful tool. Just having one around to open some of the packagings that are out there today is a real blessing. But a good utility knife can do so much more. My utility knife of choice is the razor blade type knife. They’re very sharp and when they start getting dull, the blade can be changed.
The uses for the utility knife are virtually endless. The can be used for arts and crafts, home repair project, and countless everyday living tasks. You can use them for cutting tape, cardboard, carpet, vinyl flooring, wood, plastic, fiberglass screen door material, fiberglass and foam insulation, and drywall just to name a few. For more examples check out the “DIY Guy’s” article on utility knives. He has a couple of duplicates, but there are several other practical uses.
They come in several different styles and sizes and if you’re like us, you will end up with several of them around the home and workshop. They come with the tradition retractable blades, folding lock blades and even disposable razor knives, which actually work quite well. You will definitely want one for your toolbox.
Clamps
When it comes to making certain home repairs and creating woodworking projects clamps can play a huge role. By using a little wood glue along with a clamp or two, many repairs can easily be made. There are several different types of clamps, but I’m going to recommend 3 options that can handle most home repairs and woodworking projects. And you’ll want at least a couple of each type. Maybe more, but you don’t have to get them all at once.
Quick Grip Clamps
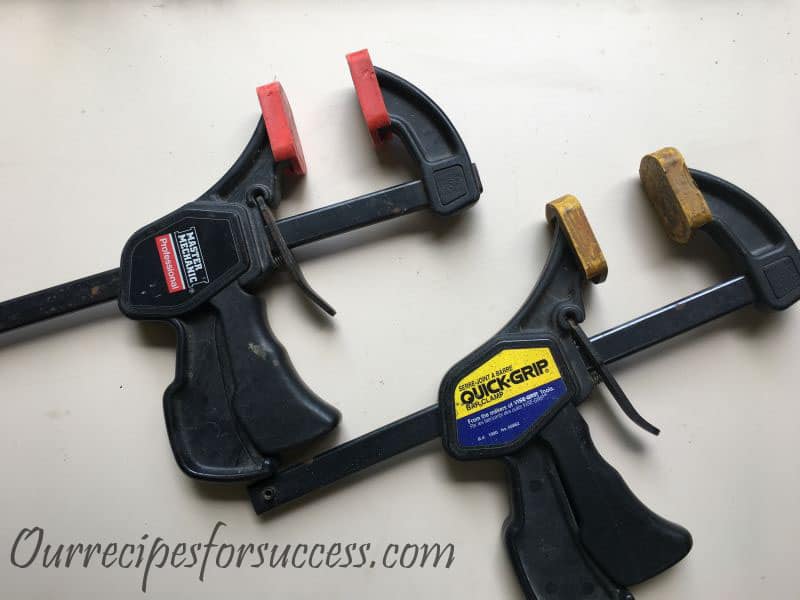
Quick grip clamps are at the top of this list for a reason. They can be engaged easily with one hand and hold securely. I have a couple of them and use them all the time. They’re great for temporarily holding pieces together while you align them, mark them, drill them, check them for square, and glue them. They’re that “third hand” you often wish for. Hopefully, you get the picture. They are very useful.
Pipe Clamp Set
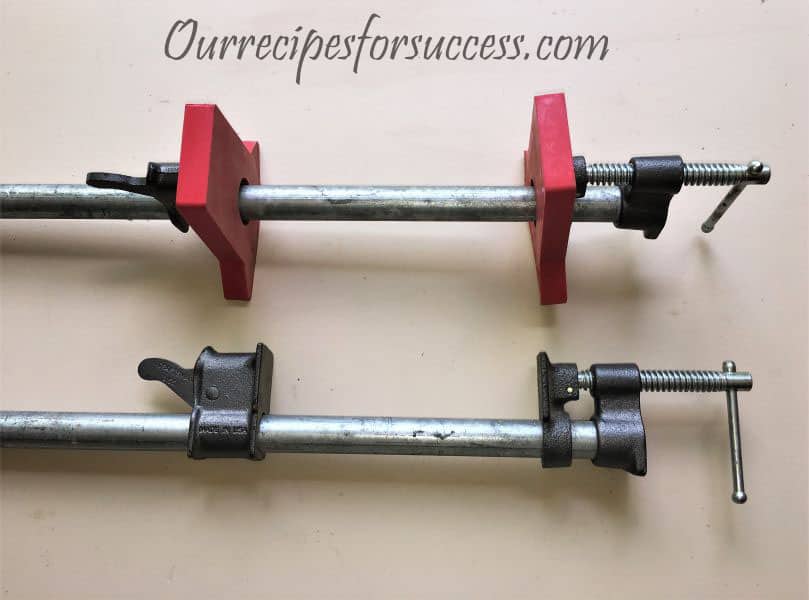
Pipe clamps were made for woodworking projects that you need to glue two boards together. However, they are good for making repairs around the house too. As a homeowner, I can almost guarantee that you will have draws that will either crack, pull apart, or have dovetail joints that break. Here’s where you old friend the pipe clamp and a little wood glue will come to the rescue. Glue them up and clamp them overnight and they’ll be good for another several years of slamming!
When purchasing pipe clamps you buy the clamps set and the have to supply the black pipe to attach them to. One end must thread onto the pipe, while the other end is adjustable and slides up and down the pipe. I actually use “rigid” conduit. It has a galvanized coating, so it doesn’t rust.
I recommend going with the ¾” pipe clamp set. ¾” pipe is more solid and won’t flex as much as 1⁄2” pipe. That helps keep the jaws squarer and will apply more even pressure on the pieces being clamped. ½” clamps are okay for maybe up to a couple of feet long and if you don’t over tighten them, you should be fine.
Band Strap Clamp

Another type of strap that works nicely it the band strap clamp. I must confess I don’t own an actual band strap clamp set. Most of the time I use just a regular ratchet strap to help hold pieces together using a combination of glue and a few brad nails or finish nails. Occasionally I use one along with the pipe clamps. The strap holds all the pieces together tightly and the pipe clamps can be used to adjust the miter joint fit. It works well.
With that said, if I were gluing pieces with miter corners, the corner brackets look like they would work well for holding the mitered joints together nicely. Either way, having a few different clamping options will help assure you have the resources to get the job done right the first time.
Pry Bar
When you hear the words “pry bar” most folks automatically think demolition. While they do help make quick work of tearing things apart, they can be useful for putting back together too. We’ll look at the two pry bars I recommend and their biggest features.
Wrecking Bar
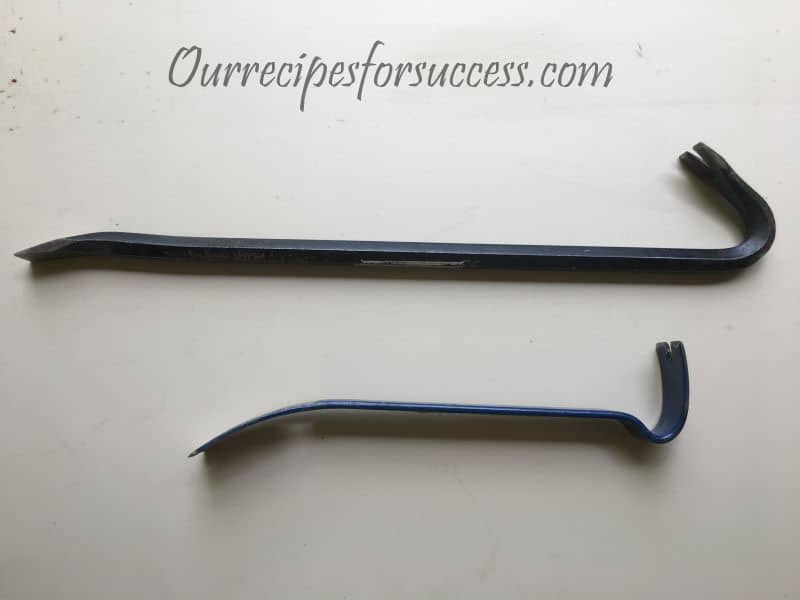
A wrecking bar is a good tool for demolition. It’s made of thicker, heavier material and can be used for removing even the most stubborn board, brick or stone. On the other hand, they can be used for wedging a support beam or board into place when you start going back together too. When you need a little extra horsepower the wrecking bar is the tool.
Flat Pry Bar
I find the flat pry bar, often just call the “flat bar”, to be a much more universal tool. You can still pull nails and remove boards with it, but in many cases, they’re used on projects that call for a little more finesse.
A good example is if you need to remove baseboard trim or brick molding and don’t want to damage the trim boards and the drywall or board they’re attached to. The flat is the perfect tool for the job. The ends will most often easily start under the trim boards and you can work it along the length of the trim board carefully loosening it. The other nice feature of the flat bar is the width of the bar. This helps distribute the prying force over a greater area, which helps reduce the chance of damaging the surrounding drywall or boards.
I also like using the flat bar for installing drywall or other wallboards. Once the board is in place, you can slide the end of your flat bar under the middle of the wallboard and using your foot raise it up into place getting the recommended gap between the wallboard and the floor. The flat bar is a great tool to have in your tool kit.
Sawhorses
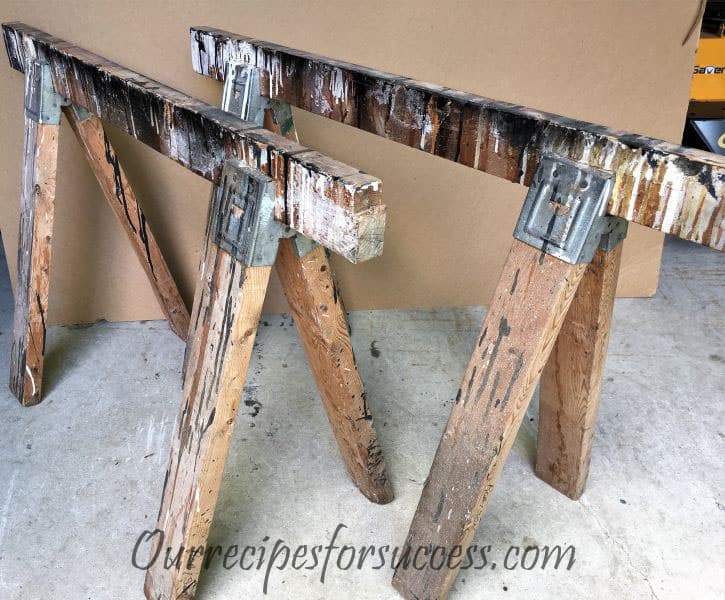
The last item on my list is a set of sawhorses. There are a ton of different styles out there anymore, they don’t have to be anything special. I would just get a couple of sets of sawhorse brackets and a few 2×4’s and make your own. They’re a must-have for cutting boards or plywood with a hand saw or circular saw.
Sawhorses are also great for making a temporary workspace. Through a piece of plywood or an old door on a set of sawhorses and you have a great place for sanding, painting, staining, and assembling smaller projects. They also make good tables for garage sales too. I have two sets and use them together frequently. Especially when my wife and I are working together on a project.
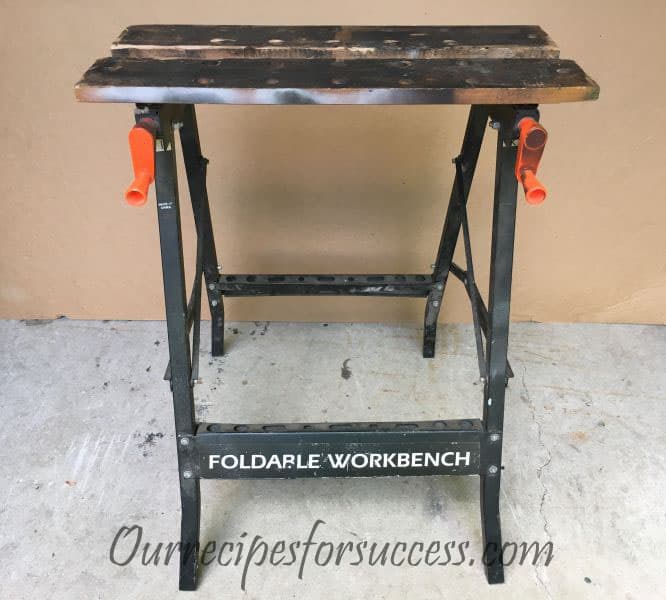
Along the same lines, and as a little “bonus”, another very useful option is a folding, portable workbench. I’m talking just the inexpensive version. I was given one as a Christmas gift many years ago and use it all the time! The top acts as a vise and can clamp material while you cut or work on it. And it’s portable, so you can take it to where it’s needed.
Conclusion
Once you start adding some of these carpentry tools to your homeowner’s tool kit from our first article, you’ll be amazed at the number of projects you can take on around the home, garage, and yard. There’s no more trying to find someone to make repairs that fit into your schedule or having to buy a new piece of furniture, due to some minor damage. With a little research, preparation, and the right tools you’ll be able to make most of these repairs easily. It’s convenient, rewarding and can save you time and money. So don’t be afraid to add to your homeowner’s tool kit, it can pay huge dividends. Get started today.
If you have any comments or questions, you can leave them in the comments section below or you can email us at [email protected]. FYI, we do not collect or share email addresses. We will only use them to reply to your comments or provide answers to your questions. We are also required to let you know that some of our links are “affiliate links”. This means if you click on a link and make a purchase, we could make a small commission, at no extra cost to you. This helps offset the cost of maintaining our website. So, if you like what you’ve seen, please be sure to give us a “Like” and “Share” on Facebook and Instagram too. Thank you for reading and good luck with all your home projects!
Thank you and thanks for sharing additional resources.
Hi! Your article Basic DIY Carpentry Tools Every Homeowner Should Have is really helpful for me. your guidance is really helpful for me, if you want to know more about the ideas of tools and guidance then you can use tttools website for more information.
James,
Thanks for the kind words. I visited your website (Health Machinery) and it’s obvious we both have the same love of tools. After all, with the right tools and a little research, there’s nothing that we can’t accomplish!
Very Informative and helpful post. Like this is the perfect list of the tools that one must have. You can find different tools in a different post but this post contains the perfect list and all the essential tools at the same place. Very well sorted list. Thanks for it.