Many homeowners would be amazed at the number of DIY projects and repairs they can make if they have the right tools. A job like tiling a bathroom floor can be done with just a few basic masonry tools. The majority of these tools are fairly inexpensive and you can easily recoup that cost by completing just a project or two yourself.
Being a homeowner normally means you will face the occasional repair. By collecting a few tools along the way you begin to fill up your “homeowners toolkit” that we cover in a separate article. Now add a few basic carpentry tools and you’ve increased the number of projects and repairs that you are equipped to take on.
In this article, we’ll look at another group of tools that can help homeowners successfully tackle projects in and around their homes. With a collection of some basic masonry tools you’ll be able to tile floors and walls, install stone and brick veneer products, or update your landscaping with bricks and pavers.
We’ve put together a list of power and hand tools below that can be used on all of these types of projects. We’ll also cover some of the safety precautions, tips, and best work practices to help you get started on that masonry project you’ve been putting off.
To help inspire you we’ve included a list of a few of the projects we’ve done with these basic tools. And this list is just the tip of the iceberg as to the projects you’ll be prepared to tackle. So let’s get started.
In this article, we will be providing you with a few links to some products for pricing and informational purposes. We are required to let you know some of these links are “affiliate links”. This means if you click on a link and make a purchase, we could make a small commission, at no extra cost to you. This helps offset the cost of maintaining our website. Now, let’s get started.
Masonry Project Safety
Table of Contents
One of our main themes here at Our Recipes for Success is to always work safely. There are three main ways to protect yourself when working with tools on any project. Especially power tools. They are to wear the proper PPE, use the correct tool for the job, and follow known best work practices. Let’s briefly look at each one.
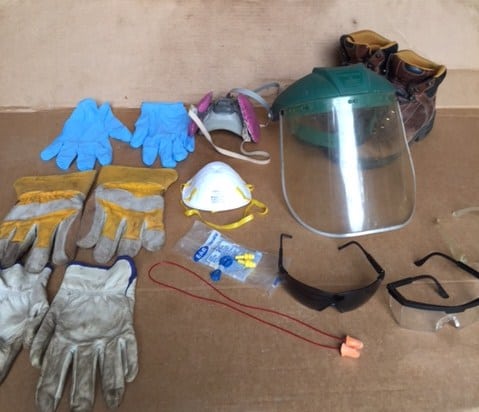
Personal Protective Equipment (PPE)
Personal Protective Equipment (PPE)
When working with many masonry products the potential for flying, airborne particles, and dust is common. You can expect to encounter excessive noise when cutting your material whether it’s with a saw or you’re using a hammer and chisel. Therefore you must wear the appropriate PPE to protect yourself at all times.
Below is a list of the minimum safety gear you should have on hand and use when working with masonry products. For additional ways to protect yourself on other home projects, please consider reading our article on Personal Protect Equipment.
Safety Glasses – Safety glasses are a must for almost every project you take on. Find a good pair that fit comfortably and use them.
Face shield – I highly recommend using a face shield when using any grinding or cutting tool. They protect your face from flying debris and are an added level of protection for your eyes when worn over your safety glasses.
Hearing Protection – Always wear hearing protection when load tools or equipment are used. Loud noises can have a cumulative hearing loss effect over time. There are lots of choices, so find something that is comfortable, convenient, and always use them.
Dust Mask/Respirator – When cutting and grinding masonry products a lot of dust can be generated! be sure to wear a good fitting dust mask at a minimum. Respirators with replaceable cartridges are another great option. They typically fit better and are more efficient at removing dust particles.
Gloves – I highly recommend using leather gloves when handling masonry products. Most have rough surfaces and can be hard on your hands. Gloves also protect your hands from fly debris when cutting or chipping masonry products. Rubber gloves are good to use when mixing and applying adhesives, mortars, and grout. Masonry products have the tendency to absorb moisture and can dry your hands out.
Use Proper Tool
That’s what this article is mainly about. Our first concern here is obviously for your safety. We want you to have and use tools that are designed for striking, cutting, and finishing masonry products. As noted above there are plenty of potential safety concerns to deal with during normal use. Always make sure your saw blades, chisels, and drill bits are designed to be used with the masonry product you’re working with.
The second reason for using the proper tools is for creating a great looking finished project. There is much less chance of the material chipping or cracking. It also ensures a secure installation, and they can help with a nice looking, smooth finished product.
Use Best Work Practices
This list of best work practices points out a few things that will help ensure a safe installation on your next project. The last couple of items could be considered more like tips, but both help make for a safe, well-constructed project.
Follow Manufactures Instructions – This has to be at the top of our list because it applies to both the materials and adhesives you’re working with and to any tools you may be using. Whether it’s mixing or installation instructions, or safe use directions for tools, they’re all there to help ensure you have a safe and secure finished produce.
Use GFCI Outlets (when required) – Some handheld electric tools require the use of water to cool the blades. When using any electrical power tool equipped with these types of blades, or any electrical tool in a damp location, be sure to use a “ground fault circuit interrupting” (GFCI) receptacle to protect you from electrical shock. If one is not available, there are GFCI pigtails that can be used in regular outlets to provide protection.
Keep Your Face Shield Clean – I always recommend using a face shield, in addition to safety glasses, whenever using any kind of cutting or grinding tool. When using water with cutting or grinding blades you will likely get dirty water splattering on the face shield. Be sure to clean the shield frequently to ensure you can clearly see what you’re working on.
Use Proper Trowel for Applying Adhesive (covered more below) – When hanging masonry products on a wall in many cases you will apply the adhesive with a notched trowel. The type of trowel needed depends on the product you’re hanging and the type of adhesive it requires. Always follow the manufacturer’s recommendations to ensure a strong, secure bond.
Shop-Vac – If you need to cut or grind any masonry product indoors, a shop vac is a great way to help control excess dust. Have a helper hold the hose as close as safely practical while cutting. It helps with visibility plus it helps reduce the mess quite a bit.
Knee Pads – If you’re working on installing a tile floor or installing pavers, knee pads can be a game-changer! The surfaces you’ll be kneeling on can easily bruise or cut the knees and you’re sure to ruin a good pair of pants.
Ask For Help – As I mentioned earlier, this is more of a helpful tip. I highly recommend having some help. Masonry products are typically heavy and an extra hand is always useful. On jobs like laying tile the job time can be greatly reduced with help. Having someone mixing thin-set and cutting tile is a real blessing for the person laying the tile. And that’s just one good example.
Basic MasonryTool List
Basic Masonry Tools
Below is a list of the masonry tools that I would recommend for someone getting ready for an upcoming tile or backsplash job, veneer brick or stone installation, or most masonry projects around the house. These tools, along with a few others from the homeowner’s basic toolkit and the carpentry tools we recommend, will allow you to tackle many masonry projects around the house.
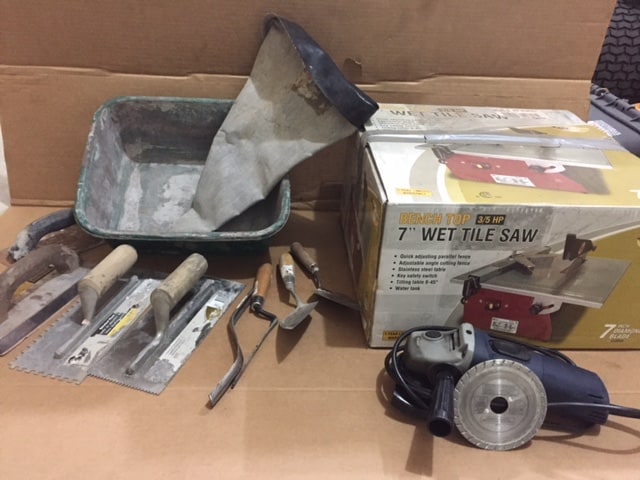
Masonry Chisel – A masonry chisel and hammer (see our “Homeowner’s Toolkit Article”) are good for the “rough” shaping of brick, block, and other masonry products. For more precise cutting or shaping a diamond blade cutting tool (see below) will provide better results.
Brick Trowels – Used for mixing, spreading, and working with the cement and mortar. They are ideal for applying cement or mortar when installing bricks or cement blocks. They are also perfect for “buttering” the backs of veneer masonry products during installation. The above link is to a newer style trowel with a flat end on it. It’s perfect for use in 5-gallon buckets, which many of us home DIY’ers like using.
Notched/Flat Trowel – These trowels have square notches on a couple of sides and flat sides on the other two. They are used for installing adhesives for larger tiles on walls and floors and other types of masonry products. They come with different sized notches to be used with the various adhesives and mortars. Be sure to see what the manufacturer recommends for their particular product. You may end up owning a few different sizes.
V-Notched Trowel – This trowel is much like the notched trowel, except they have “V-notches” on them. The V-notches are usually smaller and are used for installing mastic adhesives when hanging backsplash and other types of wall tiles. They too come in different sizes depending on the adhesive being used, so be sure to check the adhesive manufacture’s recommendations.
Grout Bag – Used for applying the grout to the joints and seams of bricks and other masonry products.
Grout Float – The grout float is used when applying grout to your tile floor and wall seams. It has a semi-flexible bottom that helps work the grout into the seams between the tile and removes the bulk of the excess from the tile. But no tiling job is done without using a tile sponge too (next).
Tile Sponge – A damp sponge is used to help remove the residual grout from the tile surface before it dries. Be sure to rinse it frequently while cleaning the tile surfaces.
Joint Tool – This tool is used for smoothing grout joints and seams between bricks, cement blocks, and other masonry products.
Concrete/Mortar Mixing Paddle – These work well for mixing small batches of mortar and cement. With that said, I do recommend using a good quality, corded 1/2″ drive electric drill to power it. For smaller projects, just a 5-gallon bucket and a brick trowel can get the job done too. For larger batches of concrete mixes, they do make electric mixers designed for masonry products, but they do come at a higher cost. Another option for a little larger project is to use a “mixing tub” and a garden hoe.
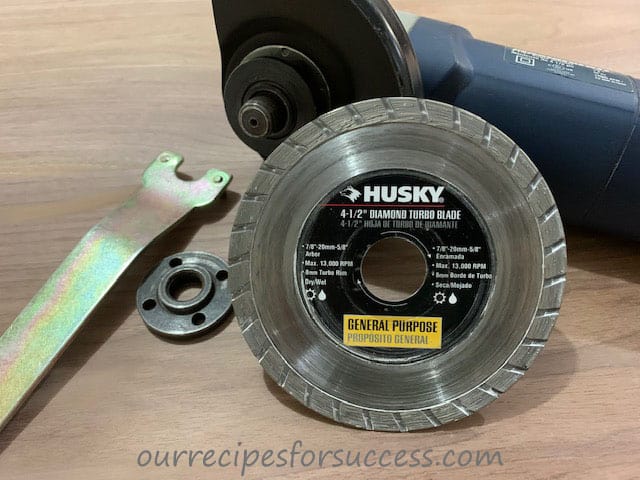
4-1/2″ Angle Grinder – Equipped with a 4-1/2″ diamond blade is a must-have when working with veneer masonry products and landscaping pavers and blocks. They are great for making unique-shaped cuts. The diamond blade is also good for cutting and smoothing rough edges on tile also. Just make sure the material is secured and take your time for the best results. The angle grinder is a very versatile power tool. Check out our article on the many angle grinder uses. It’s a must-have tool for many other home and workshop projects.
Tile / Masonry Saw – Diamond blade – These saws are not just for cutting floor and backsplash tiles. They work for cutting veneer masonry products (brick and stone) too. Even if you cannot cut completely through the material, make a nice deep “score” line on the side that will be showing, and use your hammer and masonry chisel (mentioned above) to break it off. The angle grinder can be used to smooth any rough edges if needed.
Tabletop Tile Saw
Collection of Trowels
Grout Float and Grout Bag
Some folks may argue that it is better to rent some of the larger tools, such as a tile saw. For a smaller project that might only take an hour or two, they may be right. However, if you’re working on a project that will take a couple days or more, I feel buying a reasonably price tile saw could make sense.
I did some checking in my area it costs about $30 a day to rent a tile saw. You can rent them for about $125 for a week. As you can see it would only take a few days worth of rental fees for you to be able to purchase your own saw.
The other advantage of owning your own equipment is you do not have that feeling of being rushed. You can work at your own pace. This can help make the whole process of taking on home projects a little more enjoyable. So get ride of those “time tables”, and the accompaning stress, and looking to buying verses renting, when it makes good sense to. Plus you’ll be ready for the next project in the future.
Masonry Home Projects
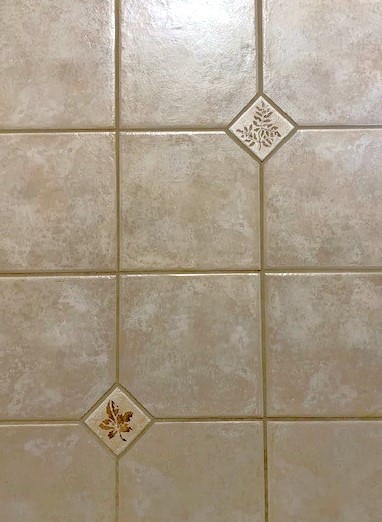
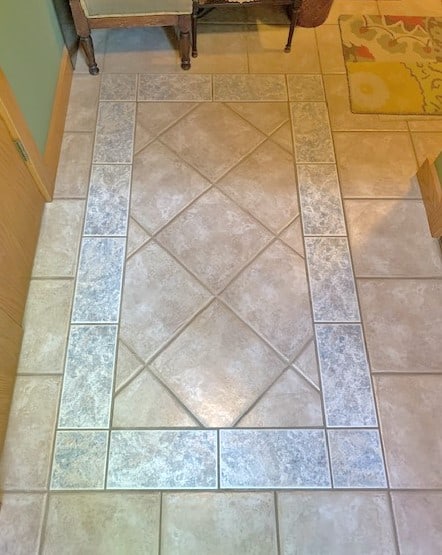
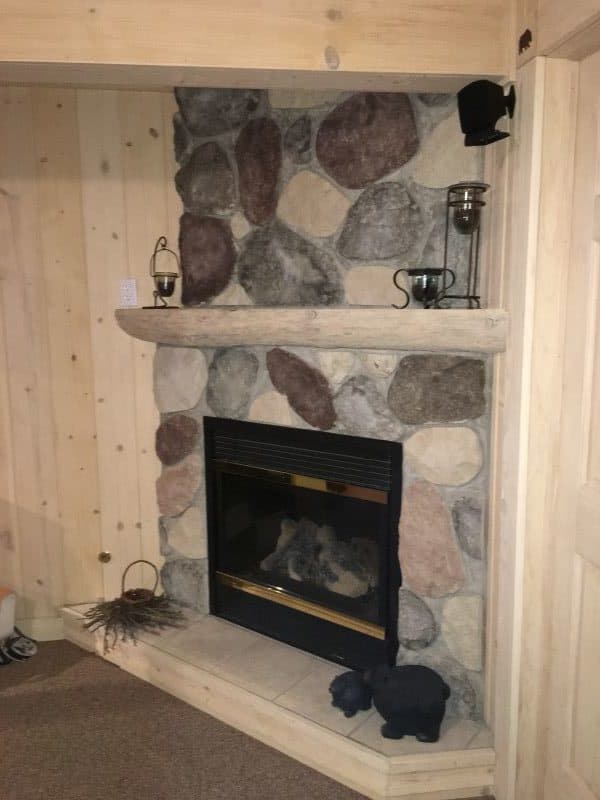
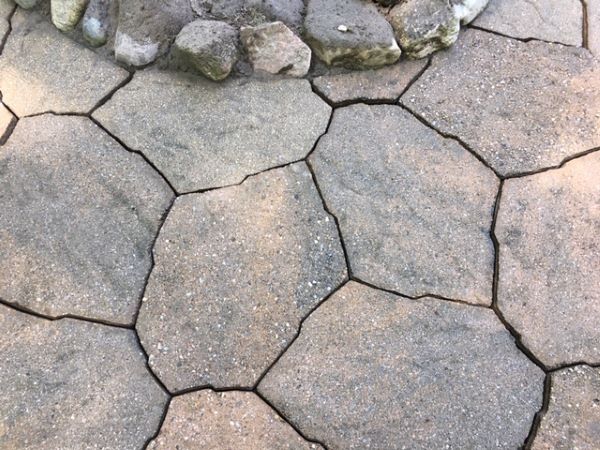
Below is a list of some of the projects we’ve been able to do using the tools in this basic masonry tool kit. These are projects that the average homeowner can easily do with the right tools, a little research, and the encouragement to give them a try. I have articles for a couple of these projects, so if you want to check them out, click the links below. My goal is to have articles for all of them eventually, so check back from time to time.
As you can see with just a few basic masonry tools you can tackle many projects around the house that you may have thought were not possible. Successfully completing a few of them can increase your confidence, impress your family and friends, and save you quite a bit of money in the process. So start your tool collection today and be ready to tackle your masonry projects yourself.
If you have any comments or questions, you can leave them in the comments section below or you can email us at [email protected]. FYI, we do not collect or share email addresses. We will only use them to reply to your comments or provide answers to your questions. We are also required to let you know that some of our links are “affiliate links”. This means if you click on a link and make a purchase, we could make a small commission, at no extra cost to you. This helps offset the cost of maintaining our website. So, if you like what you’ve seen, please be sure to give us a “Like” and “Share” on Facebook and Instagram too. Thank you for reading and good luck with all your home projects!